Parts Replacing
Non-adhesive performance of the cutter and platen degrades while being used for a long period of time, and problems such as paper jams tend to occur more frequently. It is recommended that you replace parts referring to the standard for part replacement timing.
Standard for part replacement timing
- When the
 LED is illuminated red (parts replacement notification indicator)
 - When trouble such as paper jams or cutting failures continue to occur even after cleaning
- When there is clear damage to a part
Check here for purchase of replacement parts.
For the parts replacement procedure, refer to the following. It is recommended to replace the cutter and platen roller together. Also check Safety Information - Maintenance before conducting replacement.
After parts replacement, Updating printer information and update the parts replacement notification.
Parts replacement method (check video)
You can check the procedure for replacing parts in the video.
For details of the procedures and cautions, refer to Parts replacement method.
Replacement of cutter unit
| 00:14 | Removal of cutter unit |
| 00:31 | Installation of cutter unit |
| 00:57 | Removal of stationary knife |
| 01:13 | Installation of stationary knife |
Replacement of platen roller
| 00:12 | Removal of stationary knife |
| 00:25 | Removal of platen unit |
| 00:39 | Installation of platen unit |
| 00:55 | Installation of stationary knife |
Parts replacement method
Replace parts according to the procedure given below.
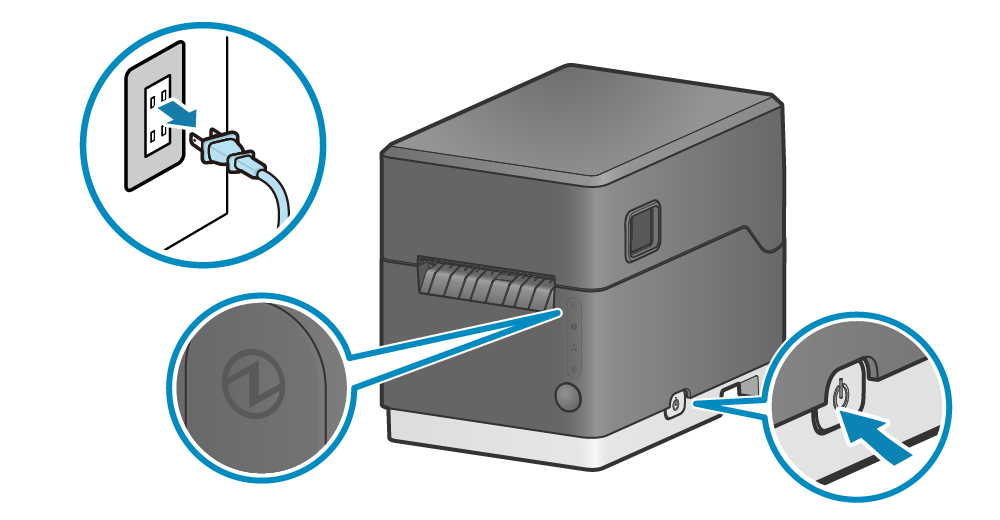
1. Turn power off
- Turn the power off, and disconnect the power plug of the AC adapter from the electrical outlet.
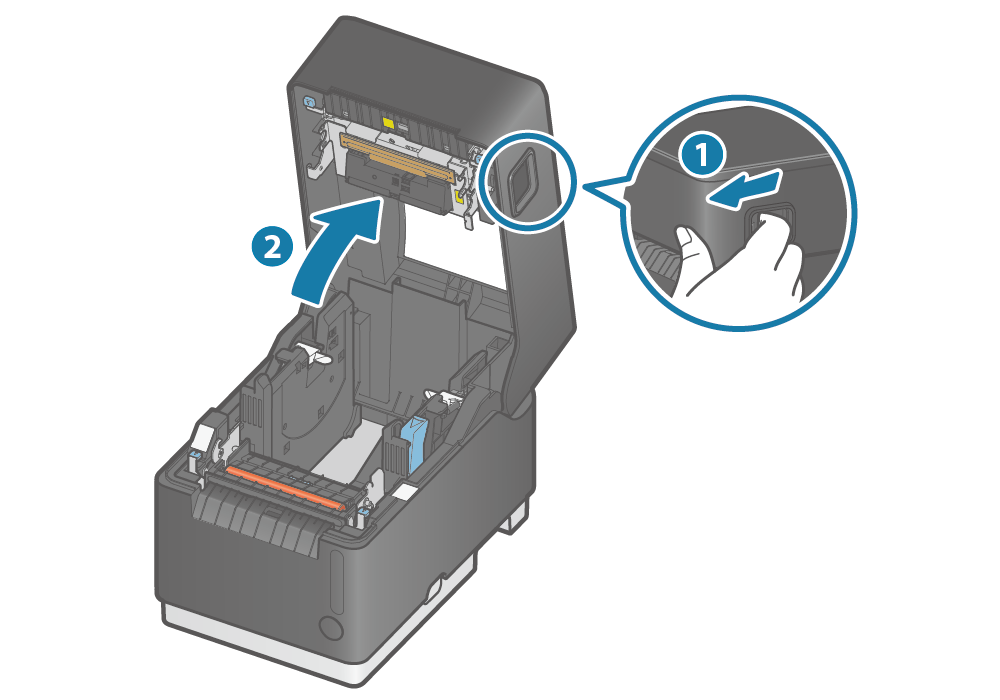
2. Open printer cover
- Pull the cover opening lever forward
 to open the printer cover
  .
.
3. Replace cutter unit
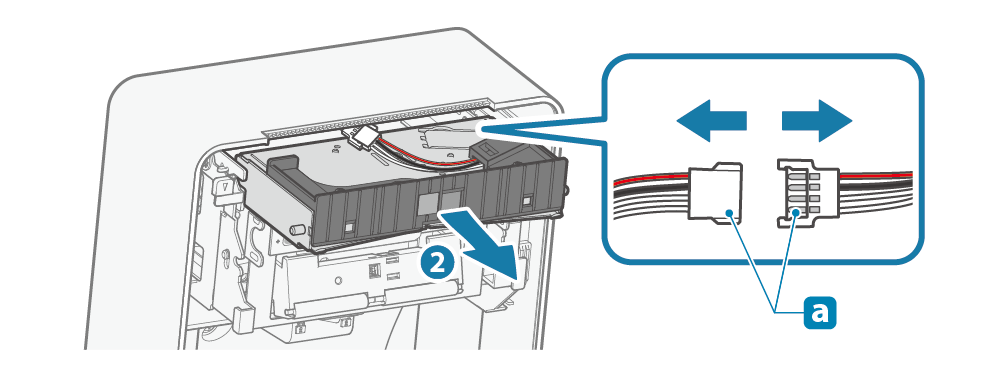
Remove the cutter unit
- Lower the left and right levers to unlock the cutter unit, lift the unit slightly, and then pull it out toward you.
- Disconnect the cable connector
 and remove the cutter unit.

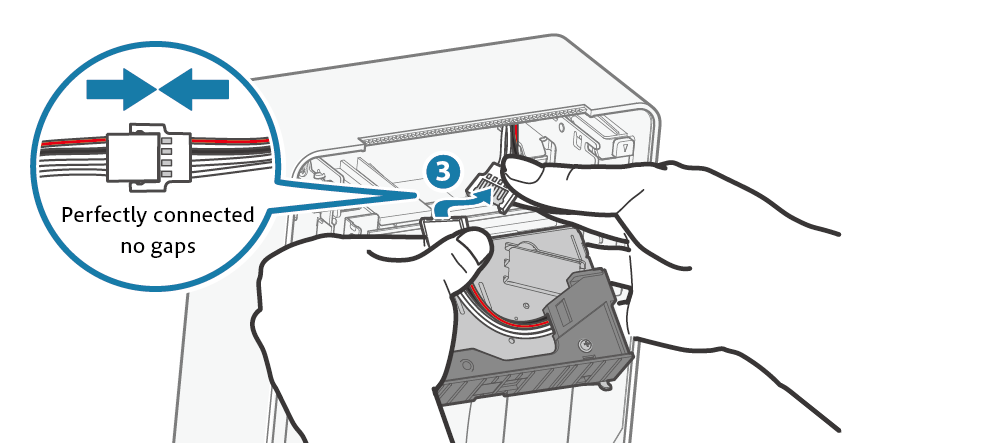
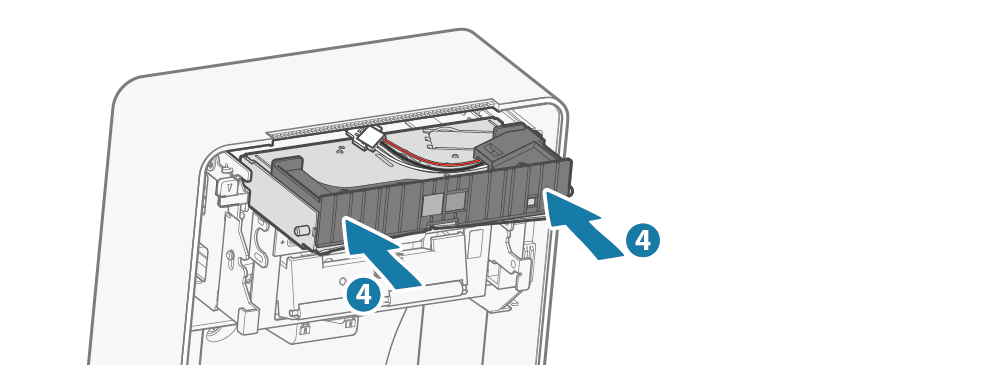
Mount the cutter unit
- Securely connect the cable connector
 .
. - Insert the cutter unit parallel to the cover as indicated by the arrows and push it in until the left and right levers are locked
 .
.
4. Replace platen roller and stationary knife
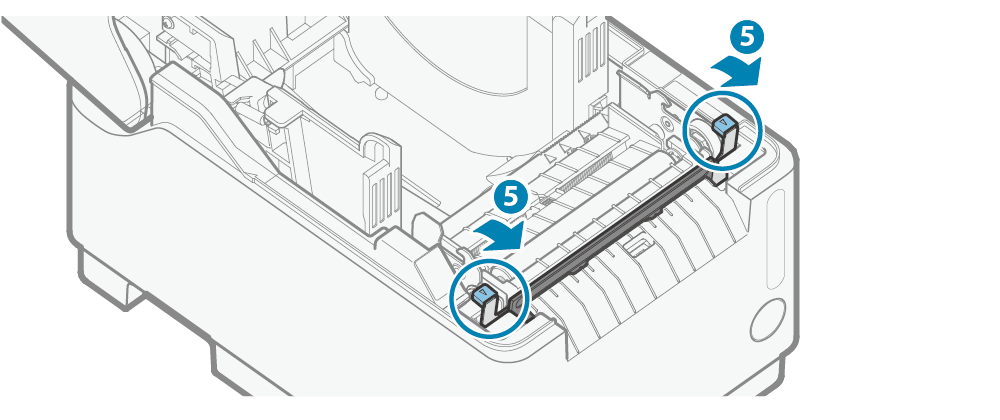
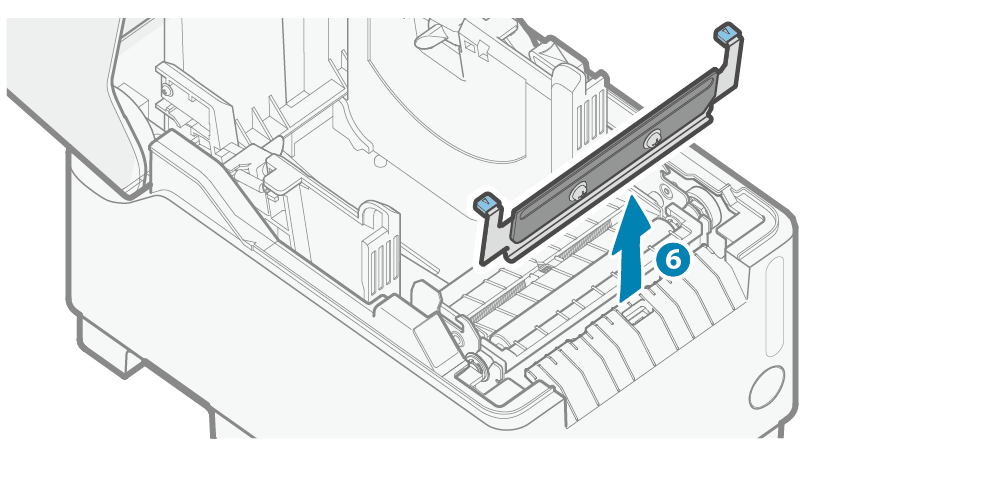
Remove the stationary knife
- Tilt the left and right levers of the stationary knife
 , and remove the stationary knife
 .
.
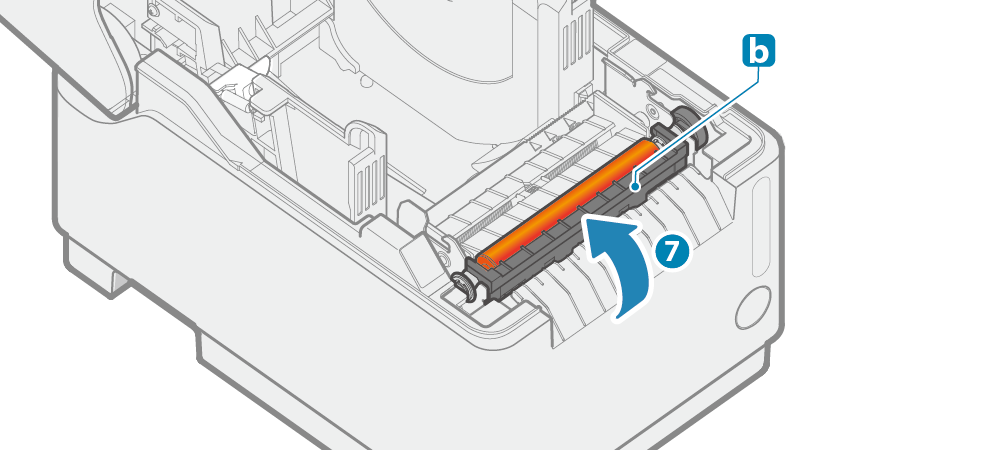
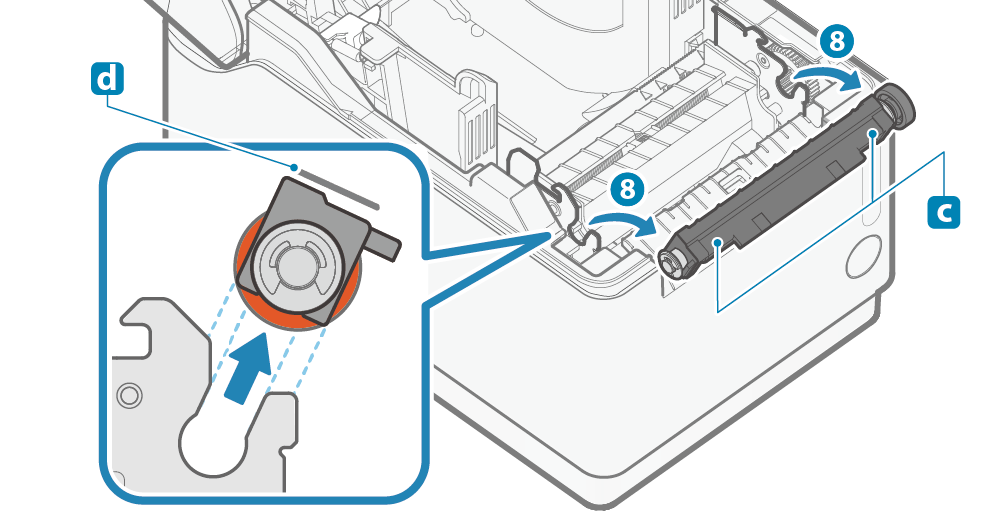
Remove the platen roller
- Turn the platen until its resin part
 stops at the top and release the
  lock.
lock. - Hold the both sides
 of the resin part with both hands and remove
 the platen roller.
Working perpendicular to the surface
the platen roller.
Working perpendicular to the surface makes it easier to remove.
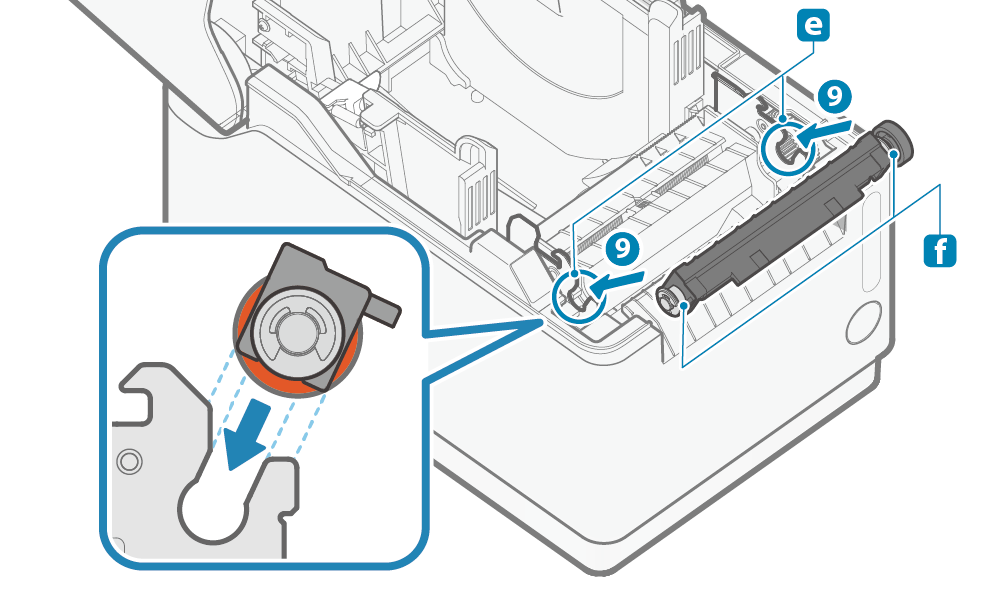
Install the platen roller
- Hold the resin part of the platen unit with both hands, and insert
 the platen unit bearings
 into the
  parts of the left and right frames of the main unit.
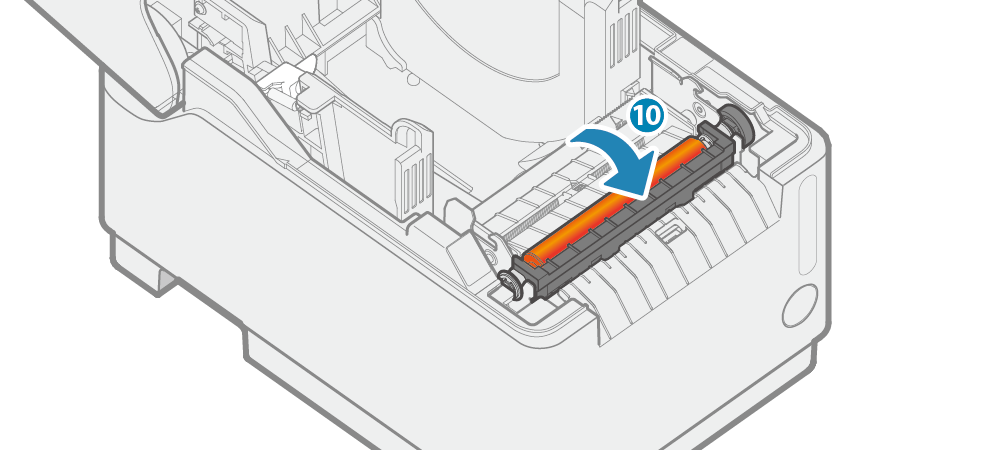
 - Turn the resin part of the platen unit toward you until it stops
 .
.
Mount the stationary knife
- Insert the stationary knife into the gap between the platen unit
 and the case
 , and push it in until it clicks and locks.
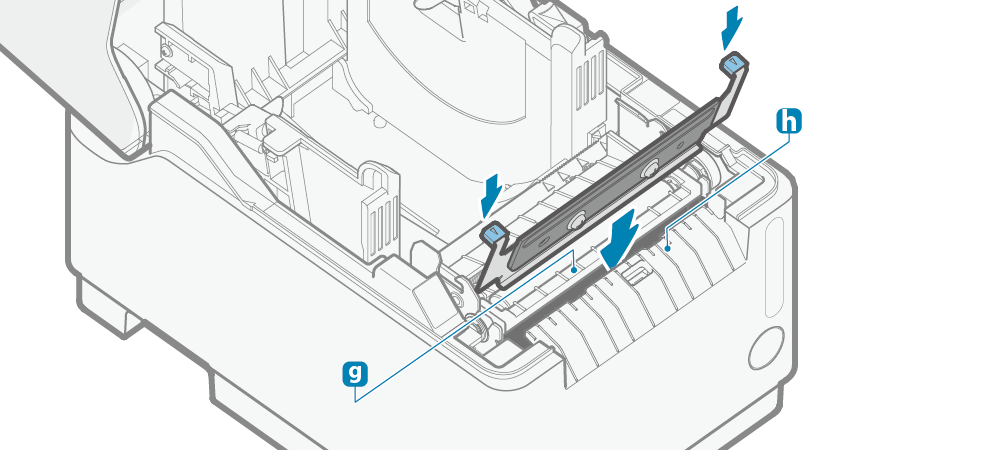
Caution
- When mounting the stationary knife, pay attention to the front or back orientation.
Updating printer information
After parts replacement is finished, update the printer information by using the configuration app or operating the printer.
This work will update the notification timing for the next parts replacement.
The LED (parts replacement notification) of the printer is turned off if it is on.
iOS/Android
Download and install Star Quick Setup Utility onto the host device to be used.
Use App
- Start Star Quick Setup Utility and select to the connected printer.
- When the LED (parts replacement notification) of the printer is lit, the icon is displayed on the connected printer and the [Parts Replacing] menu appears under it.
When parts have been replaced before the parts replacement notification appears, tap [Parts Replacing] in [Printer Settings].
- Place a check mark on “Complete replacing” on the explanation screen opened by tapping [Parts Replacing], and tap [Apply].
- The notification timing for the next parts replacement is updated.
The LED (parts replacement notification) of the printer is turned off if it is on.
Windows
Download and install Star Windows Software onto the host device to be used.
Use App
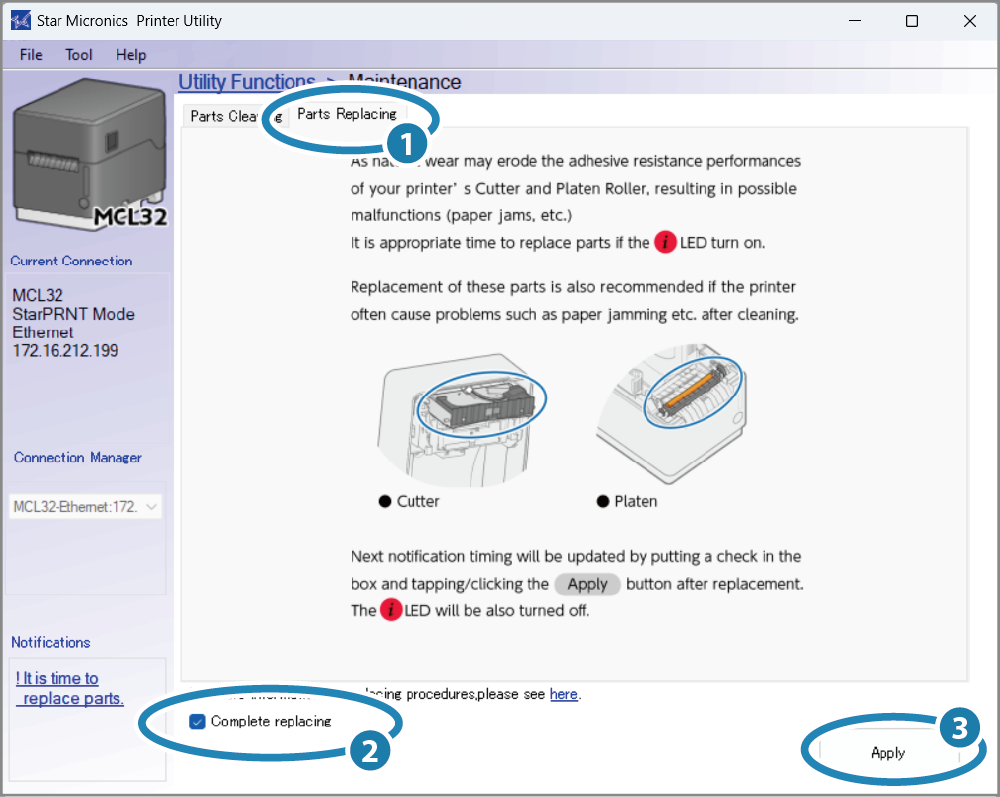
- Open [Star Windows Software] - [Printer Utility] from the Start menu to connect to the printer to be set.
- Select “Maintenance” on the utility functions list.
- Place a check mark on “Complete replacing” on the explanation screen opened by clicking the “Parts Replacing” tab, and tap [Apply].
- The notification timing for the next parts replacement is updated.
The LED (parts replacement notification) of the printer is turned off if it is on.
Update by using printer operation
- Remove the paper roll if it is set and close the printer cover.
- Turn on the printer and check that the printer shows that there is no paper (Power LED is flashing red).
- Press and hold the Multi-function button for 5 seconds or more and release it, and within 2 seconds, press and hold the button again for 5 seconds or more and release it.
- The notification timing for the next parts replacement is updated.
The LED (parts replacement notification) of the printer is turned off if it is on.