Connect Tablet/PC (Wireless LAN)
Connect (pair) the TSP100IV main unit to a tablet or PC.
<TSP143IV-UEWB only>Check Model
Caution
To use a wireless LAN connection, disconnect the LAN cable. The wireless LAN and wired LAN cannot be connected at the same time, and the wired LAN takes priority when the LAN cable is connected.
It is convenient to use the dedicated app when setting a connection with a smartphone or tablet.
For If using the app, please download and install the Star Quick Setup Utility. Use App.
The setting method varies depending on the device you are using and the environment.
Connect Using Special App (iOS, Android)
Connect Without Using Special App (iOS, Android)
Connect from a Windows device
Network to be connected
Connect Using Special App (iOS, Android)
The following steps must be performed after the power of TSP100IV has been turned on. Turn On Power
Use the following function on the device side for connections using the special app. Check the function beforehand.
Check Video
| 00:00 | Preparation |
| 00:22 | Connecting to a Wireless LAN using the app |
| 02:00 | What to do if "Failed" is printed |
1. Connect the printer to the network
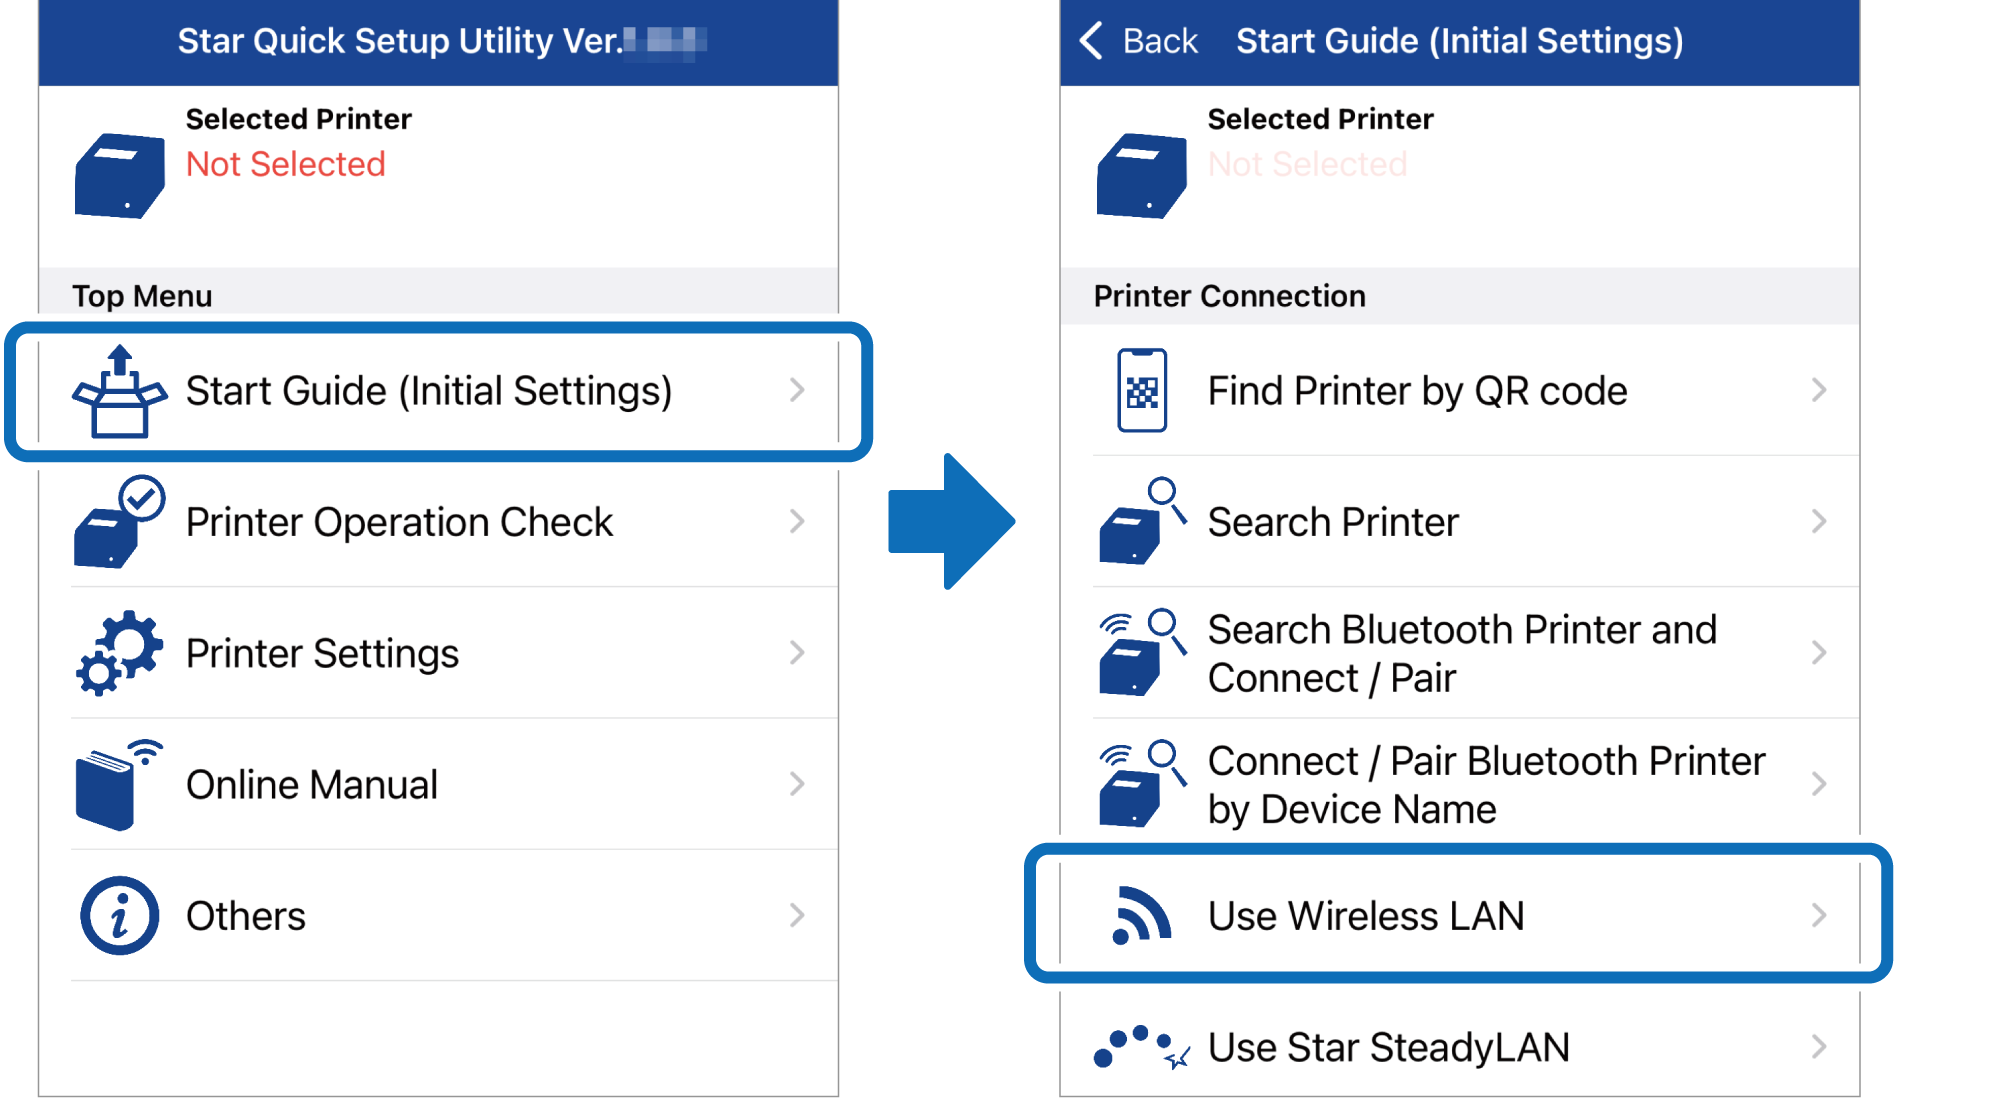
- Start Star Quick Setup Utility, and open [Start Guide (Initial Settings)] - [Use Wireless LAN].
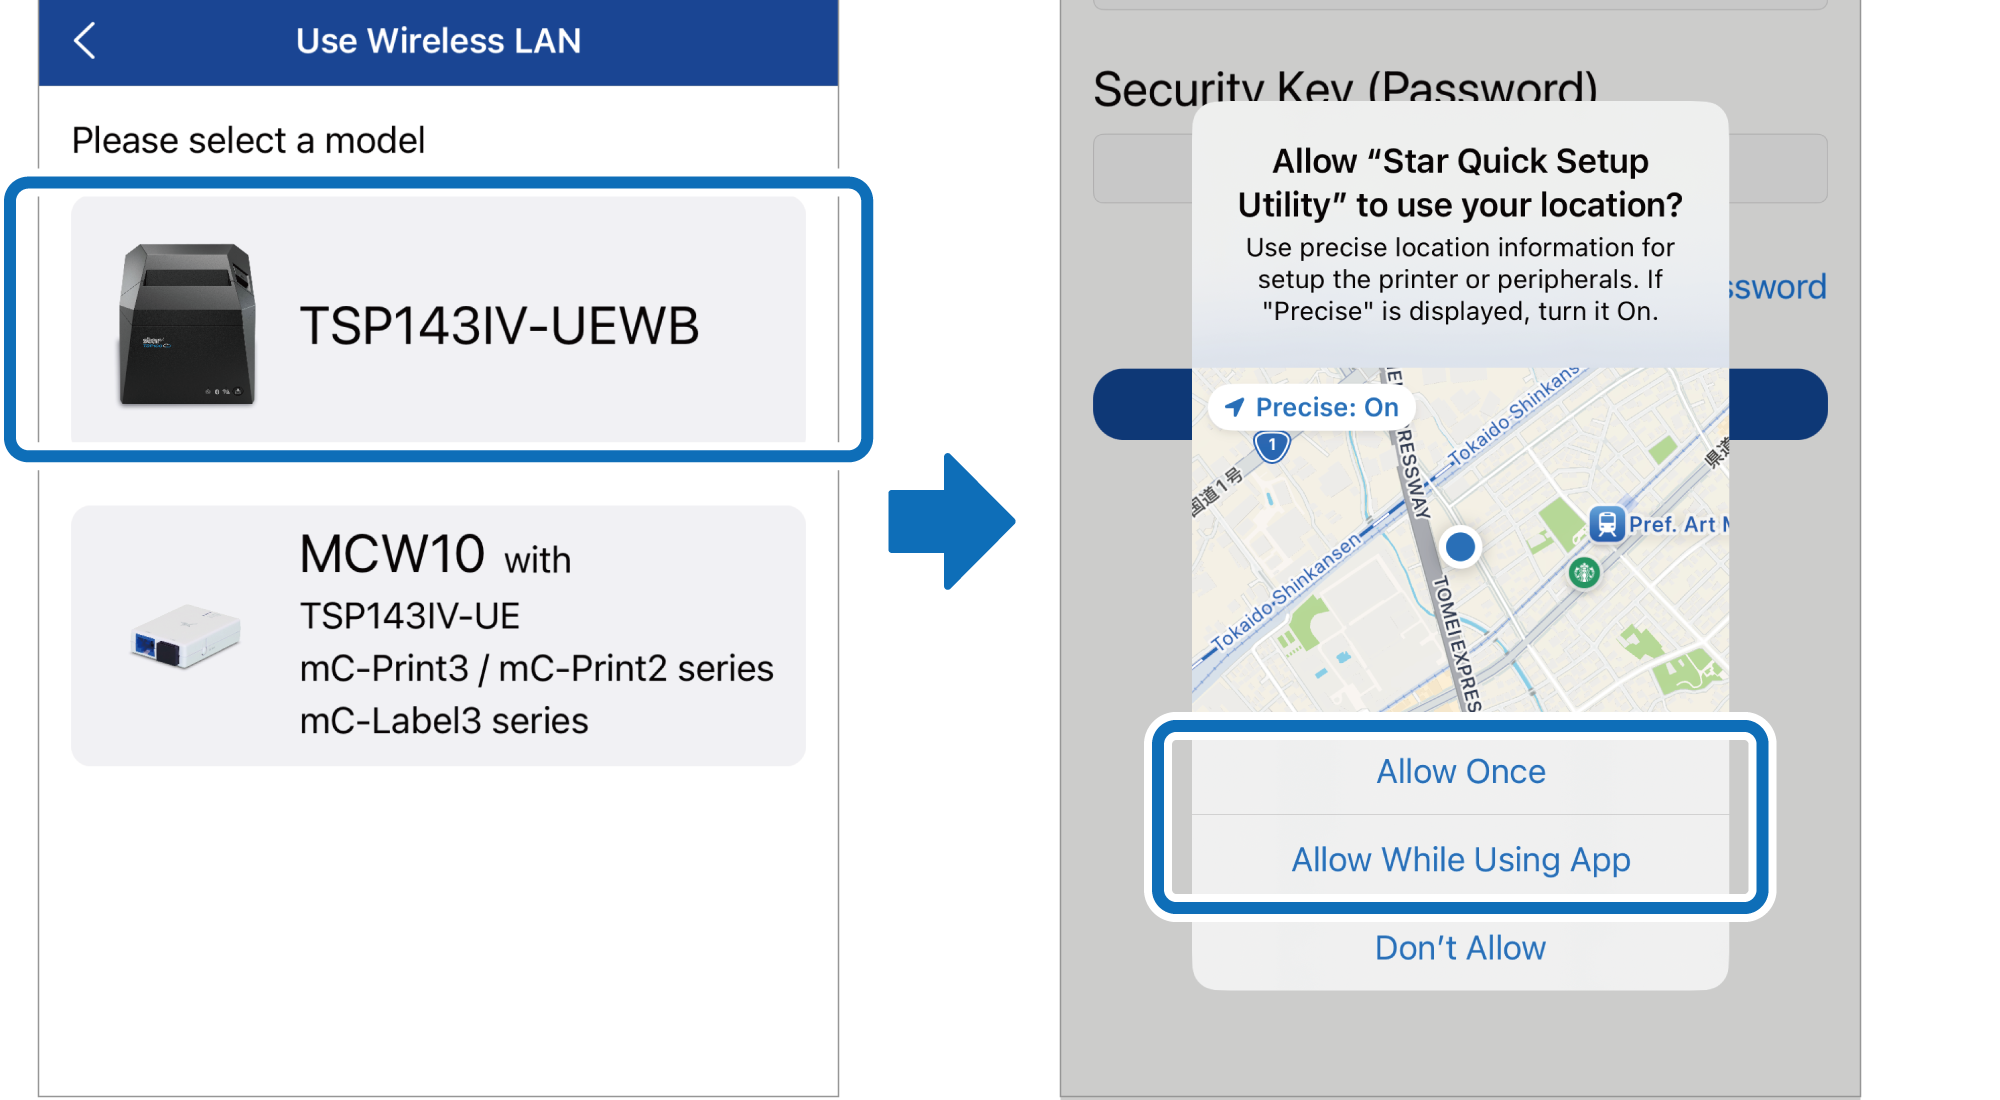
- Select [TSP143IV-UEWB] from model selection.
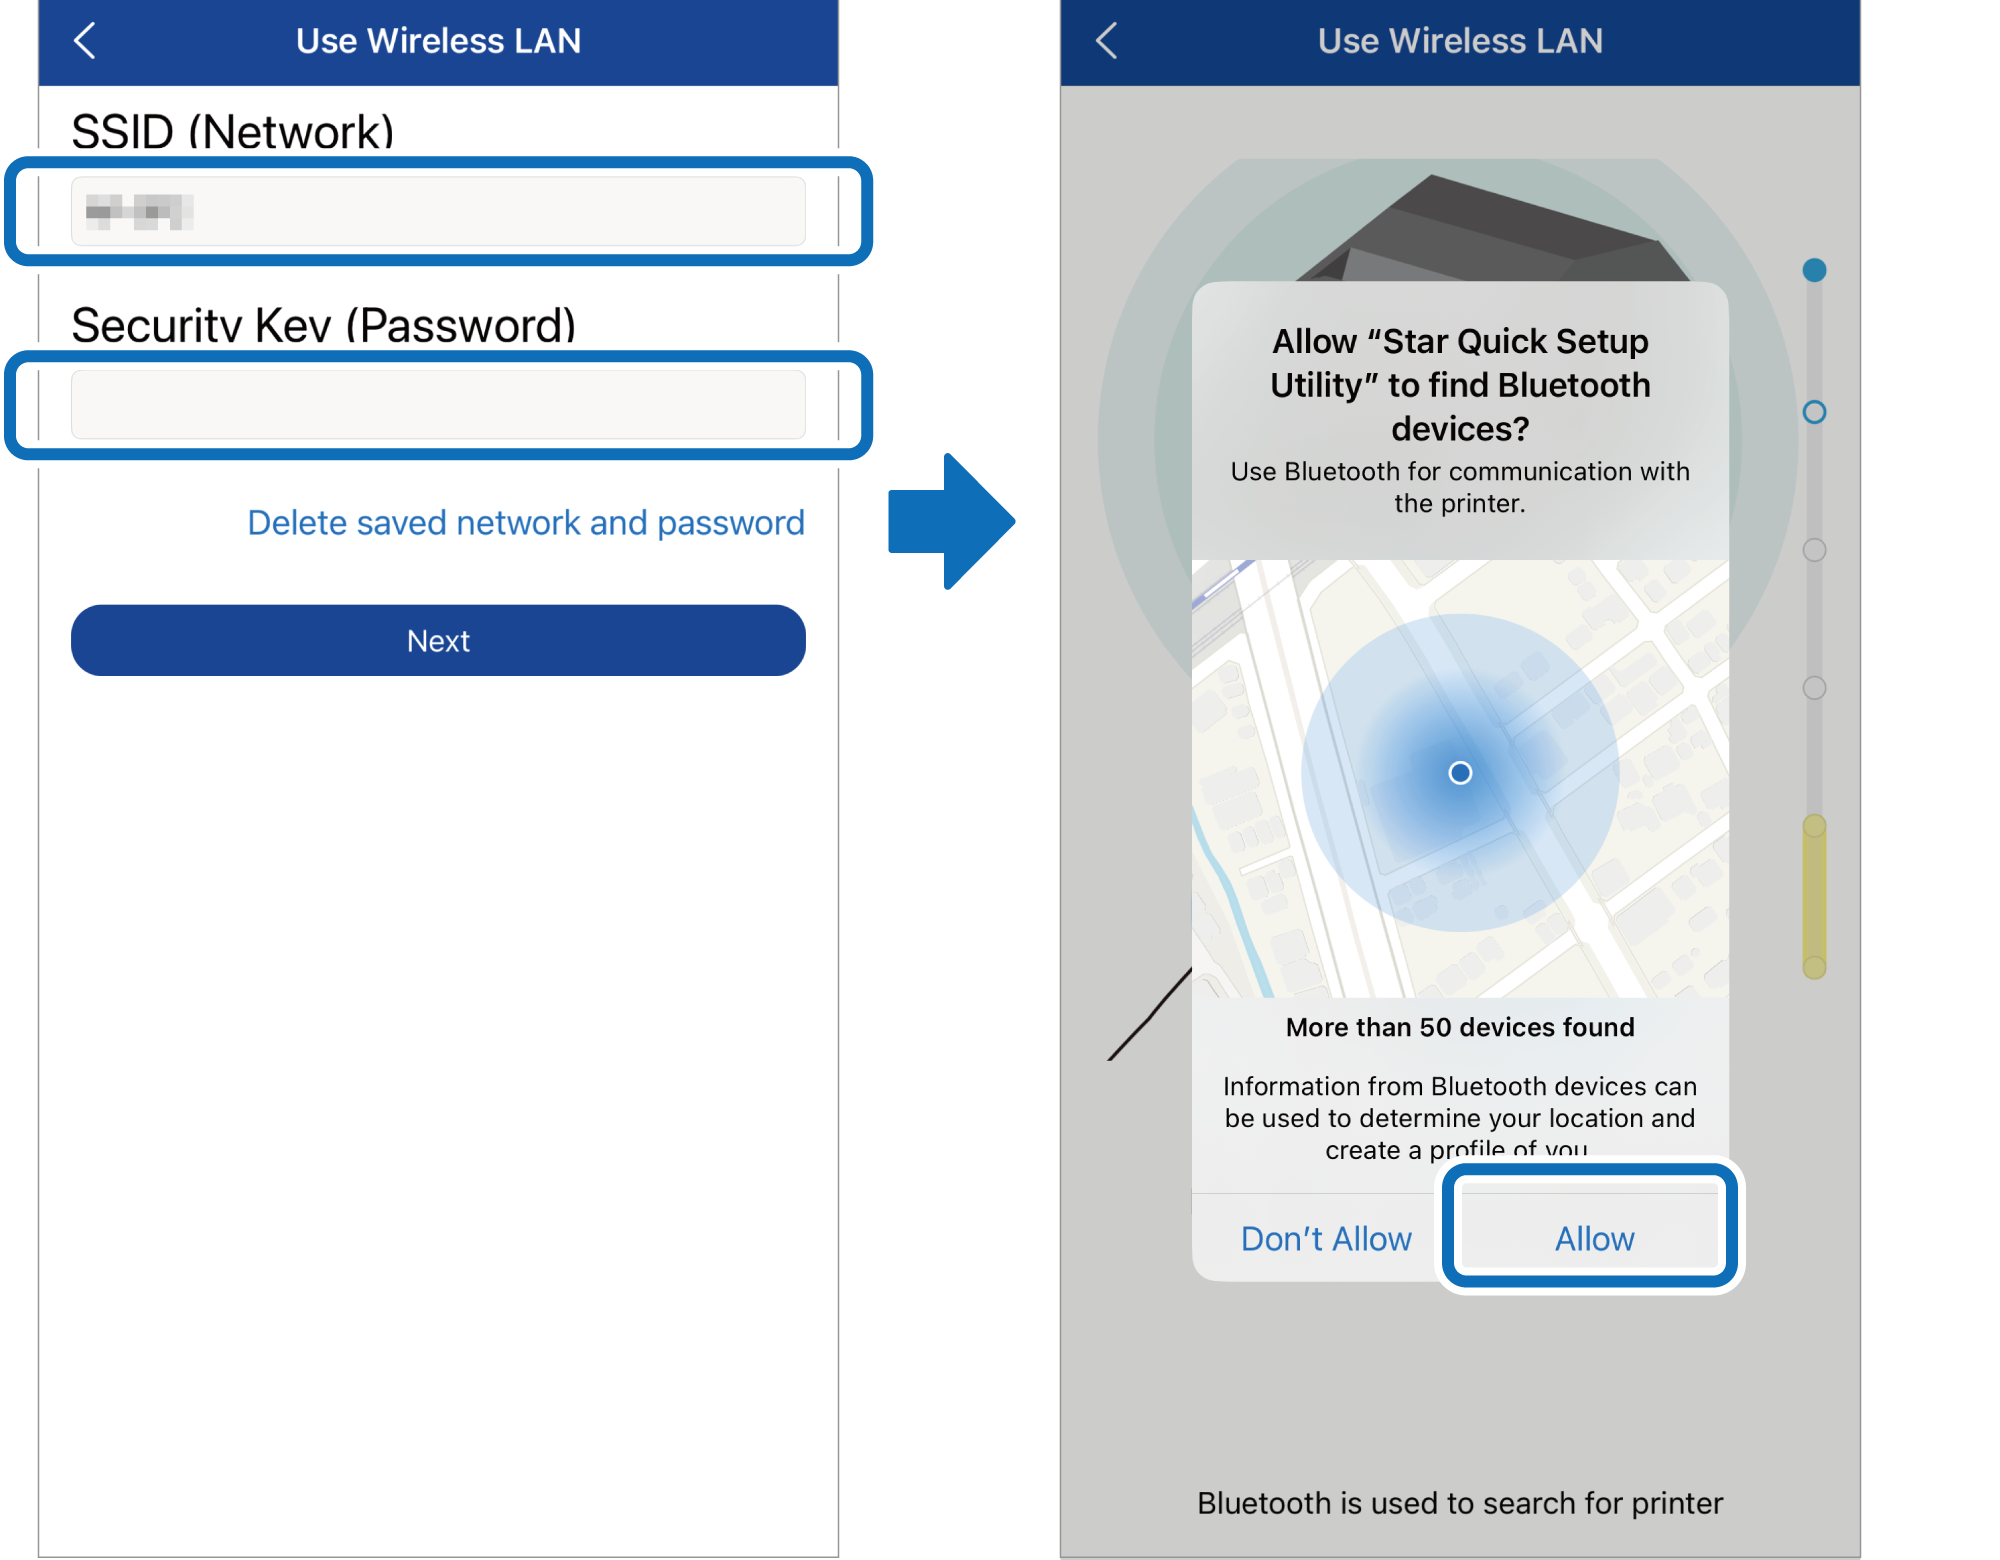
When a location information permission confirmation screen appears, select any of the [Allow] options. - Enter the SSID and Security Key of the network to be connected.
When a device detection permission confirmation screen appears, tap [Allow].
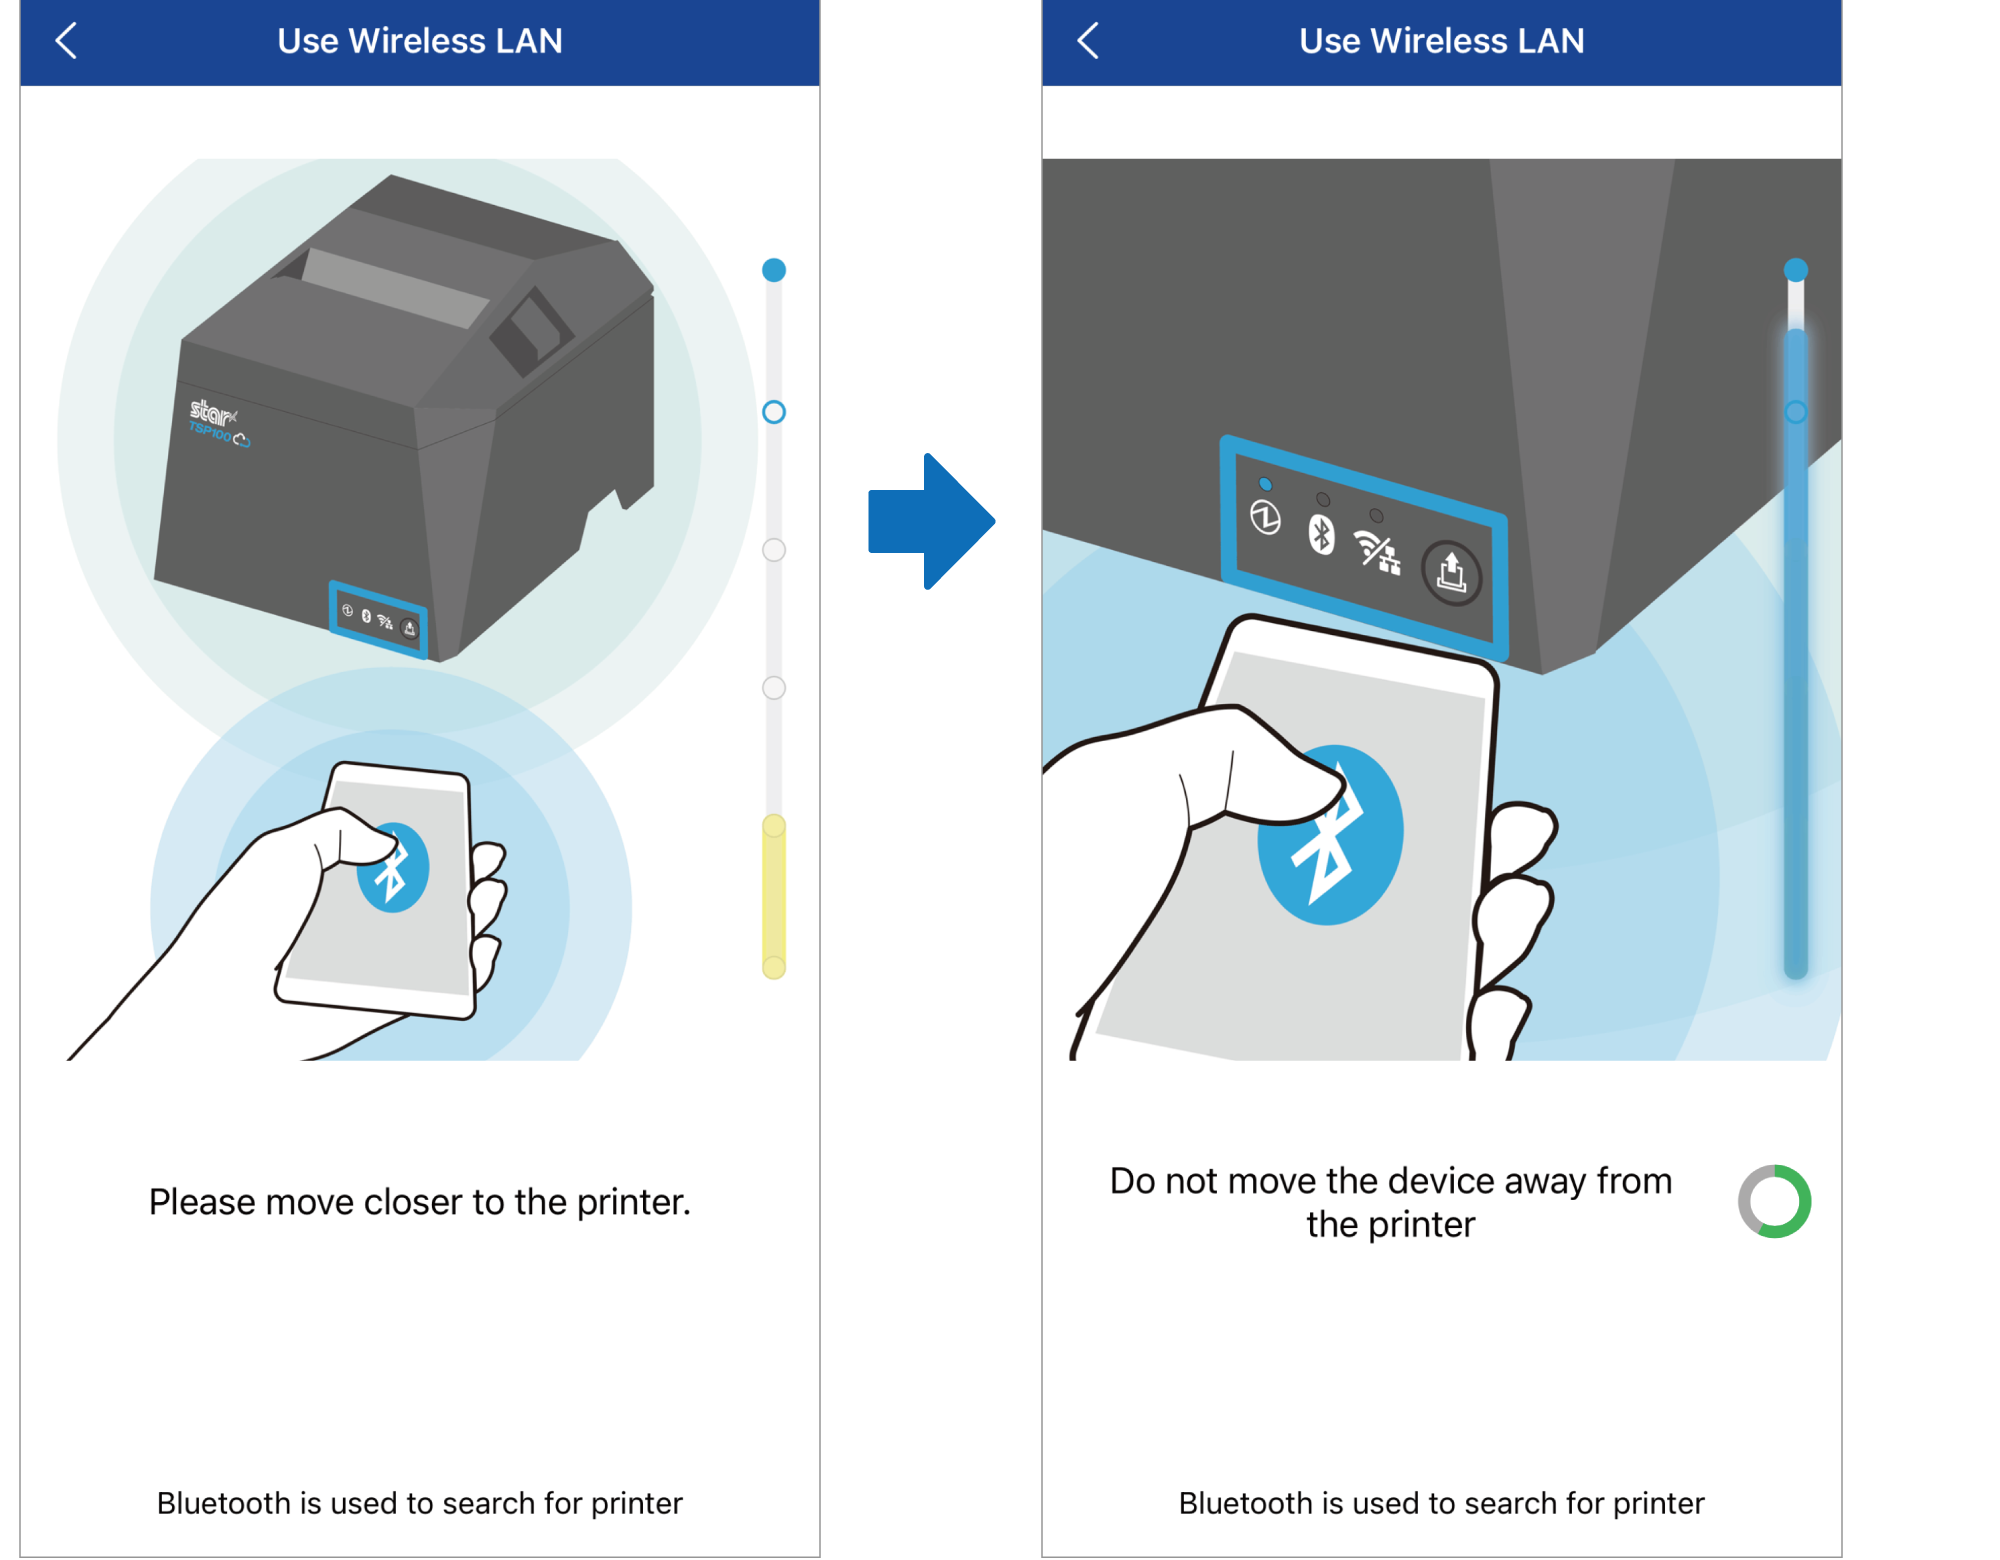
For Android devices, the SSID entry screen appears after device detection is allowed. - Bring the device closer to the LED of the printer.
Do not move the device away from the printer when the connection starts. - Do not turn off the printer power after printer setting starts.
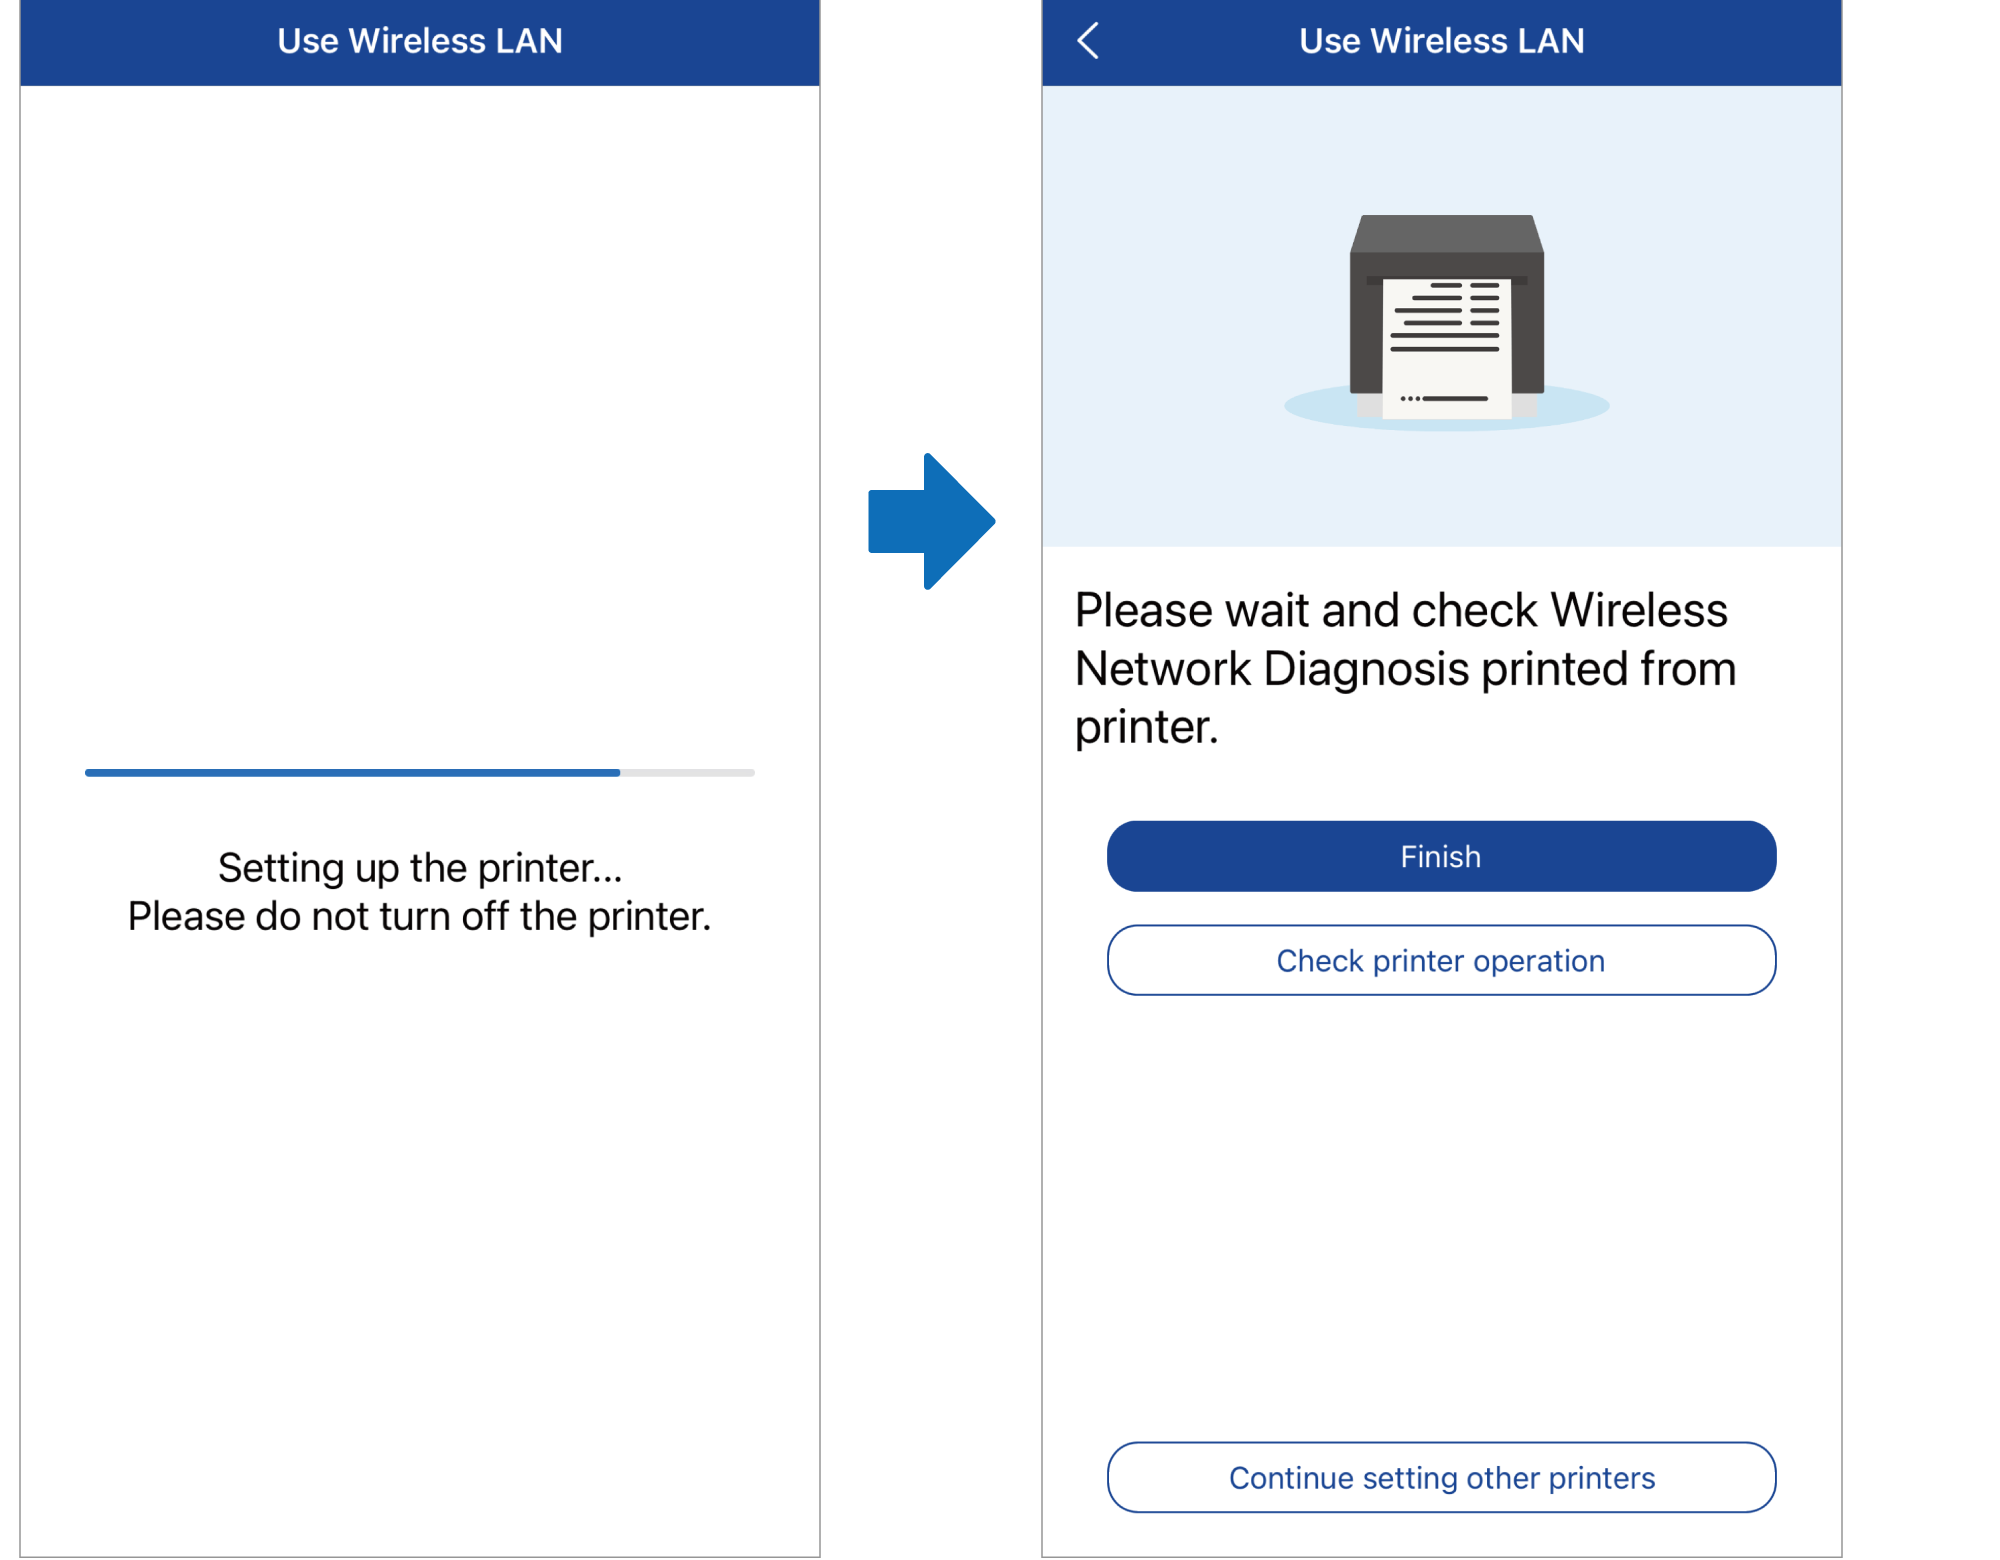
When the setting is completed, the Wireless Network Diagnosis result is printed automatically.
When setting multiple printers, tap [Continue setting of Other Printers] and configure the settings continuously.
2. Confirm that it has connected
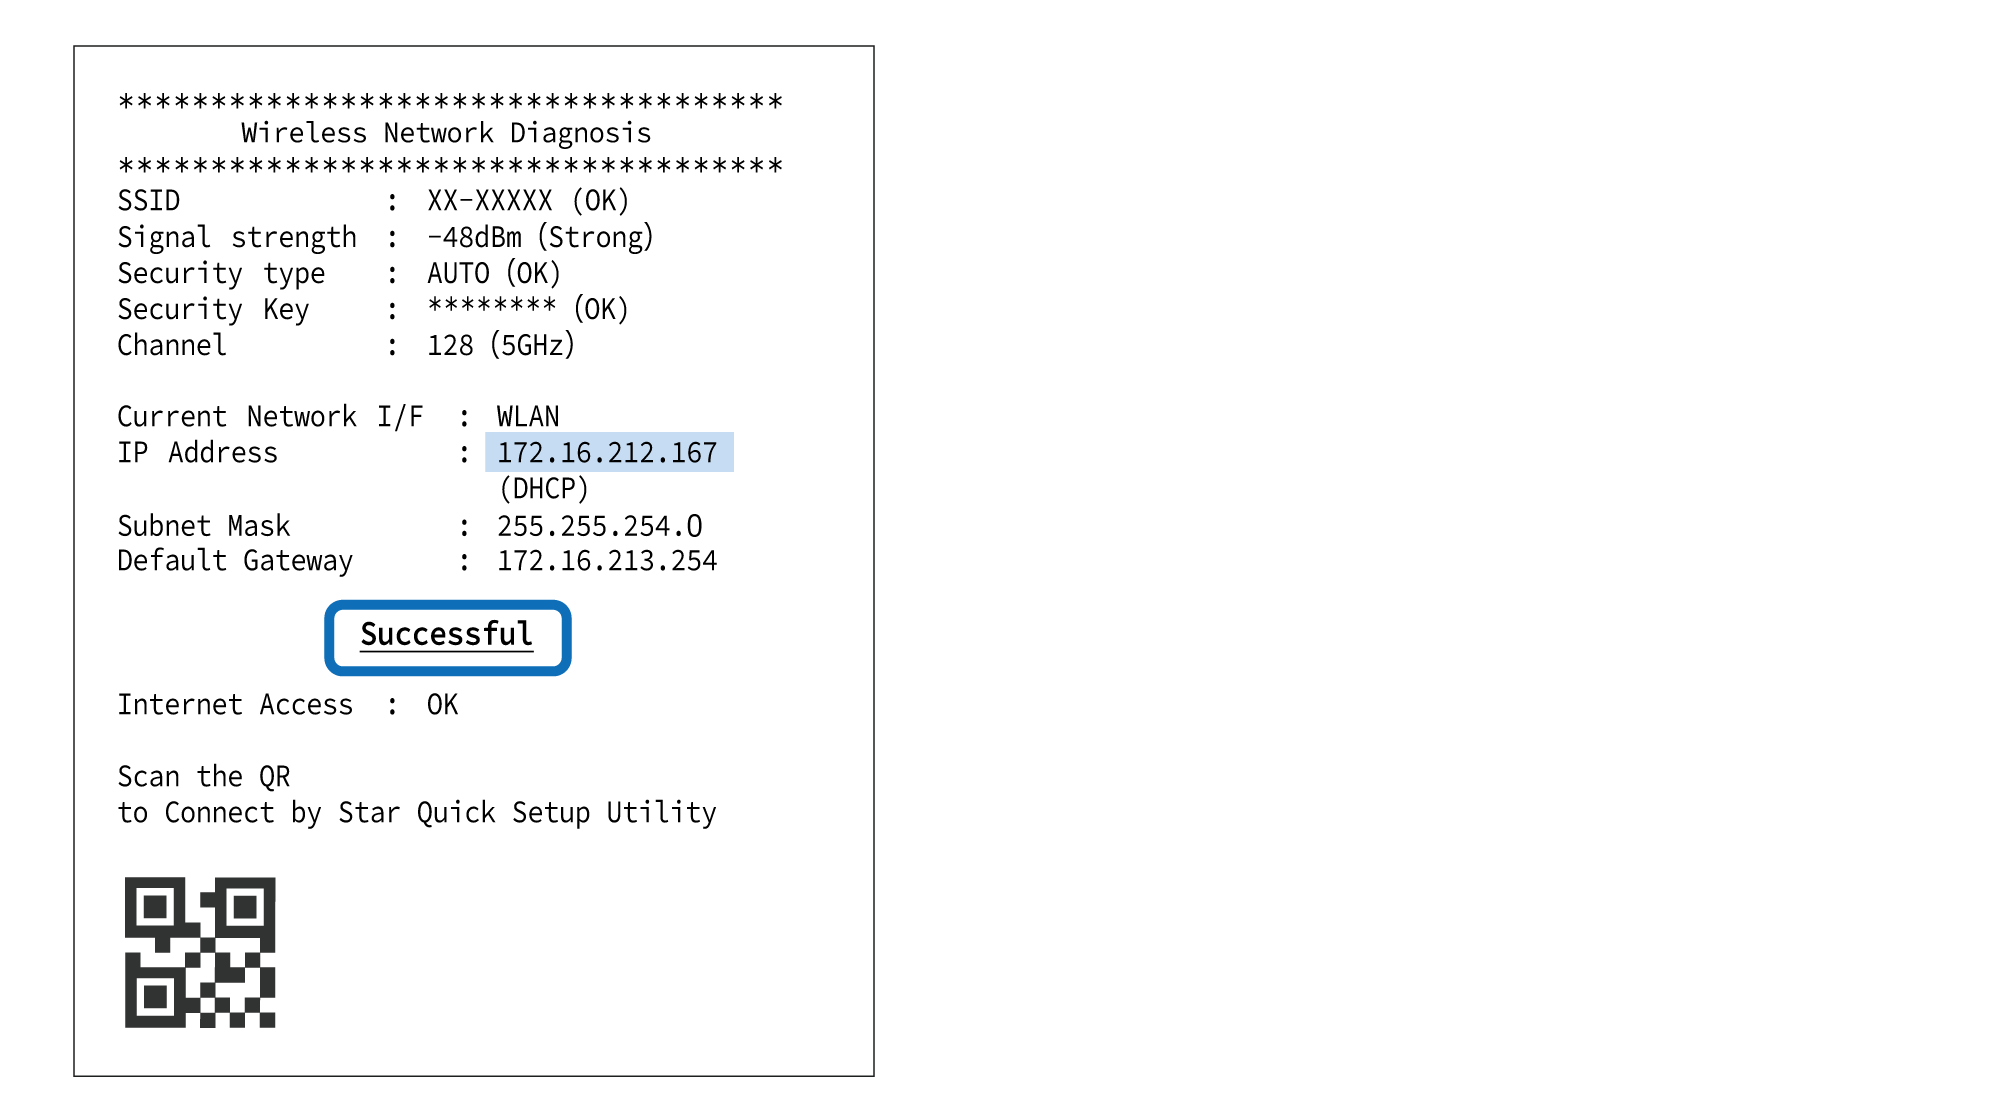
- When the printer is successfully connected to the network, "Successful" is printed on the diagnosis result. When it is confirmed that an IP address is allocated to the printer, the setting process is complete.
When "Failed" is printed on the wireless network diagnosis result
When Failed/ (Fail) is printed, the connection has failed.
For confirmation of problems and countermeasures, please refer to FAQ - Wireless LAN Setting Problems.
Connect Without Using Special App (iOS, Android)
The following steps must be performed after the power of TSP100IV has been turned on. Turn On Power
Check before starting the setting.
The SSID and Security Key of the network to be connected are required.
Check them beforehand and prepare them at hand before starting the setting.
Check Video
| 00:00 | Overview of Wireless LAN Setup |
| 00:25 | Step1 Printing the QR code for wireless communication settings |
| 01:10 | Step2 Open the WLAN settings of the printer |
| 01:52 | Step3 Configure WLAN settings on the printer |
1. Connect the printer to the network
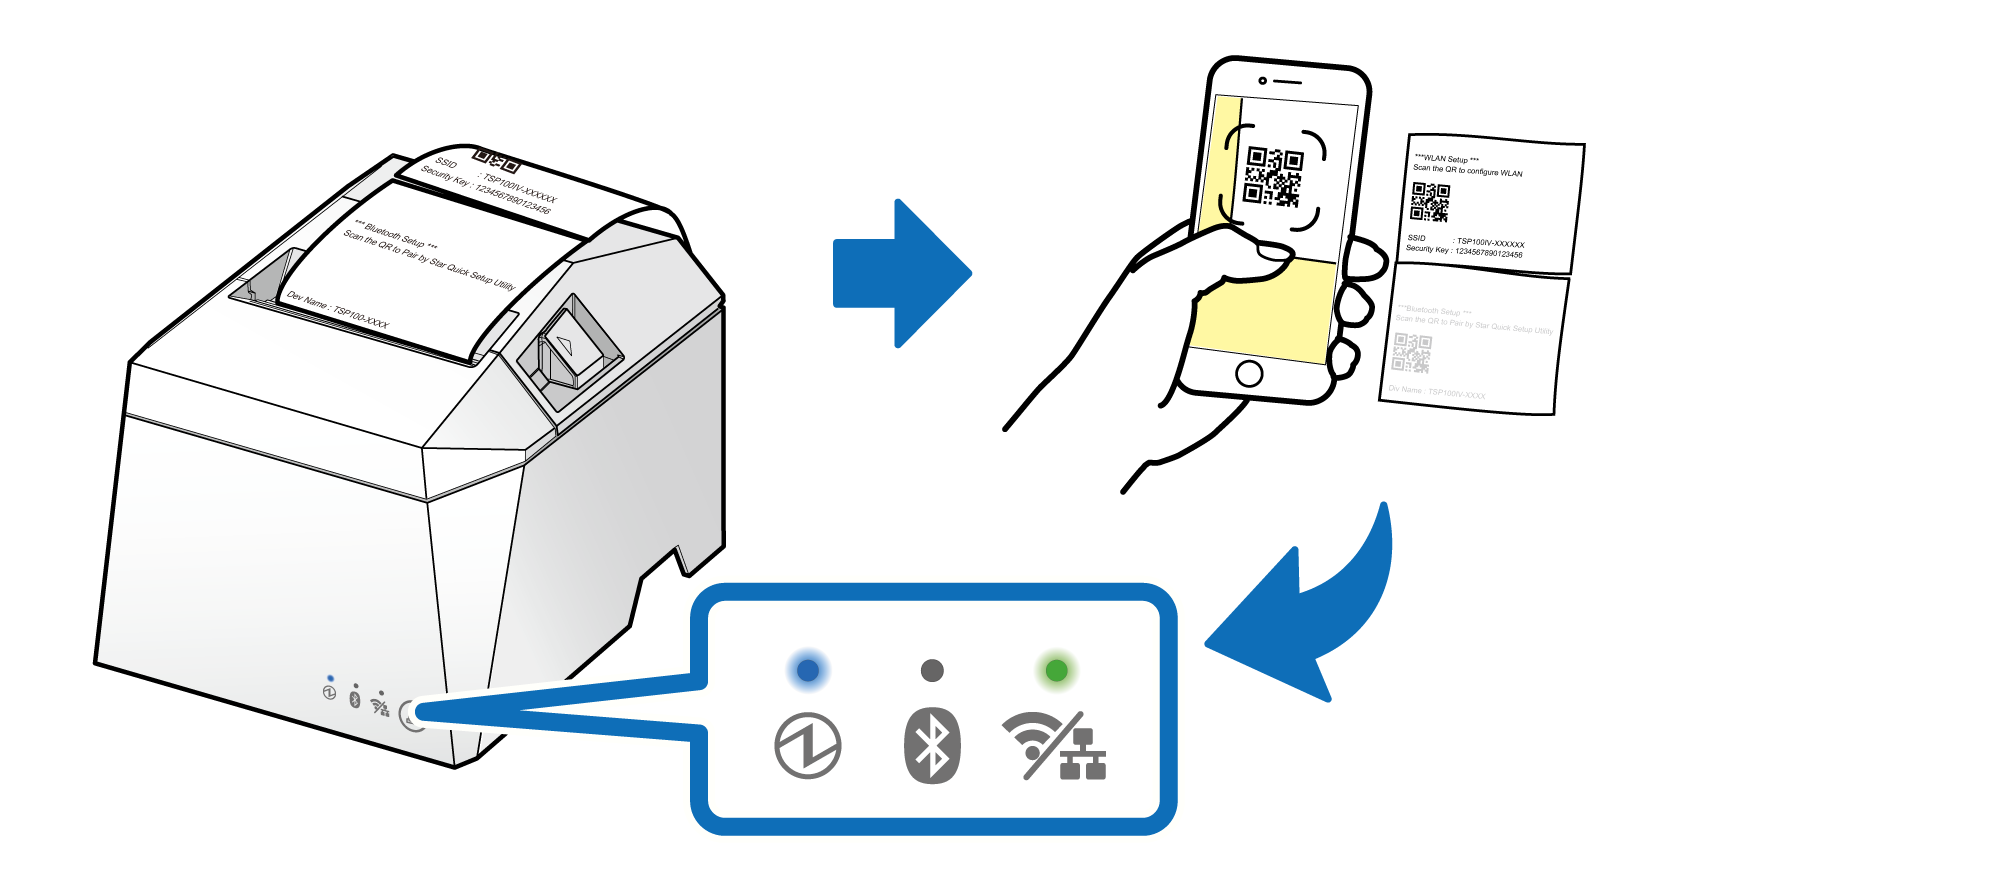
- After 20 seconds of turning on the printer power, two QR codes for wireless communication setting are printed. Read the first "*** WLAN Setup ***" QR code using a camera app or QR code reader, and tap the displayed SSID.
The Network LED (green) on the printer lights up.
When QR code is not printed/Network LED (green) does not light up.
The QR codes for wireless communication setting are not printed when the wireless LAN settings are already configured (the Infrastructure Mode is already set), when a USB or LAN cable is connected, or when Bluetooth pairing has been performed in the past.
To reconfigure the settings, or when the QR code is printed and read but the Network LED (green) does not light up, Initialize Communication Settings and connect the printer again using the procedure.
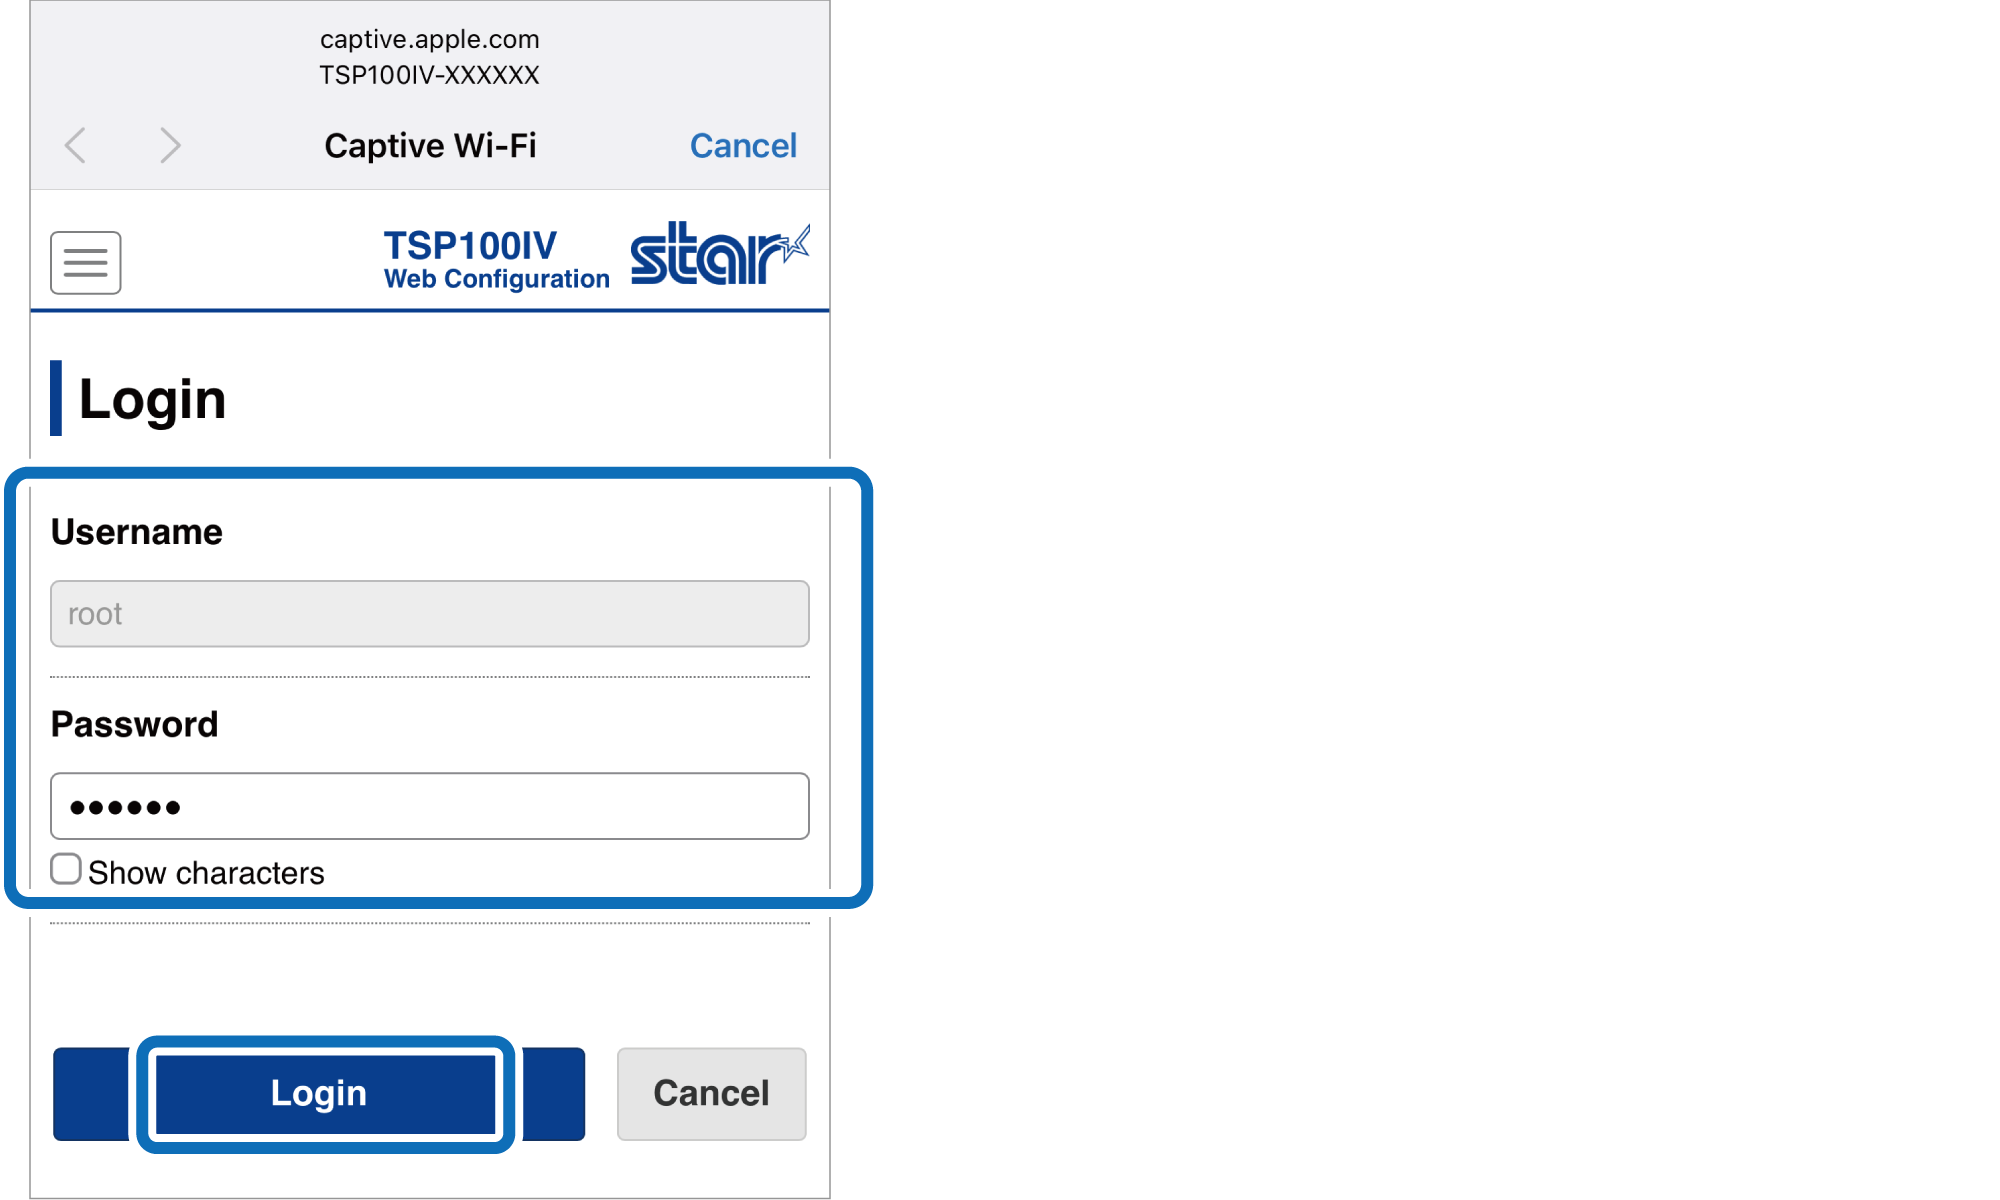
- The Web Configuration setting screen appears.
Log in using Username: root / Password: [the changed password or default password (public)].
When the Web Configuration setting screen does not appear
Depending on the type of device used, the setting screen does not appear after the QR code is read. Open Wi-Fi from Device Settings and select the SSID printed below the QR code, and the setting screen appears.

If you are unable to solve the problem, please refer to FAQ - Wireless LAN Setting Problems.
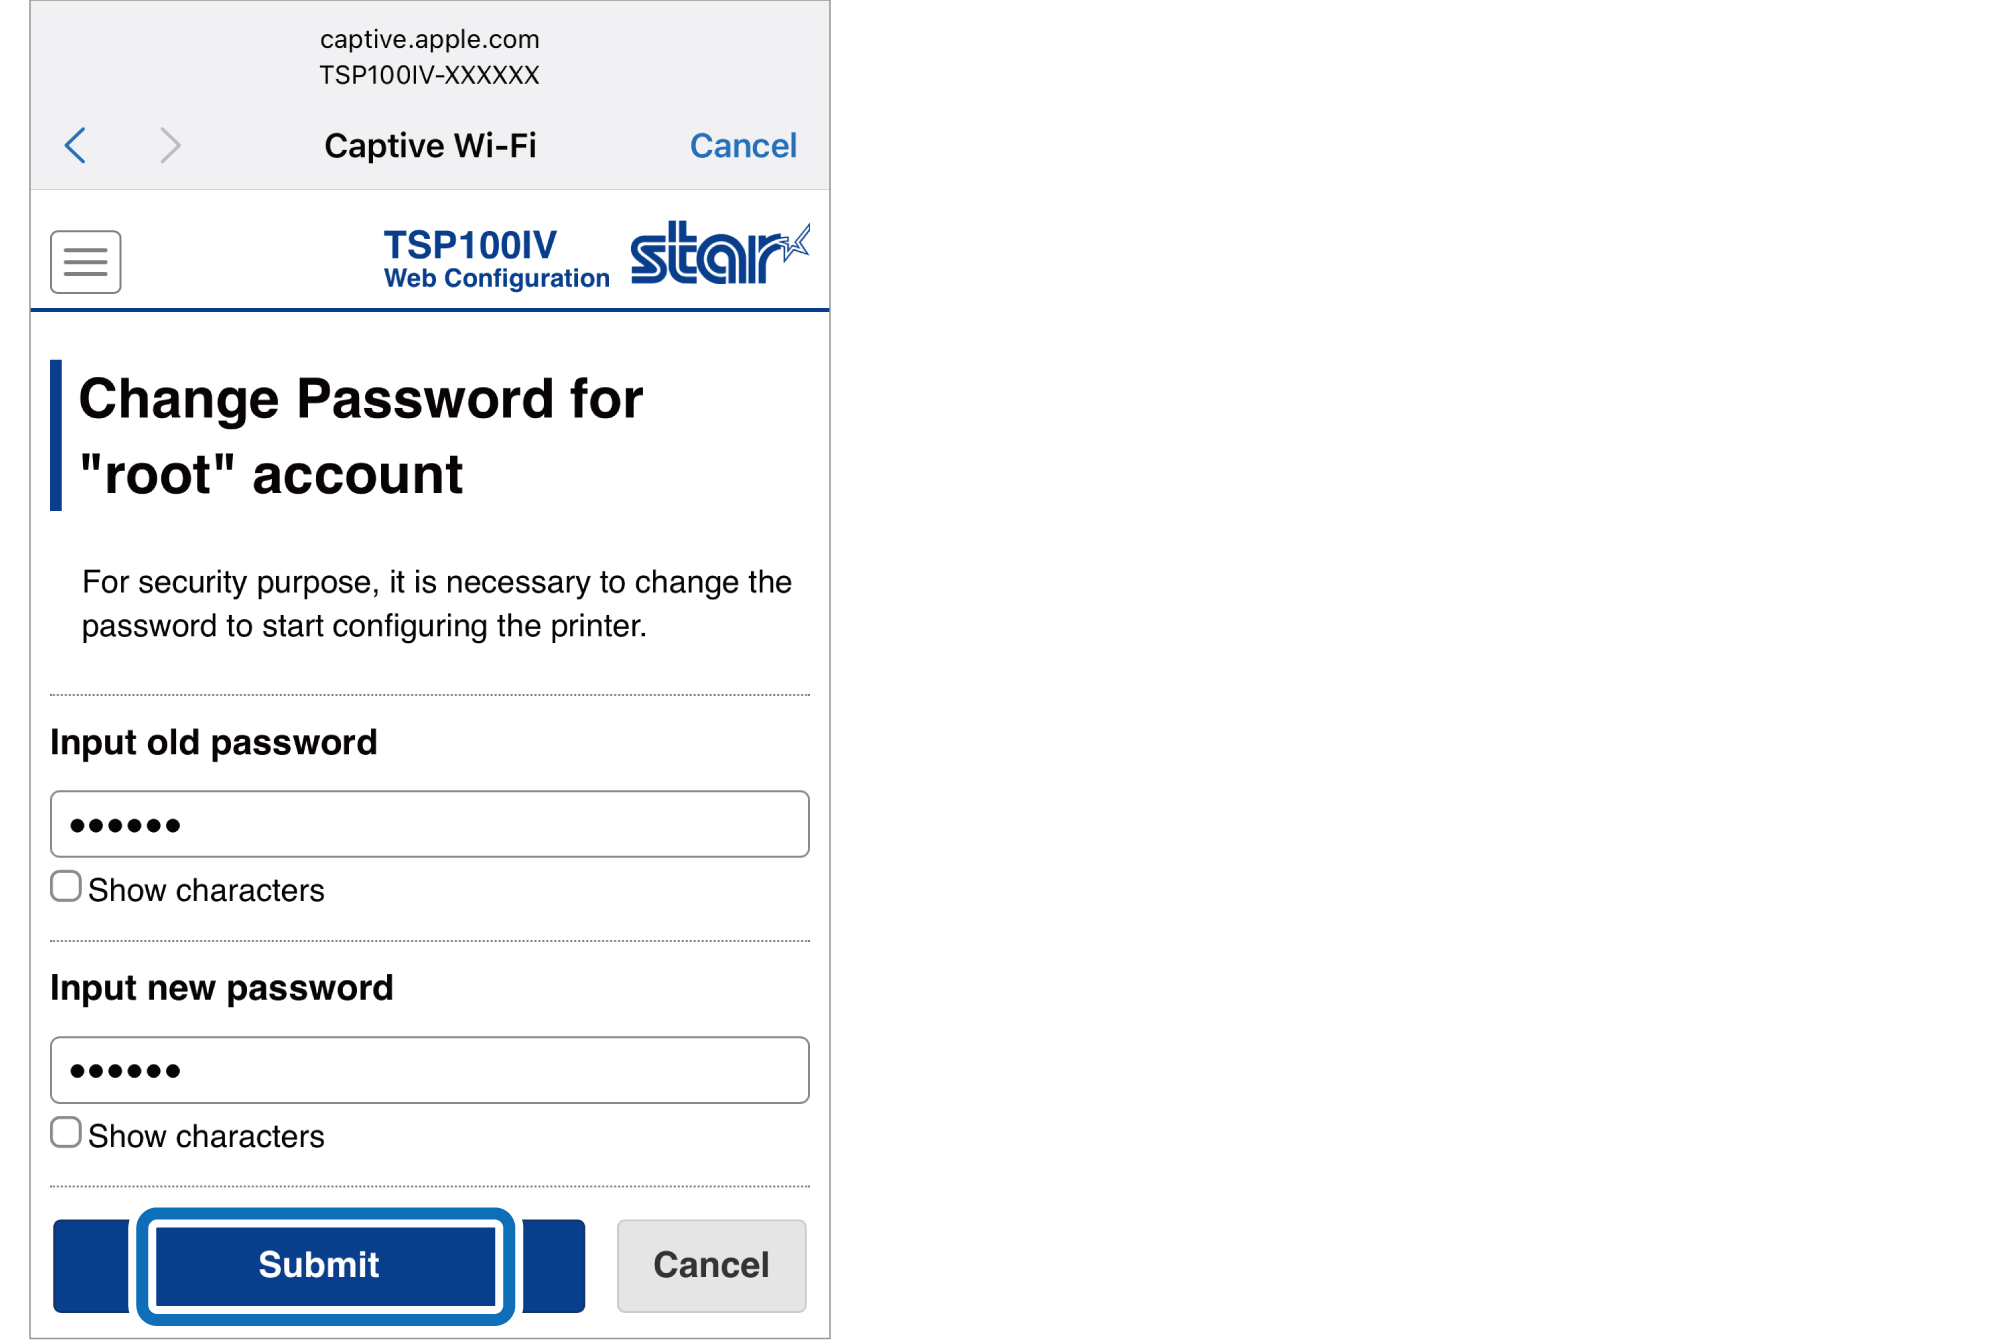
- When logging in using the default password, a screen for changing the password opens. After changing the password, proceed to the next step.
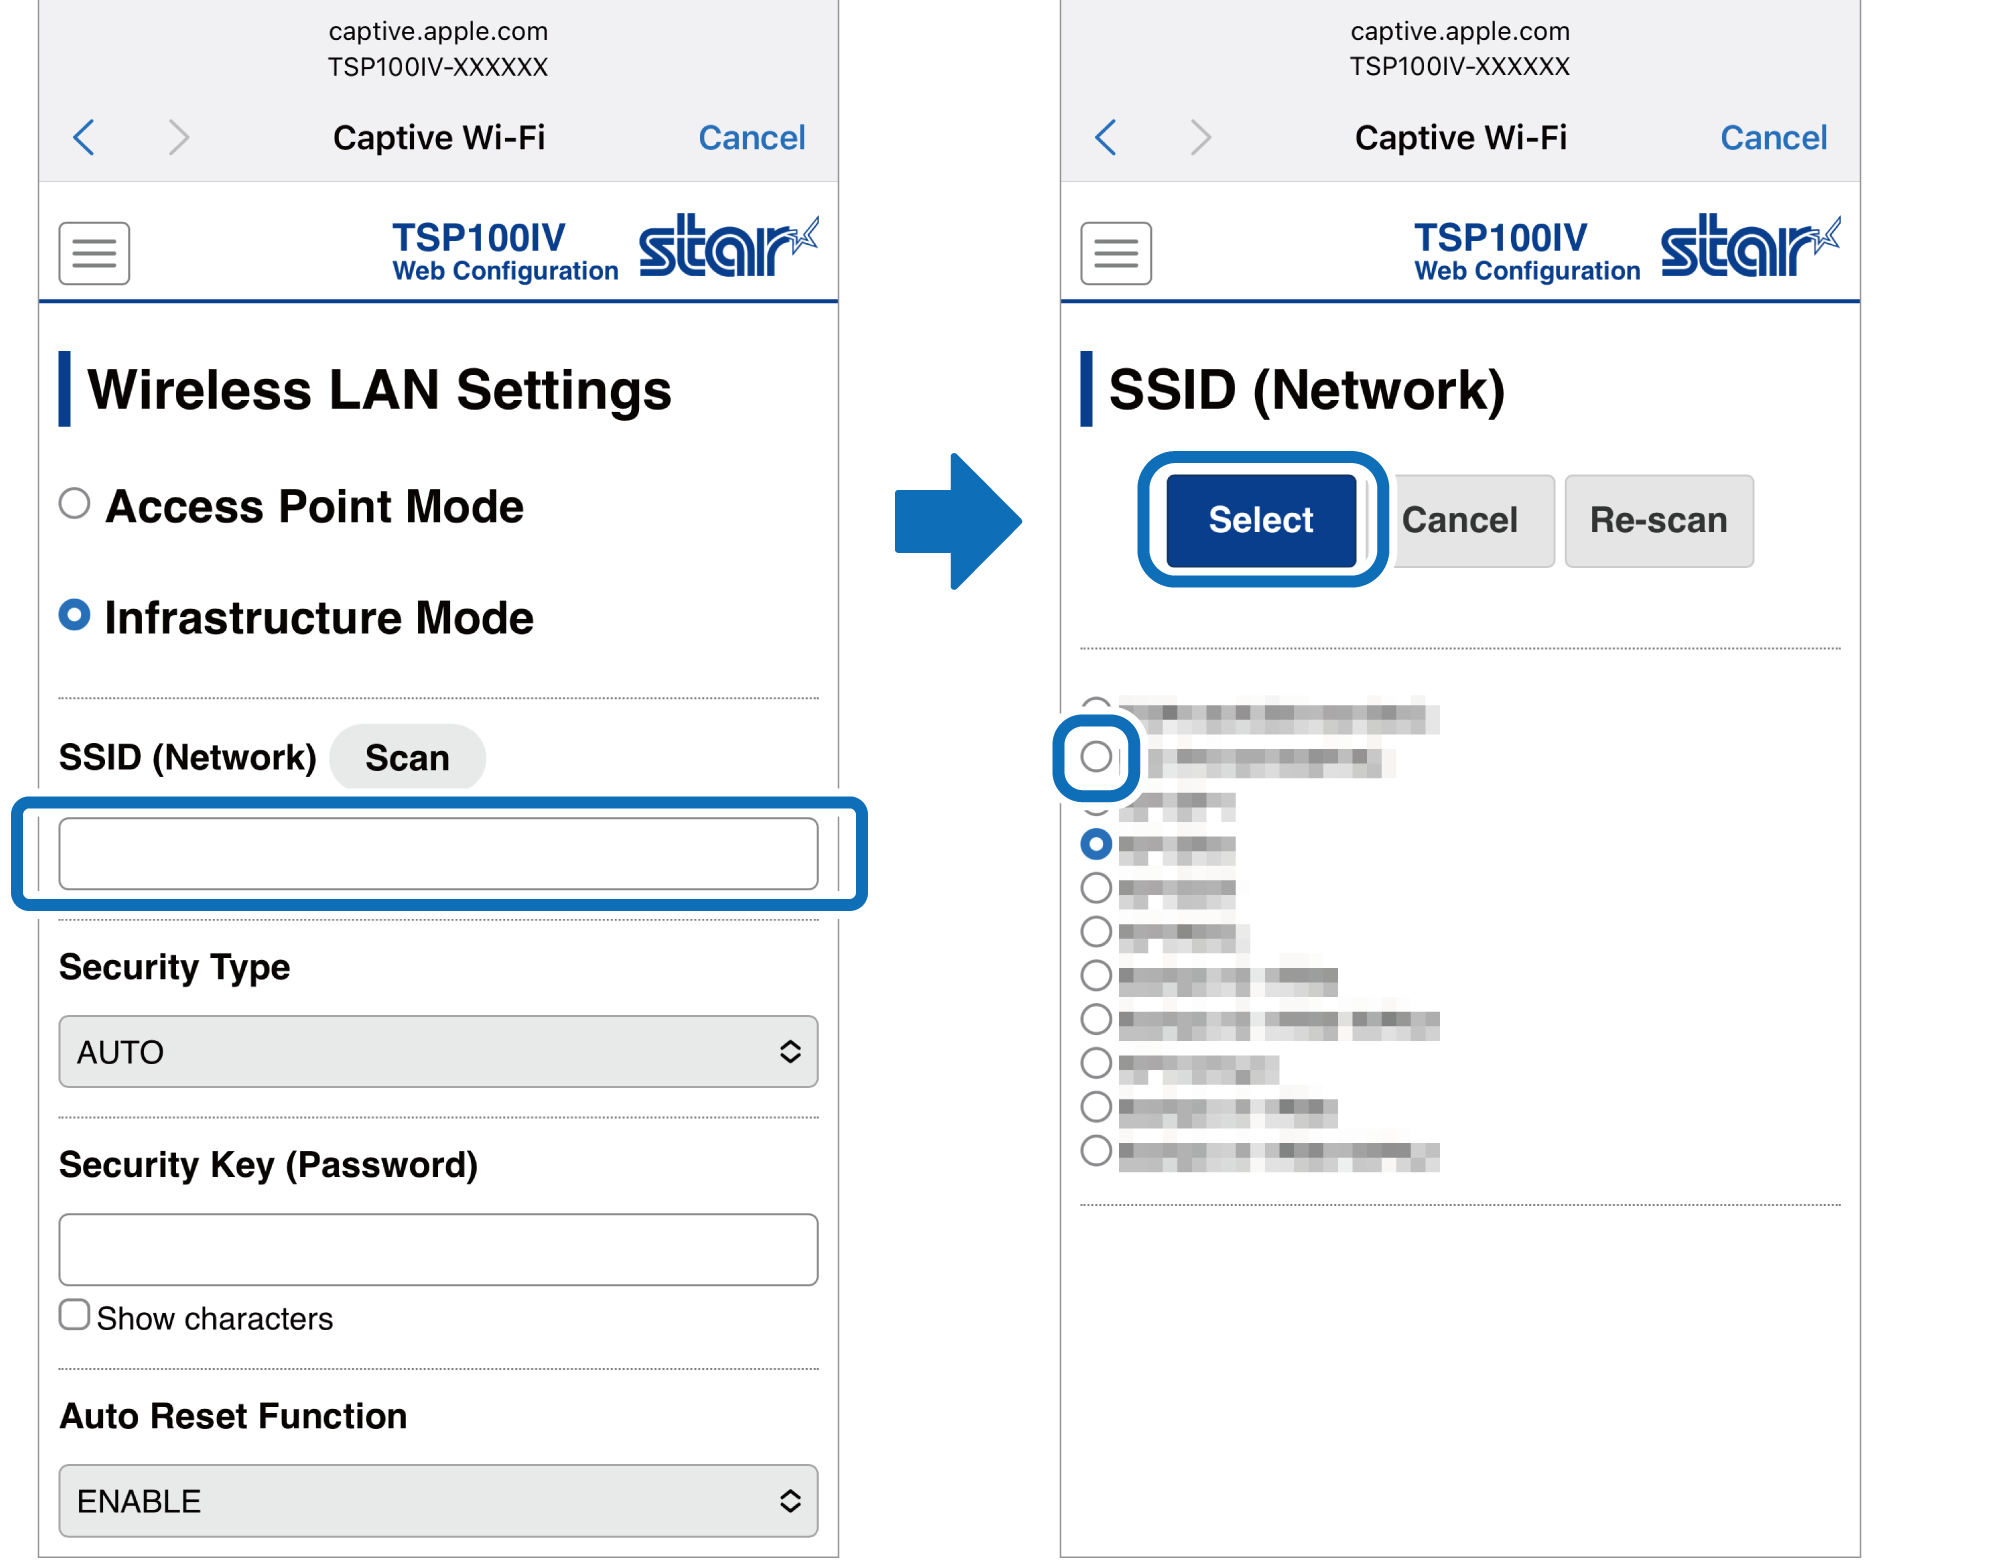
- Directly enter the SSID of the network to be connected, or tap [Scan] and select the SSID from the displayed list.
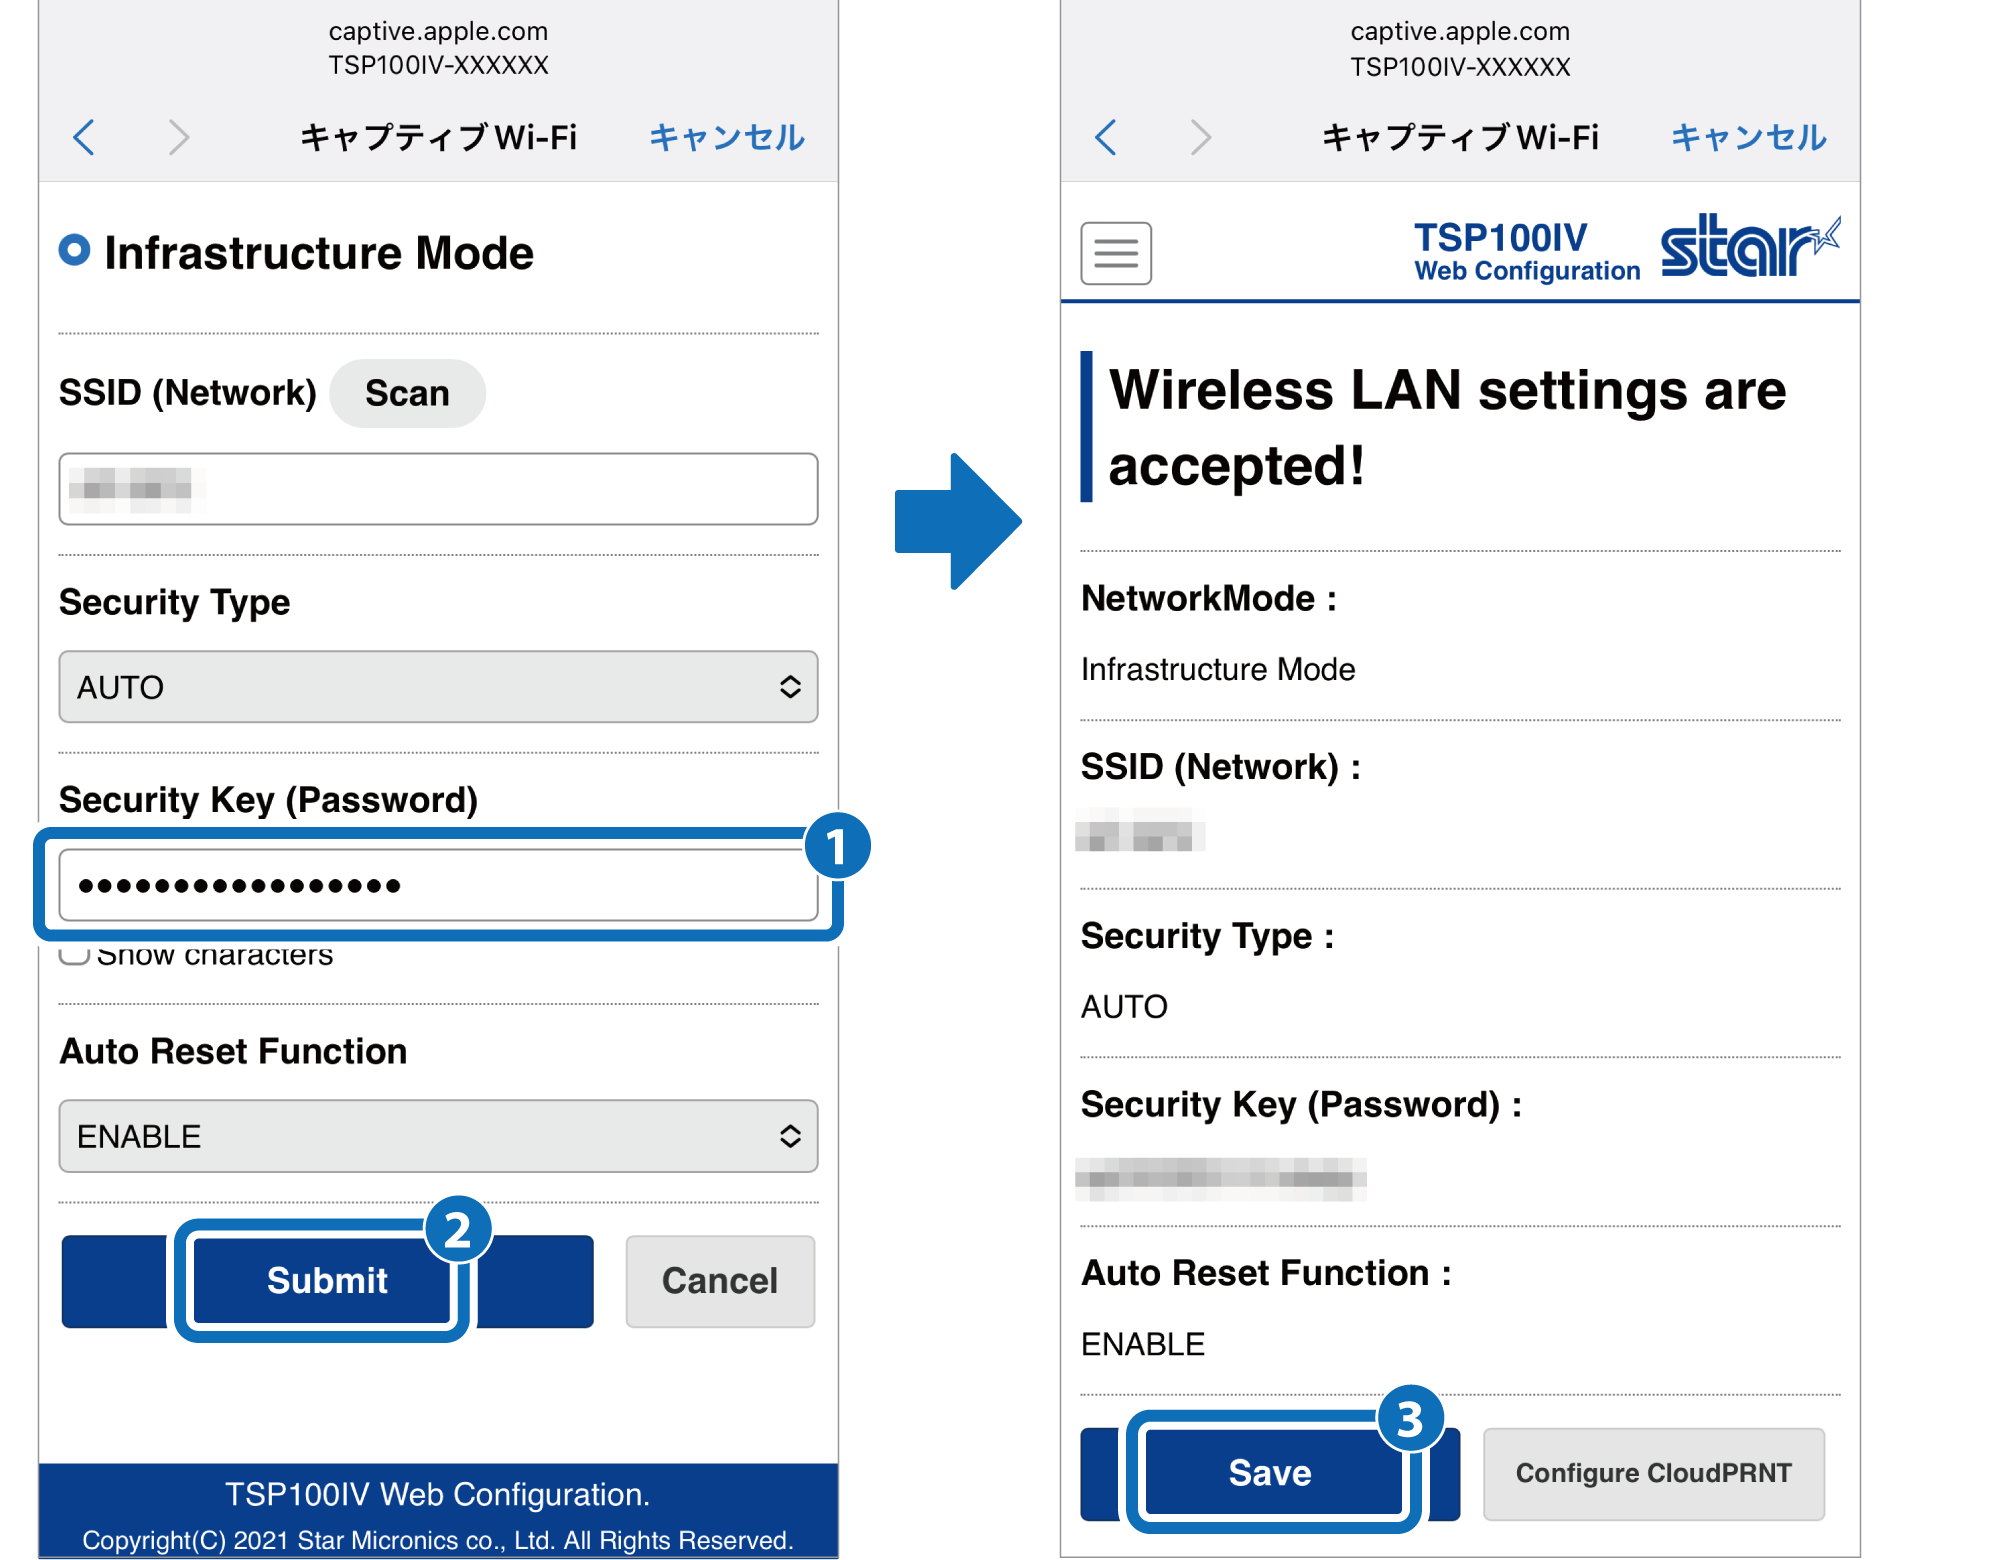
- Enter the Security Key
 of the network to be connected, and tap [Submit]
 .
.
Check the setting contents. If there are no problems, tap [Save] .
.
2. Confirm that it has connected
- The Wireless Network Diagnosis result is printed automatically.
When the printer is successfully connected to the network, "Successful" is printed on the diagnosis result. When it is confirmed that an IP address is allocated to the printer, the setting process is complete.

When "Failed" is printed on the wireless network diagnosis result
When Failed/ (Fail) is printed, the connection has failed.
For confirmation of problems and countermeasures, please refer to FAQ - Wireless LAN Setting Problems.
Connect from a Windows device
The following steps must be performed after the power of TSP100IV has been turned on. Turn On Power
Check before starting the setting.
- Prepare them before starting the setting.
Check Video
| 00:00 | Overview of Wireless LAN Setup |
| 00:24 | Step1 Printing the information for wireless communication settings |
| 01:06 | Step2 Open the WLAN settings of the printer |
| 01:40 | Step3 Configure WLAN settings on the printer |
1. Connect the printer to the network
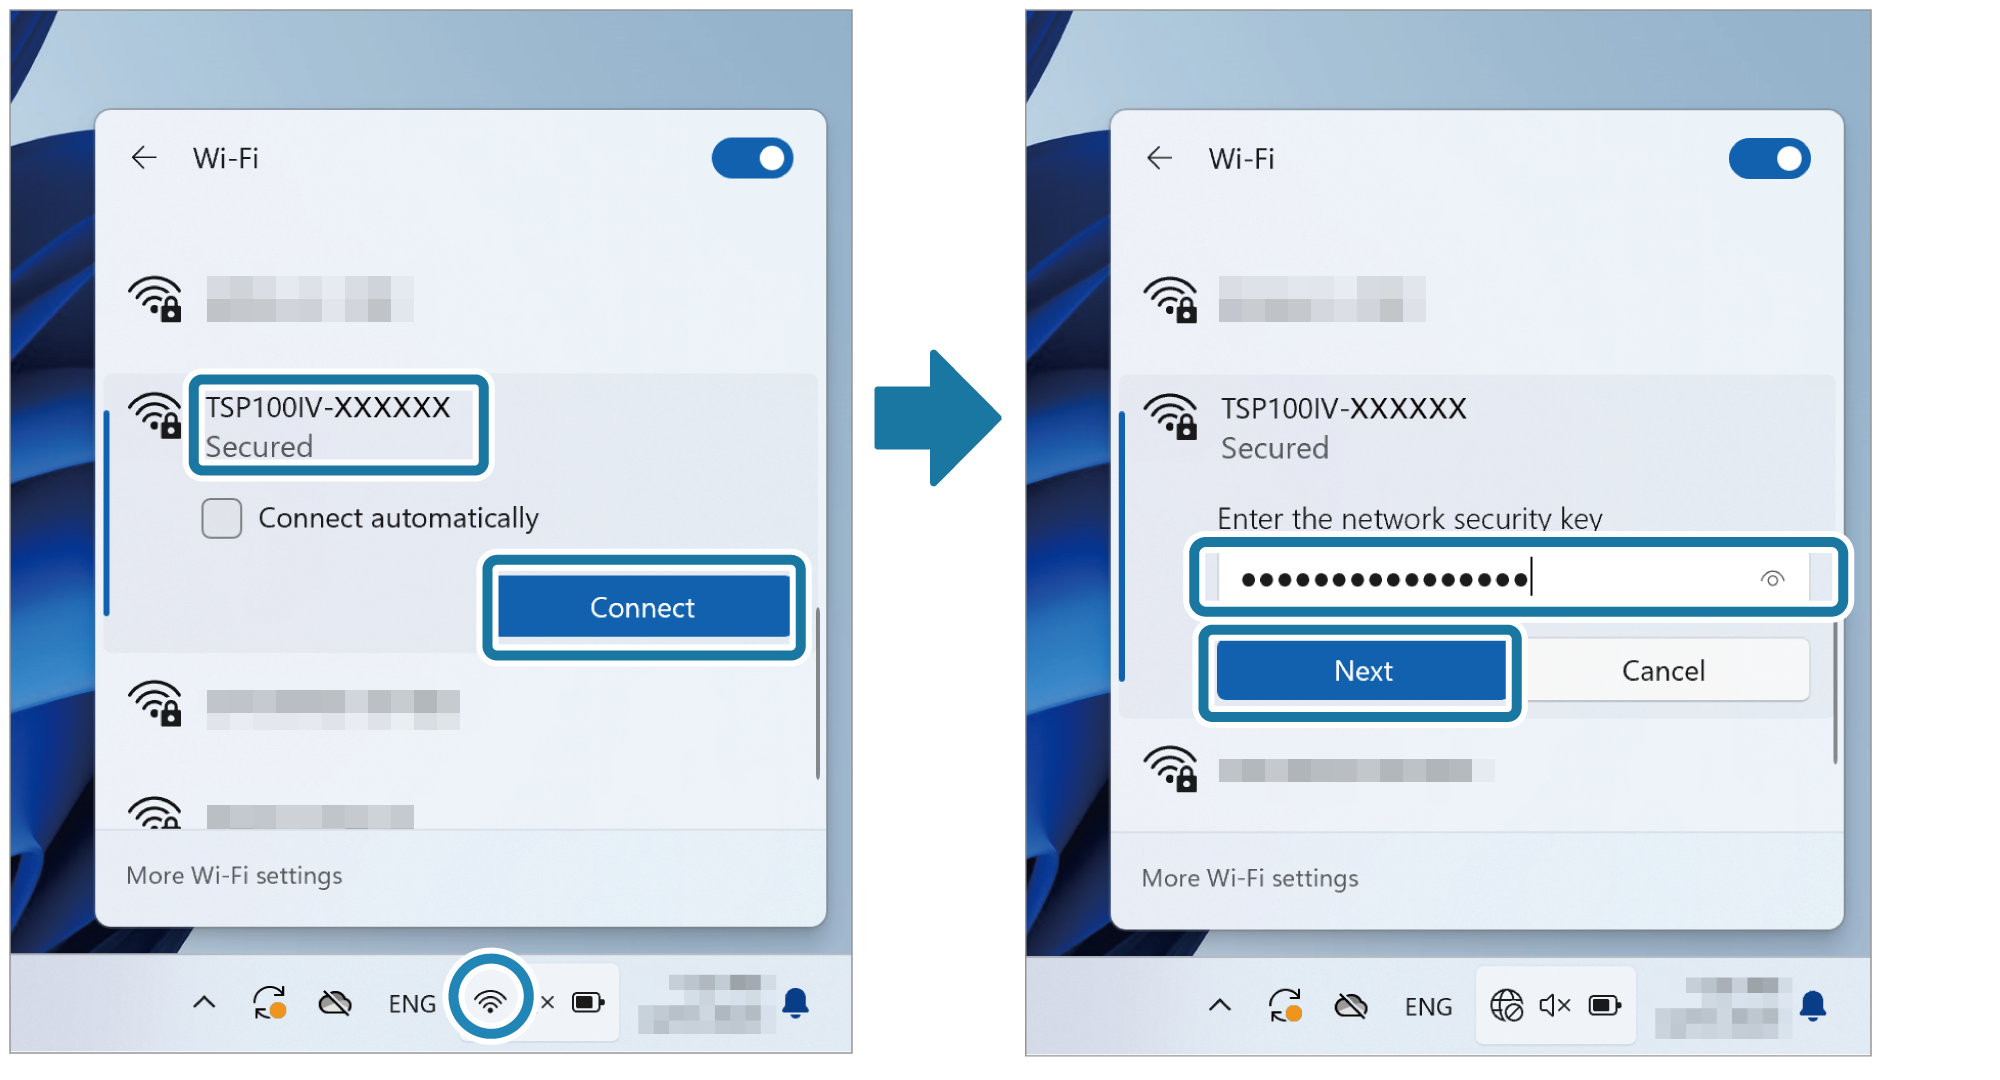
- Click the network icon on the taskbar, and turn Wi-Fi on.
Confirm the SSID (TSP100IV-XXXXXX) printed on "*** WLAN Setup ***" of the wireless setting QR codes, select it from the list, and click [Connect].
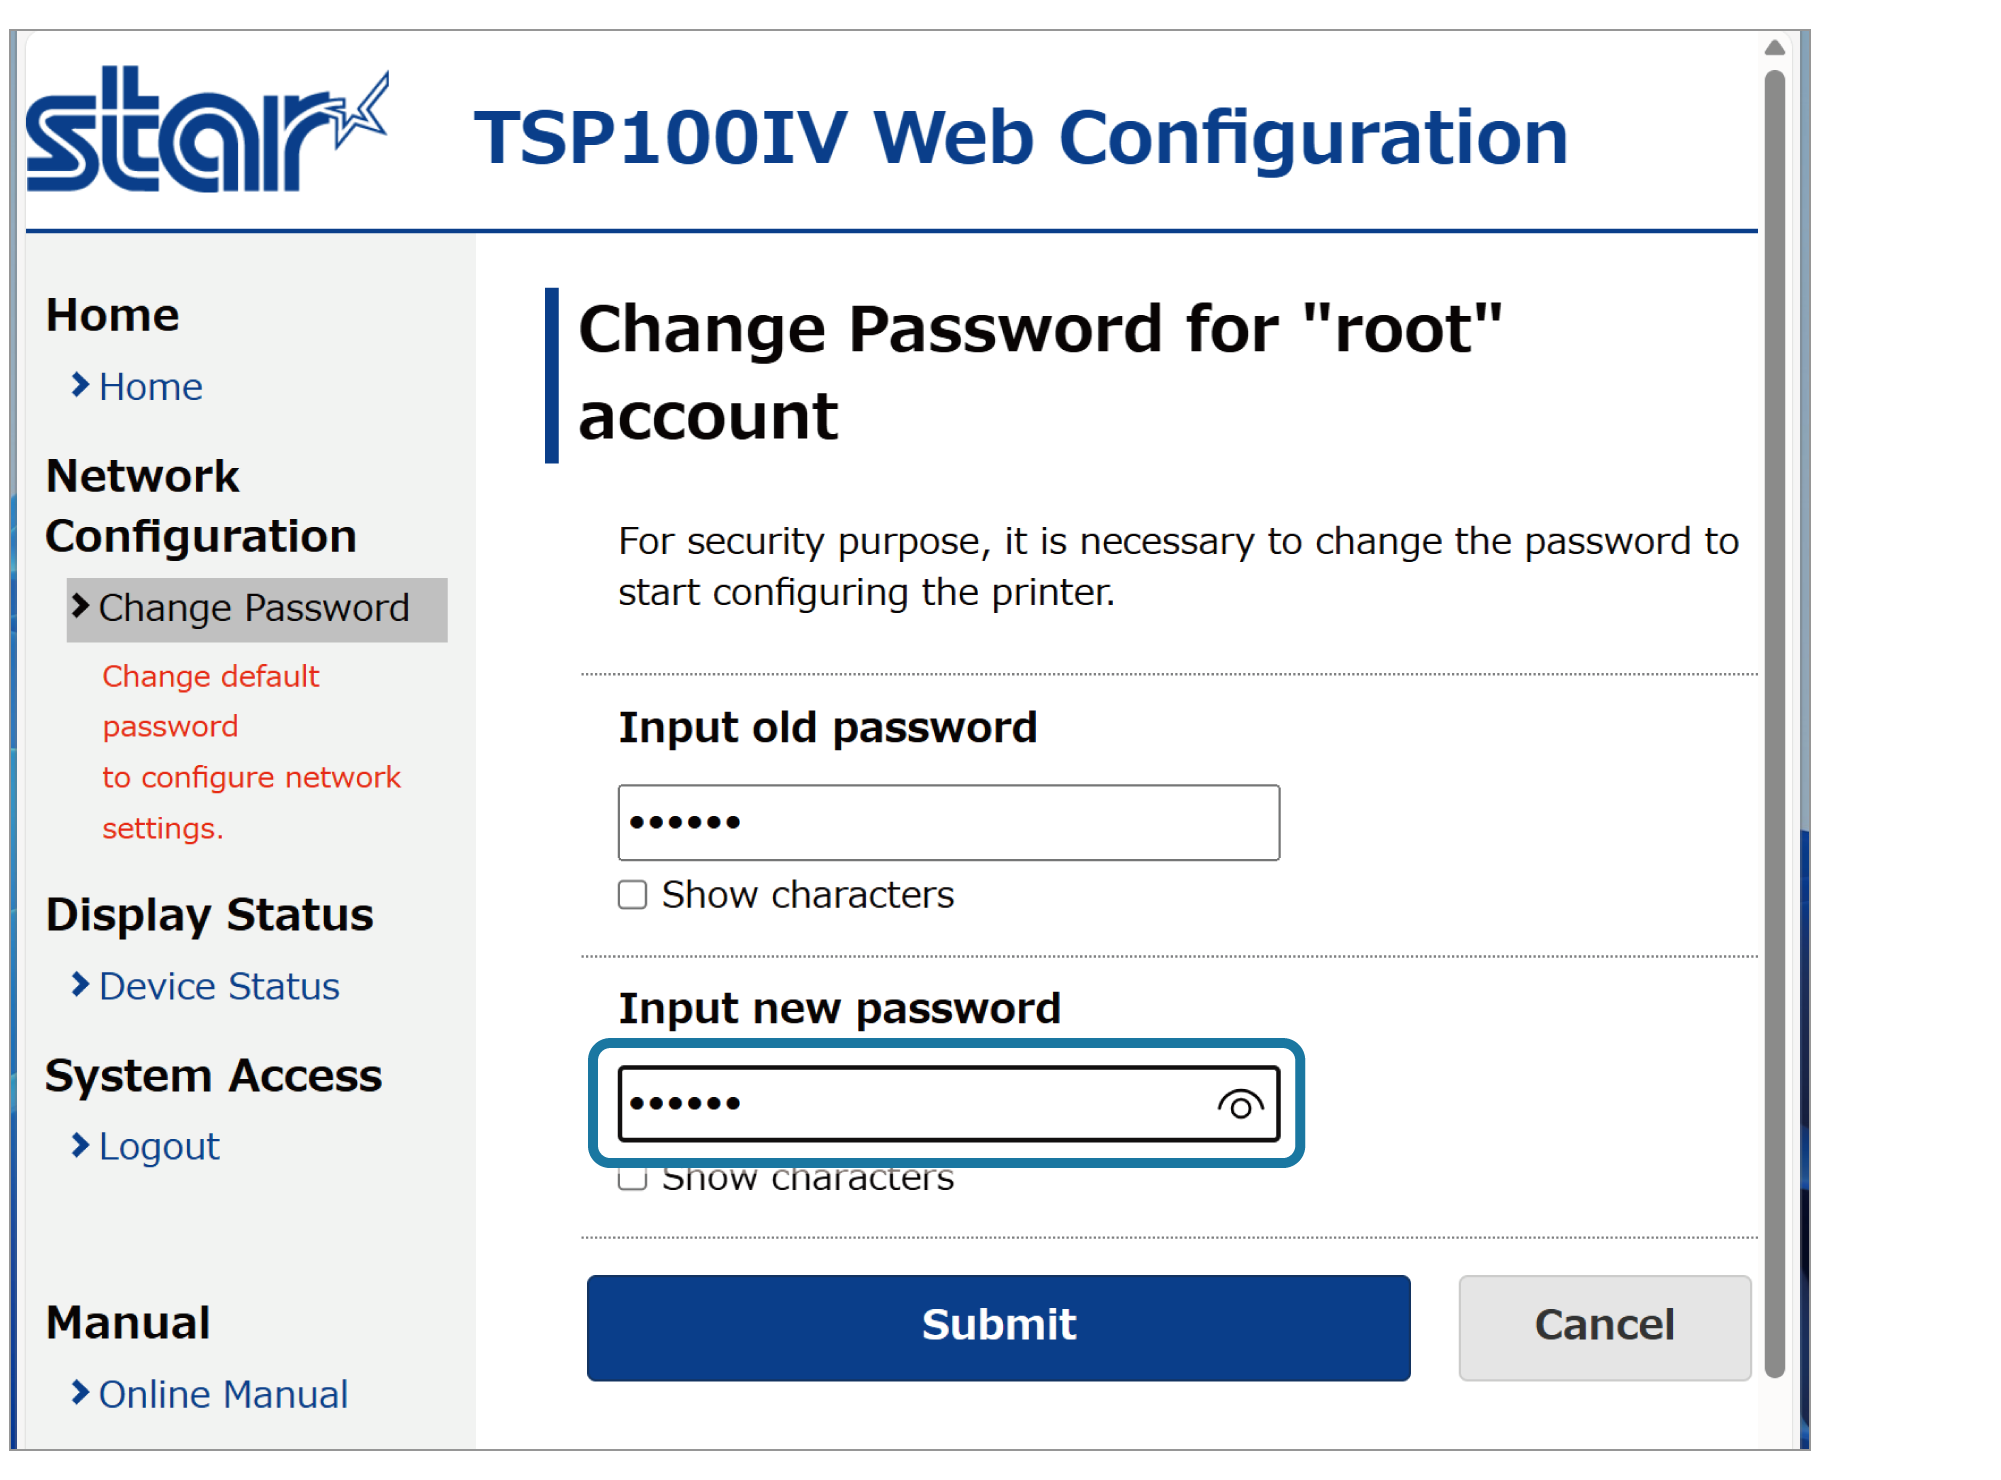
When the Security Key input window appears, enter the Security Key. - Enter Username: root / Password: [the changed password or default password (public)] in the displayed setting screen, and log in the printer.
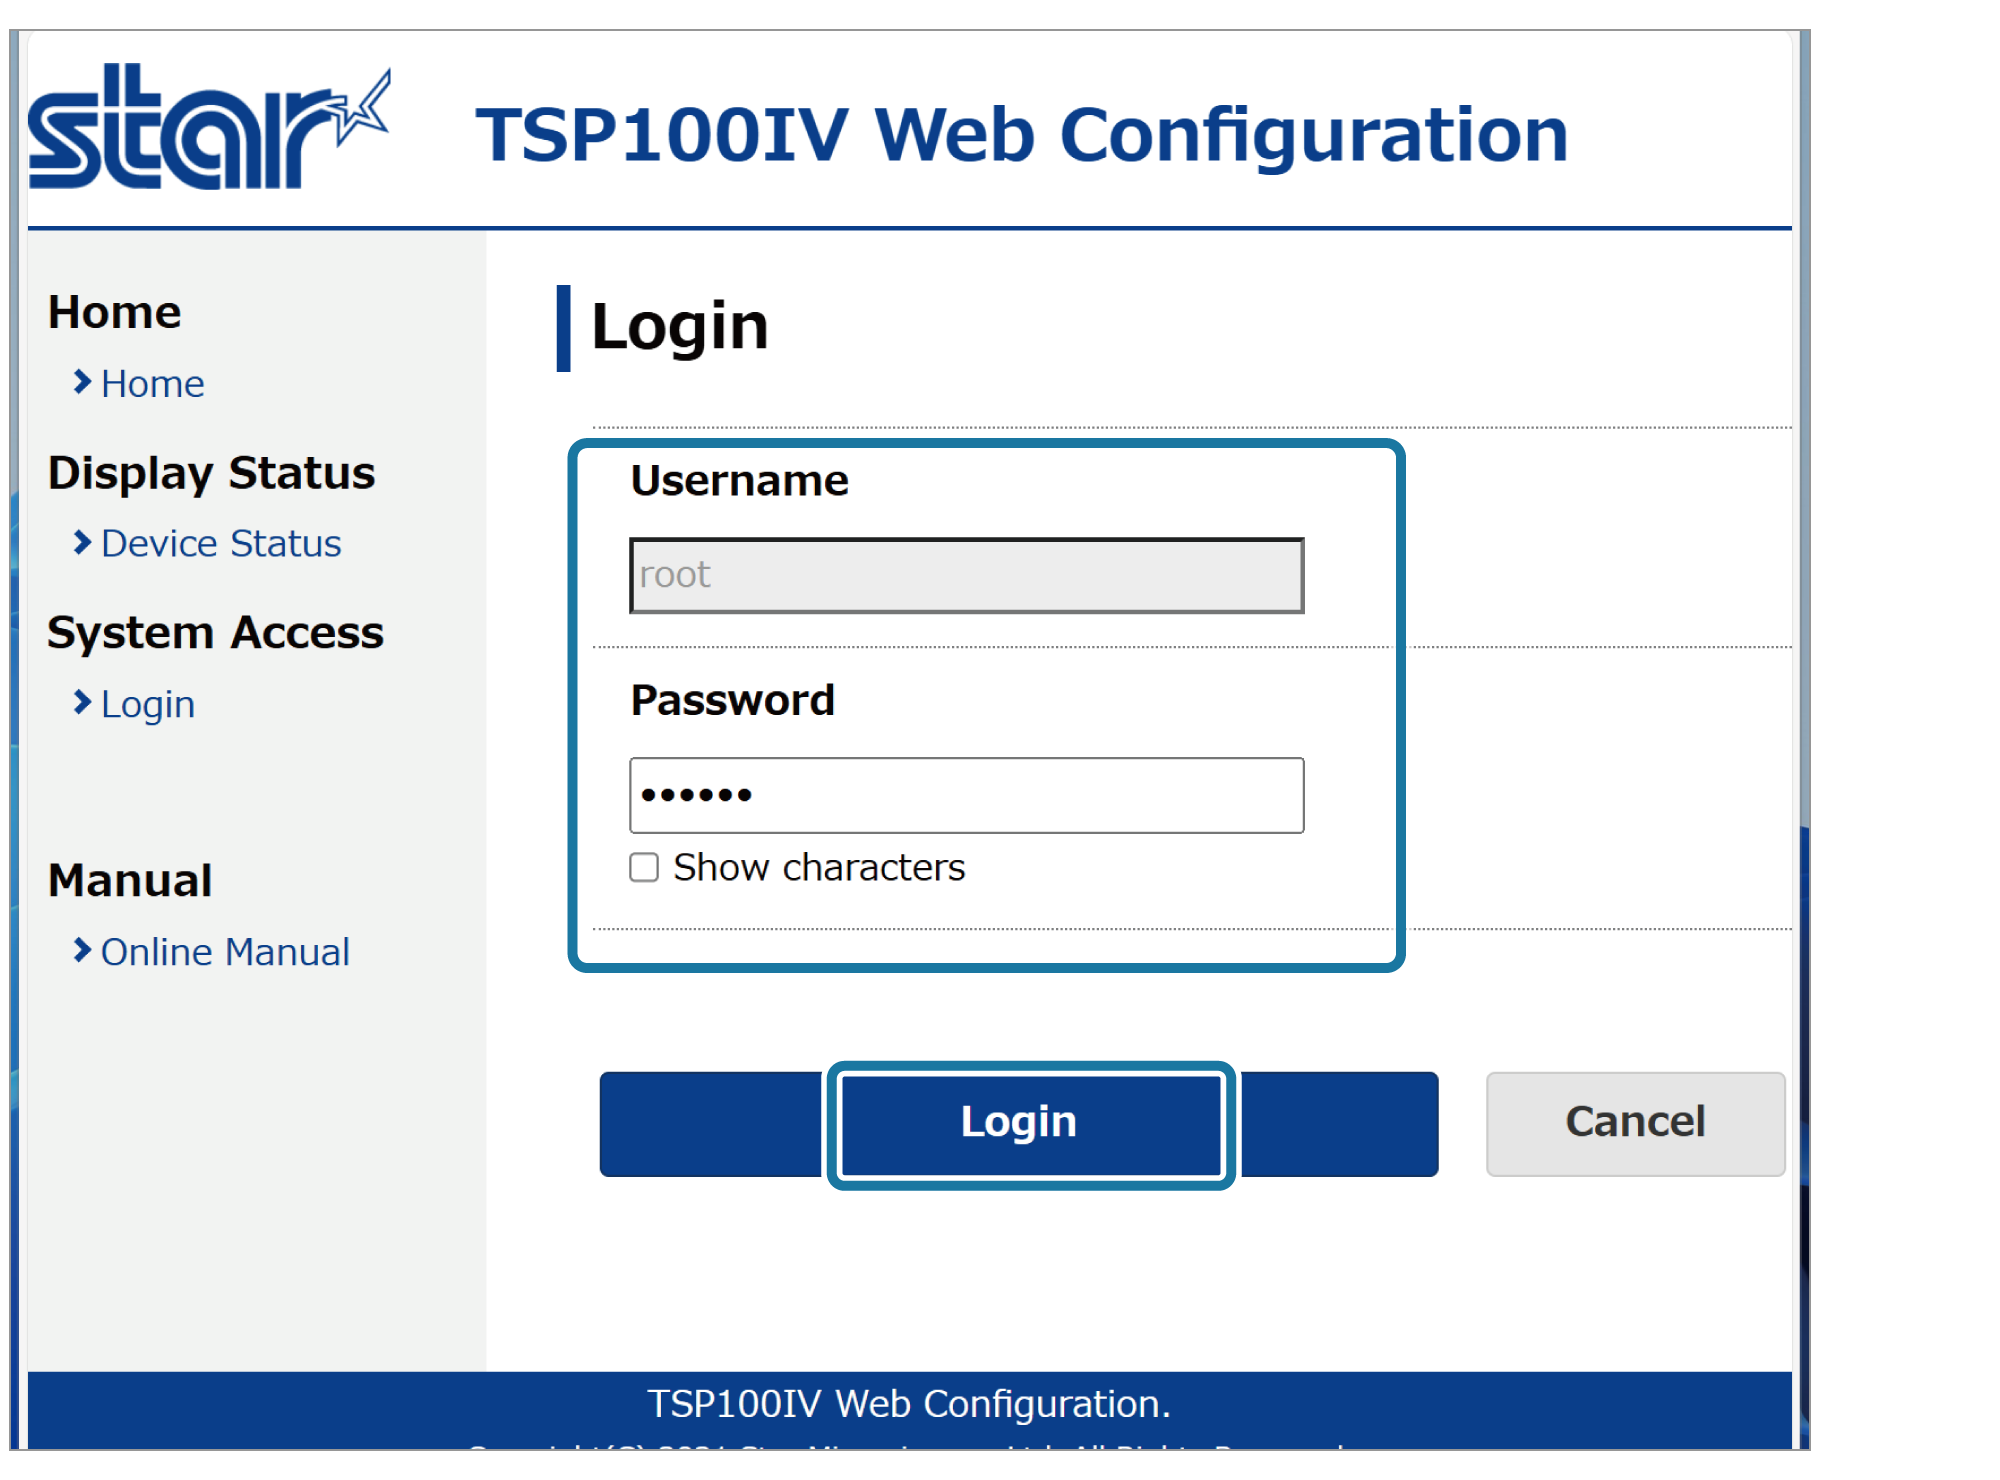 When logging in using the default password, a screen for changing the password opens. After changing the password, proceed to the next step.
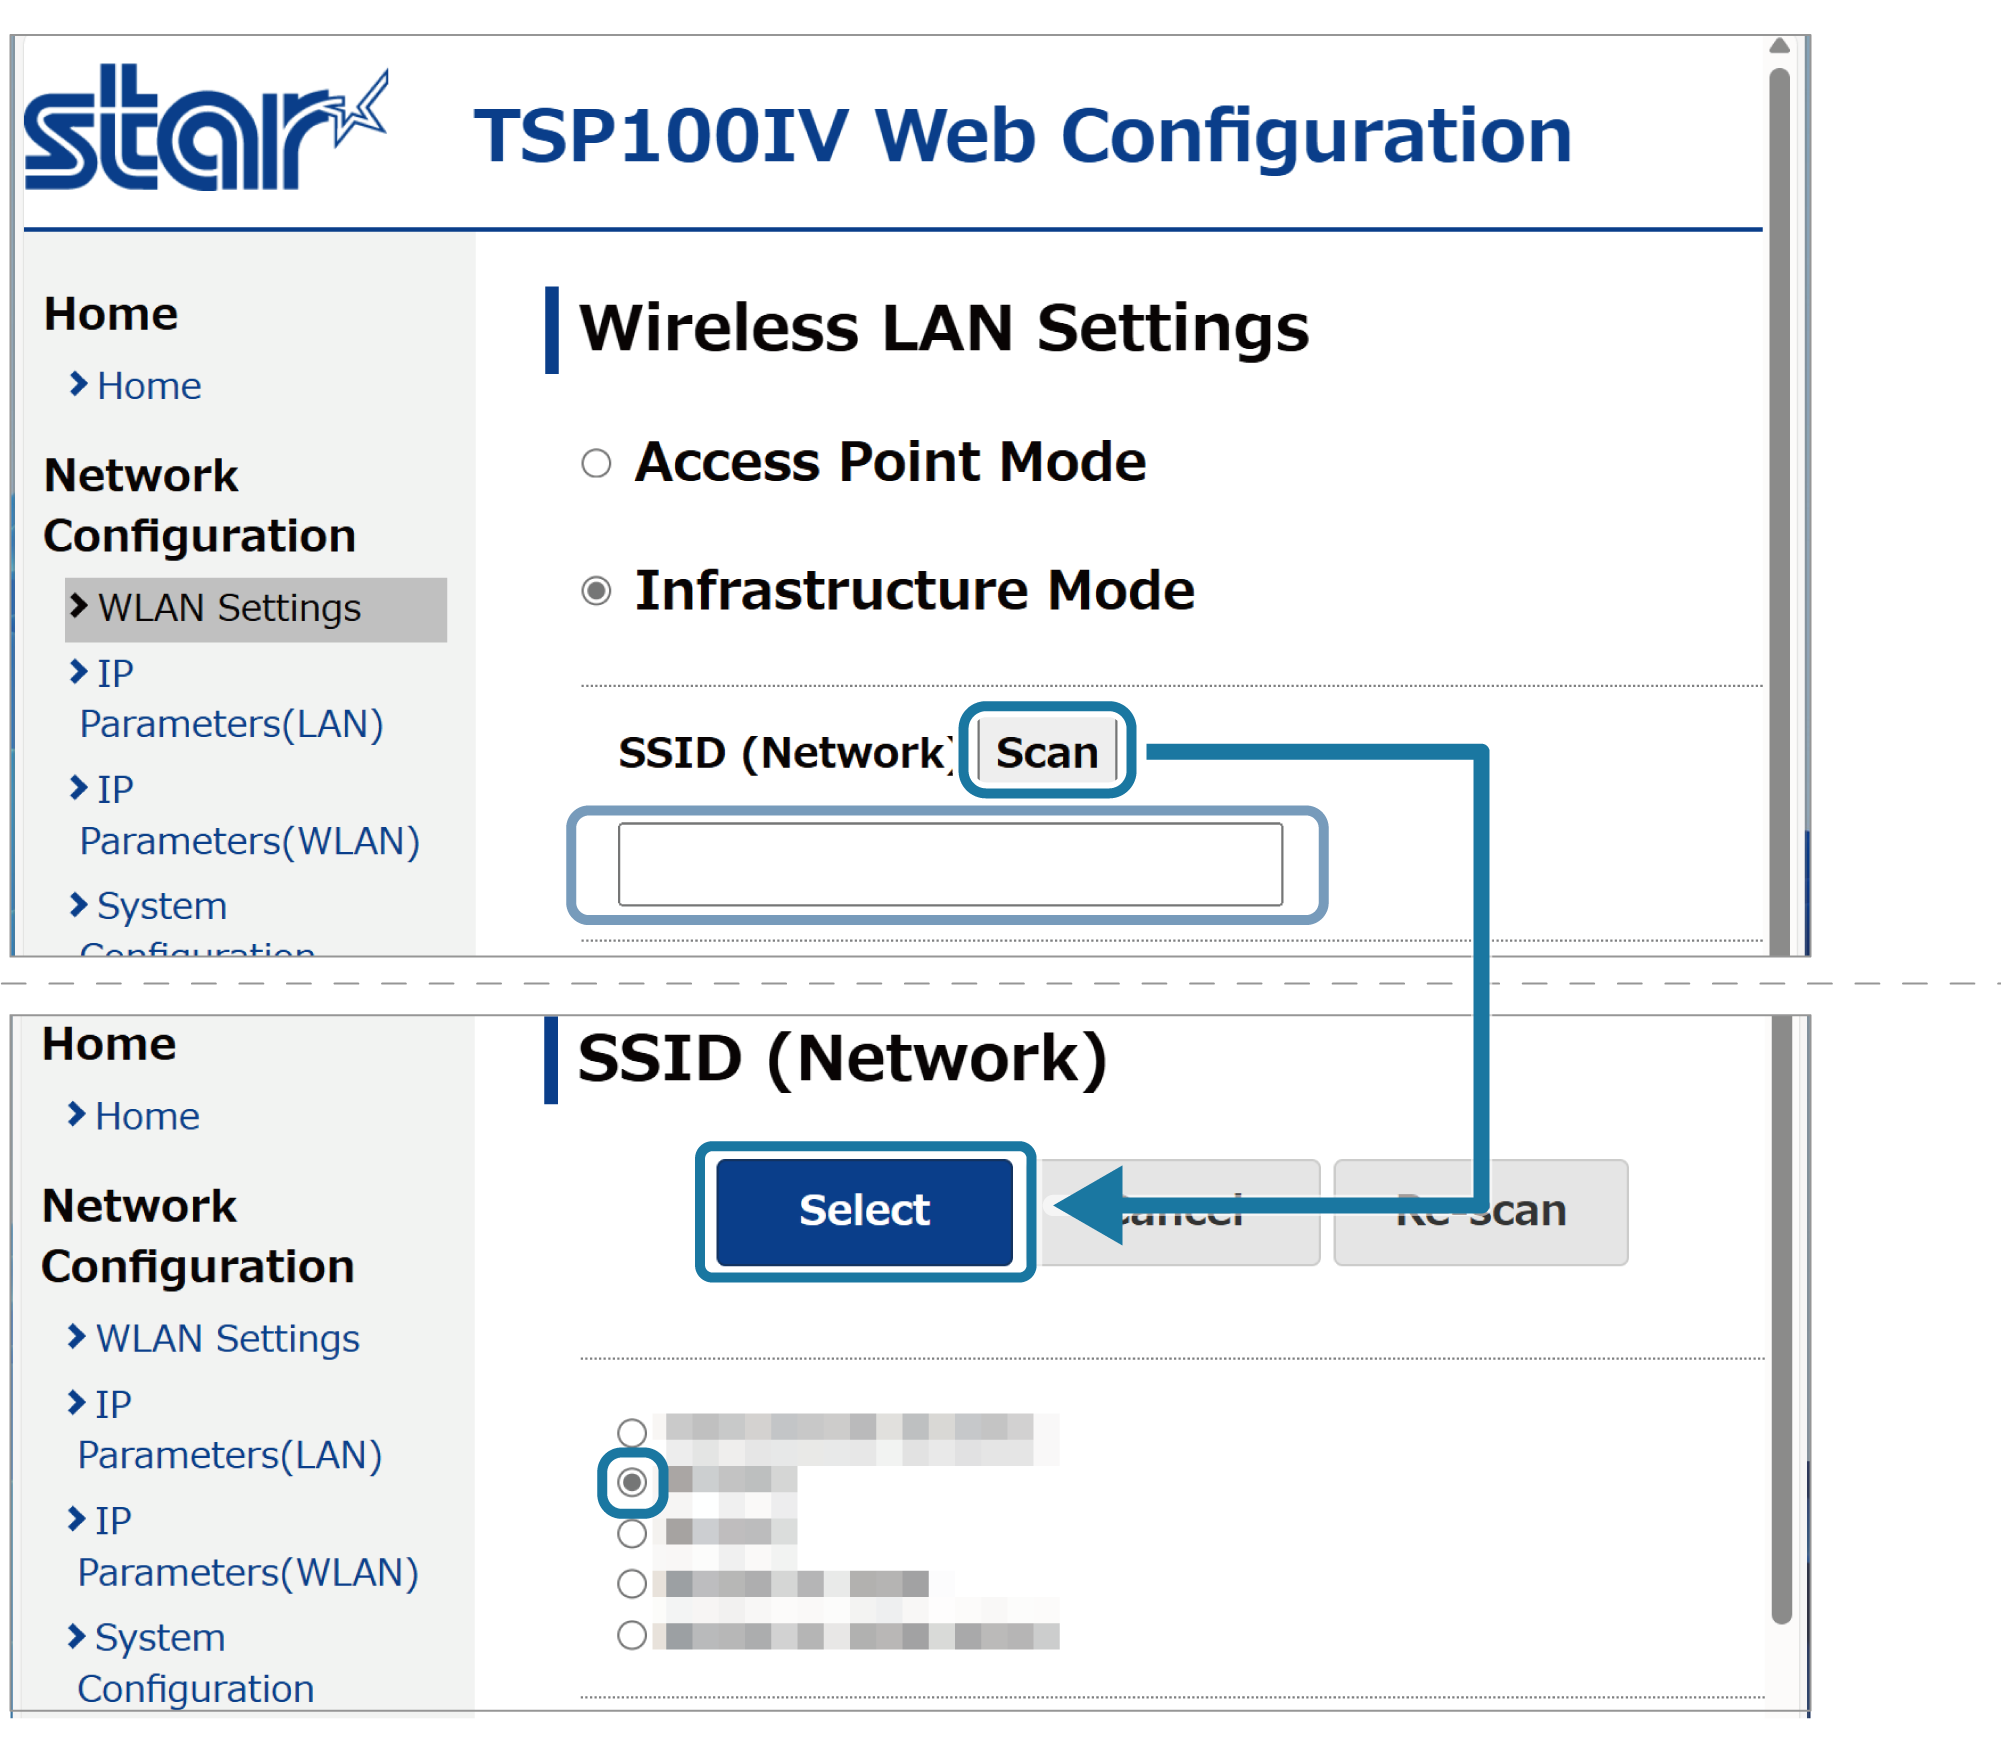
 - Directly enter the SSID of the network to be connected, or press the Scan button and select the SSID from the displayed list.
- Enter the Security Key
 of the network to be connected, and click [Submit]
 .
.
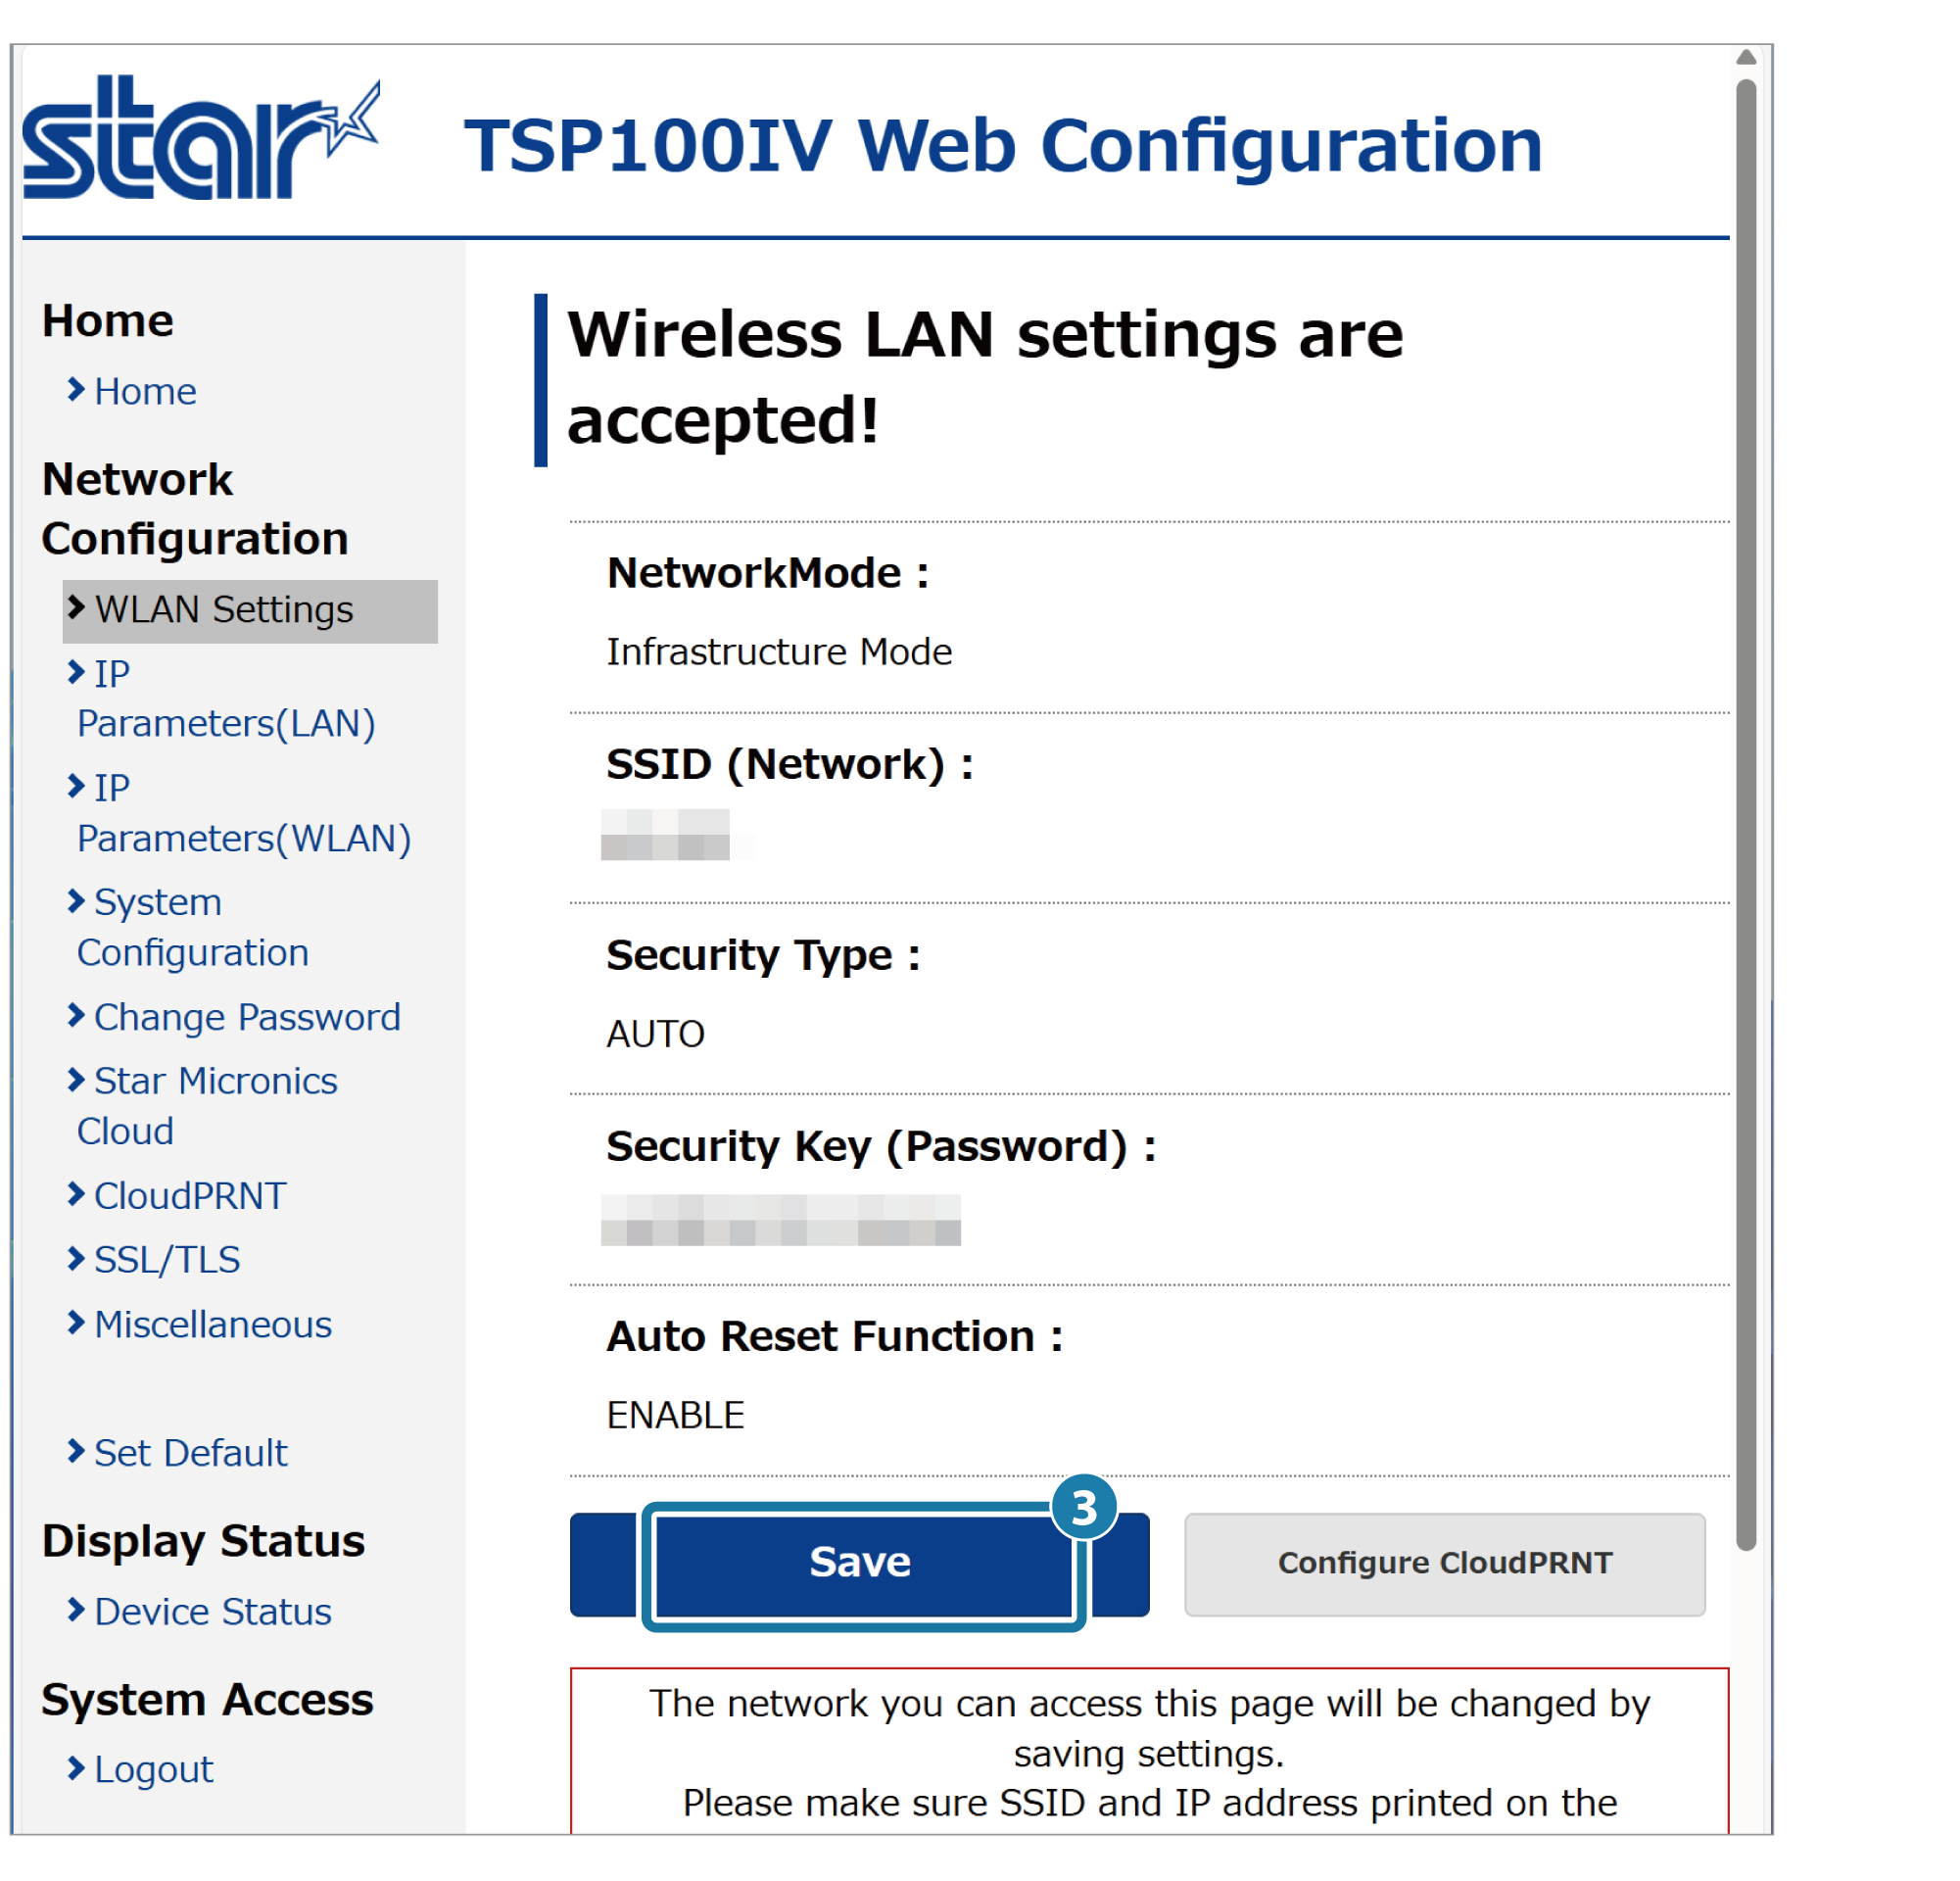
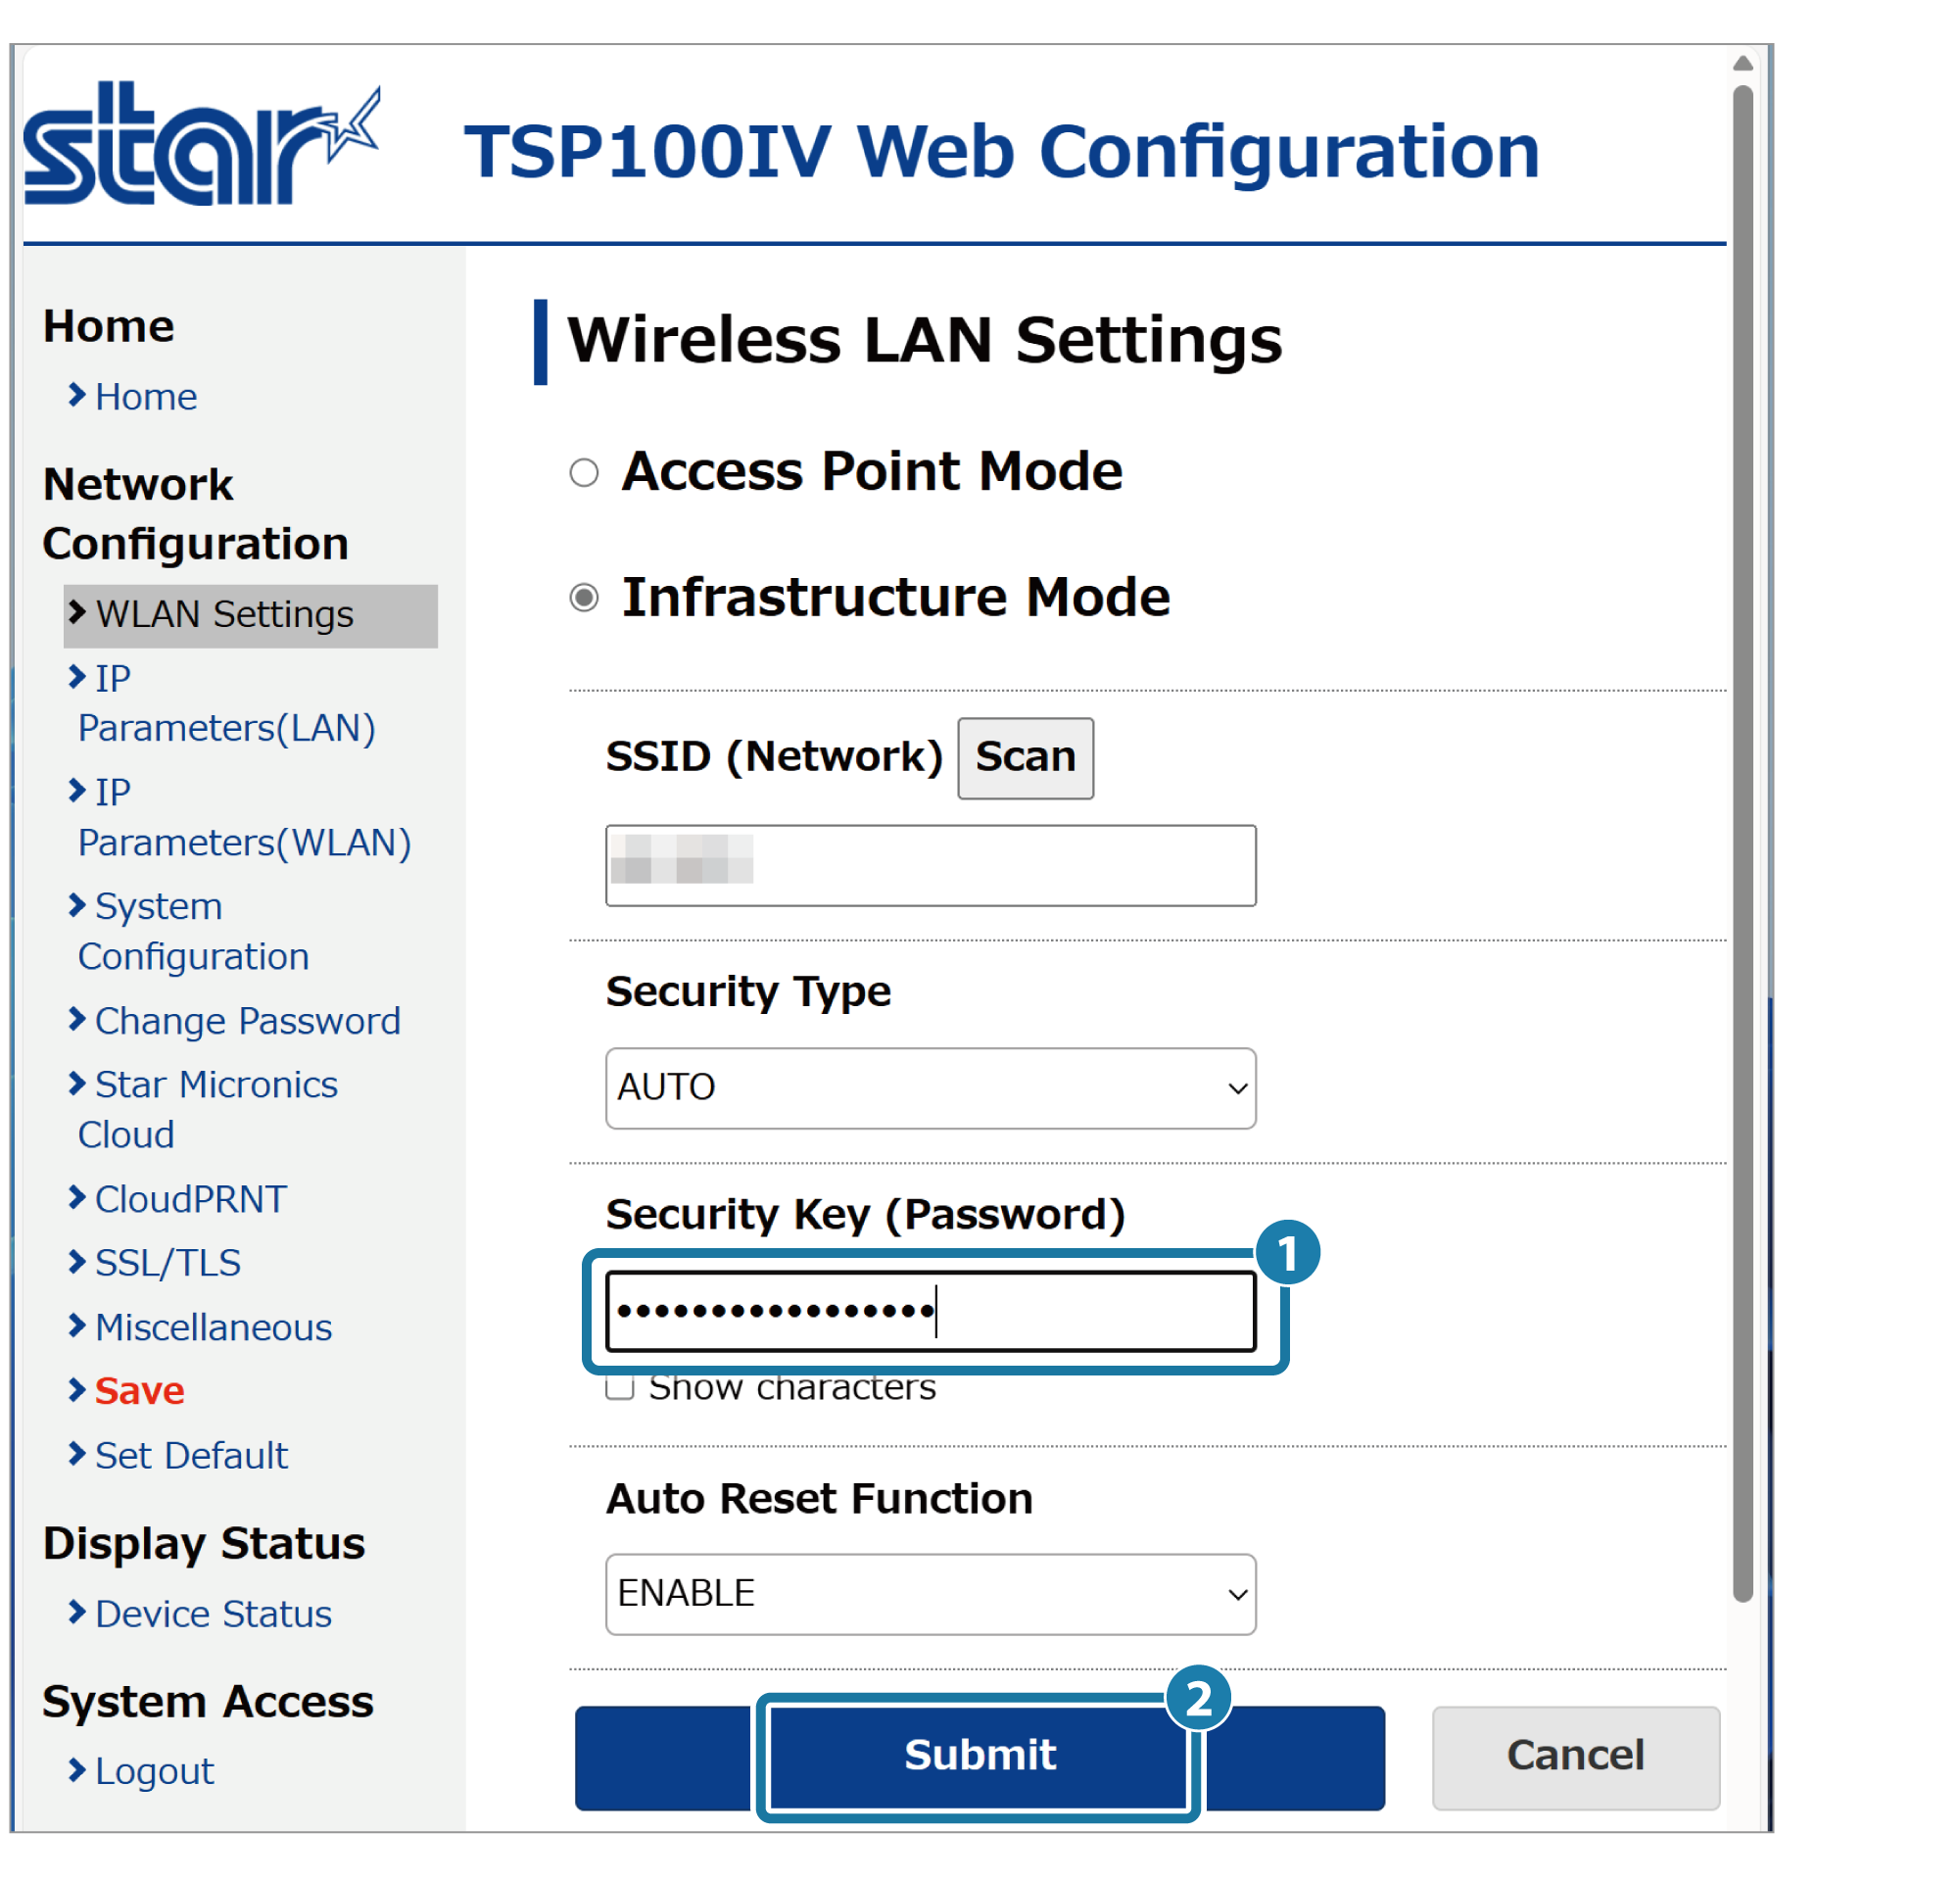 Check the setting contents. If there are no problems, click [Save]
 .
.
2. Confirm that it has connected
- The Wireless Network Diagnosis result is printed automatically.
When the printer is successfully connected to the network, "Successful" is printed on the diagnosis result. When it is confirmed that an IP address is allocated to the printer, the setting process is complete.

When "Failed" is printed on the wireless network diagnosis result
When Failed/ (Fail) is printed, the connection has failed.
For confirmation of problems and countermeasures, please refer to FAQ - Wireless LAN Setting Problems.