Connect USB Cable
Connect the USB cable for USB communication or for communication + charging between the printer and PC/tablet.
When connecting a tablet, smartphone, or other device for the purpose of charging only, and when connecting a USB-connectable product, refer to Set Up External Devices.
The printer-side connection port varies depending on the operating system of the PC, tablet, or smartphone you will use.
USB-C port
When communicating (printing) from a Windows, Mac, or Linux PC/tablet, follow the steps below and connect to the USB-C port (Windows USB-C) on the printer.
The USB-C port supports communication only. When connecting a tablet, smartphone, or other device for the purpose of charging, use the USB-A port.
Set Up External Devices: USB-A port
When using a Windows driver, install the Windows driver. Install Driver
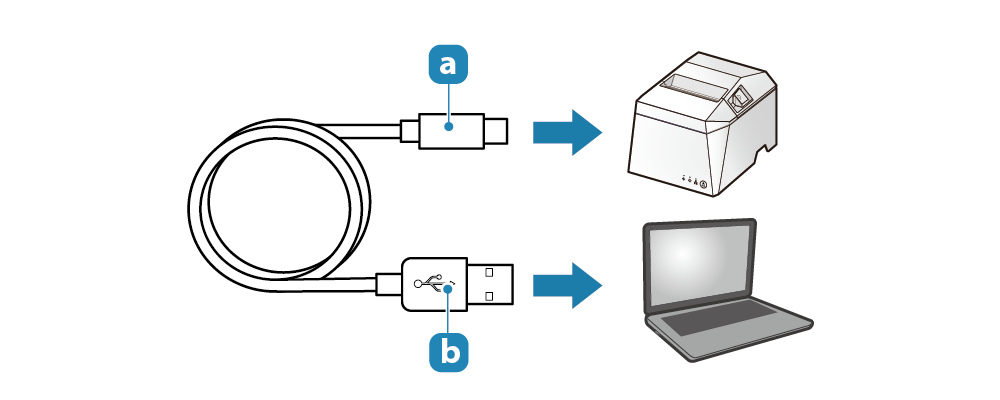
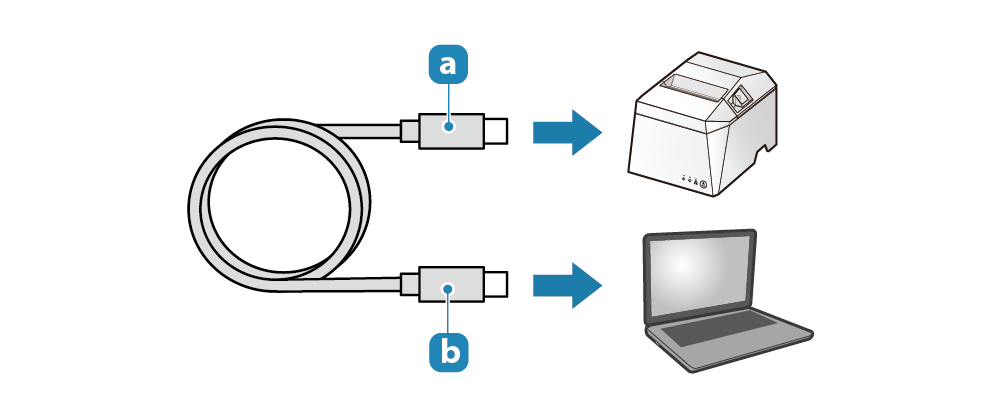
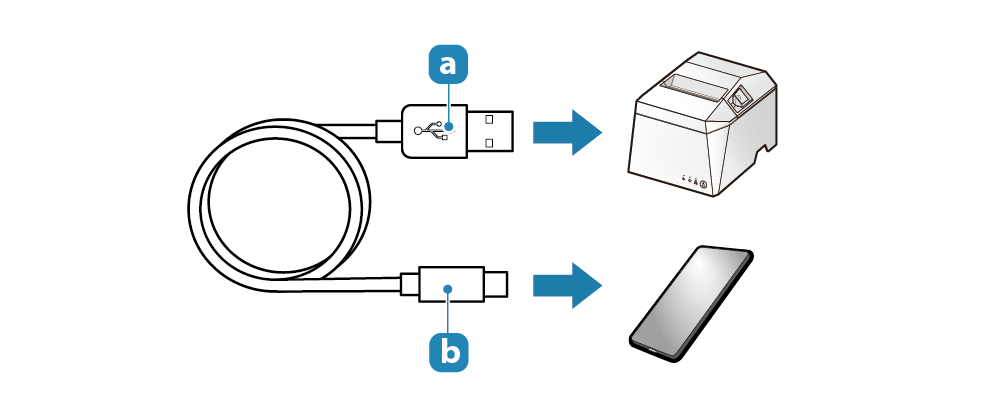
1. Prepare a USB cable
- Prepare the USB cable (C-A) that is provided with the printer or a commercially-available USB cable (C-C).
- When using the USB cable that is provided with the printer
- When using a commercially-available USB cable
 | Printer-side plug | USB-C |
 | Device-side plug | USB-A (provided) or USB-C (commercially available) |
Caution
When using a commercially-available USB cable, be sure to perform full operation checks before beginning actual use.
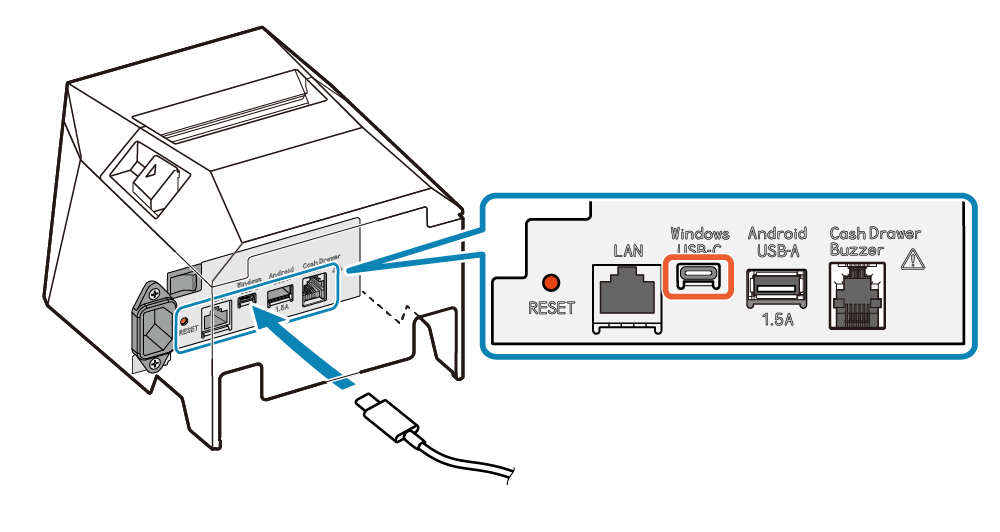
2. Connect the USB cable to the printer
- Connect the USB cable to the printer USB-C port (Windows USB-C).
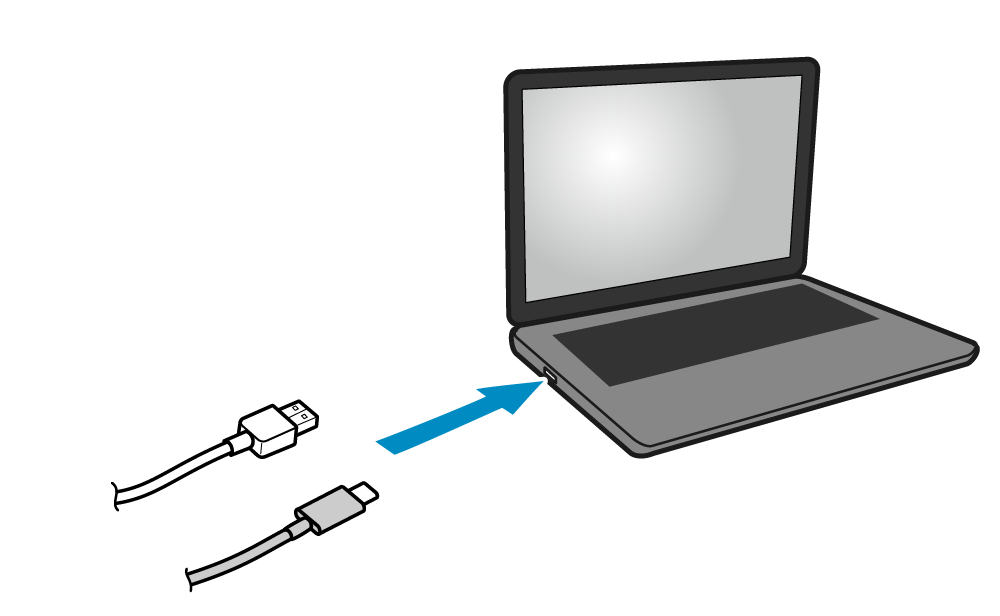
3. Connect the USB cable to the PC, tablet, or other device
- Connect the other plug to the PC, tablet, or other device.
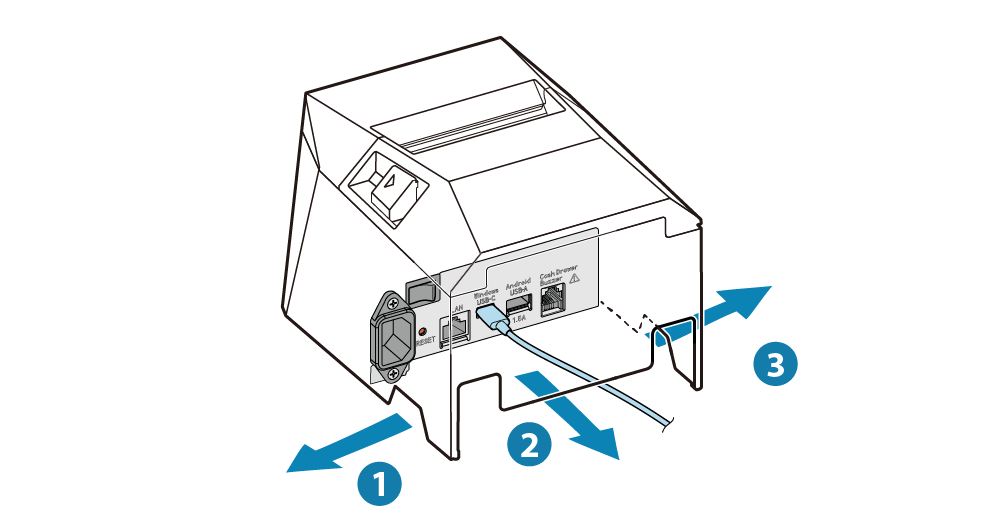
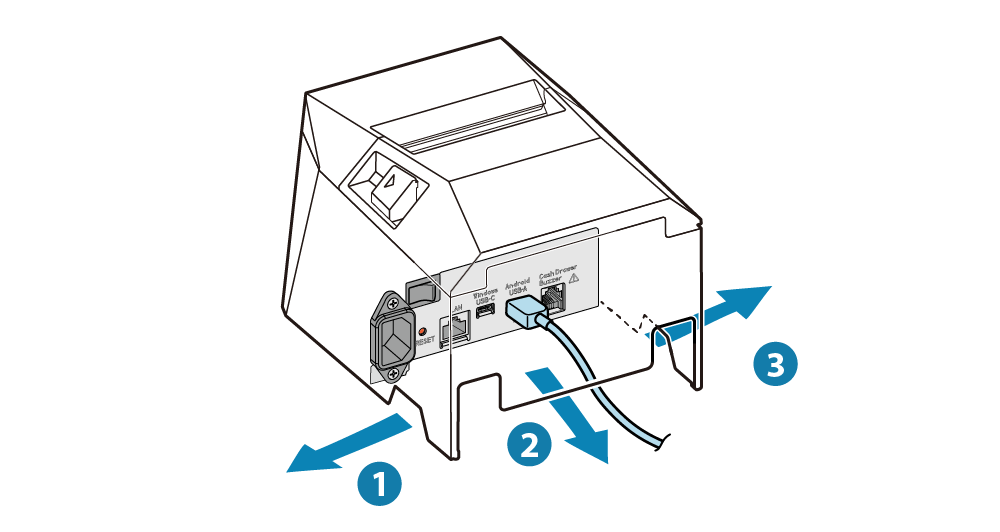
4. Route the USB cable
- Cable outlets are provided in 3 locations (right, left, and back), and cables can be routed to suit the location where the device is placed.
Note
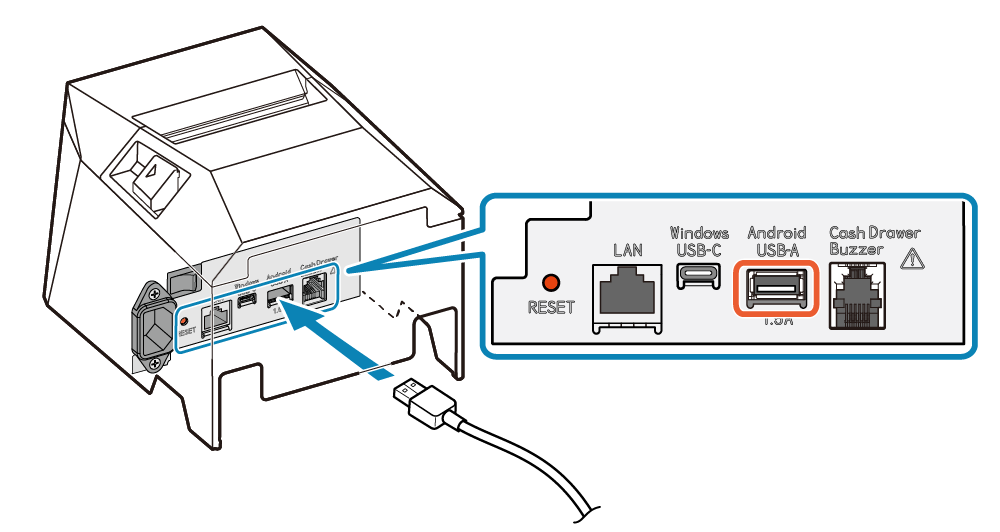
USB-A port
When communicating (printing) from an Android tablet or smartphone, follow the steps below and connect to the USB-A port (Android USB-A) on the printer.
At the same time as communication with the printer, power (max. 1.5A) is also supplied to the Android tablet or smartphone.
Caution
When connecting an Android device to the USB-A port (Android USB-A) for the purpose of communication, start the Android device, connect the USB cable to the printer, and then turn ON the printer power.
Also, be sure to fully verify operation with the actual device before beginning actual use.
1. Prepare a USB cable
- Prepare the USB cable (A-C) that is provided with the printer.
| Printer-side plug | USB-A |
| Device-side plug | USB-C |
Note
If the USB terminal on your Android device is a micro-B terminal, prepare another USB cable.
2. Connect the USB cable to the printer
- Connect the USB cable to the printer USB-A port (Android USB-A).
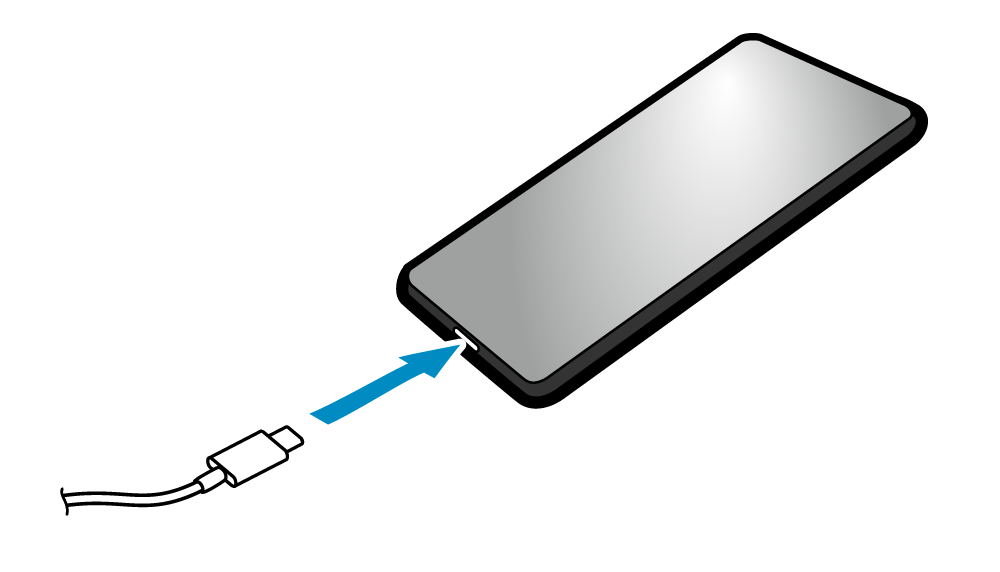
3. Connect the USB cable to the tablet or smartphone
- Connect the other plug to the Android tablet or smartphone.
4. Route the USB cable
- Cable outlets are provided in 3 locations (right, left, and back), and cables can be routed to suit the location where the device is placed.
Note