Advanced Settings (LAN)
Printer firmware version 1.1 or later supports the enable/disable settings of Telnet and the local network.
It is convenient to use the dedicated app when setting a connection with a smartphone or tablet. For details, refer to Use App.
If you do not use a dedicated app, setup is performed from the printer settings screen (Web Configuration).
Setting DNS
Enabling Telnet
Disabling Local Network
Setting DNS
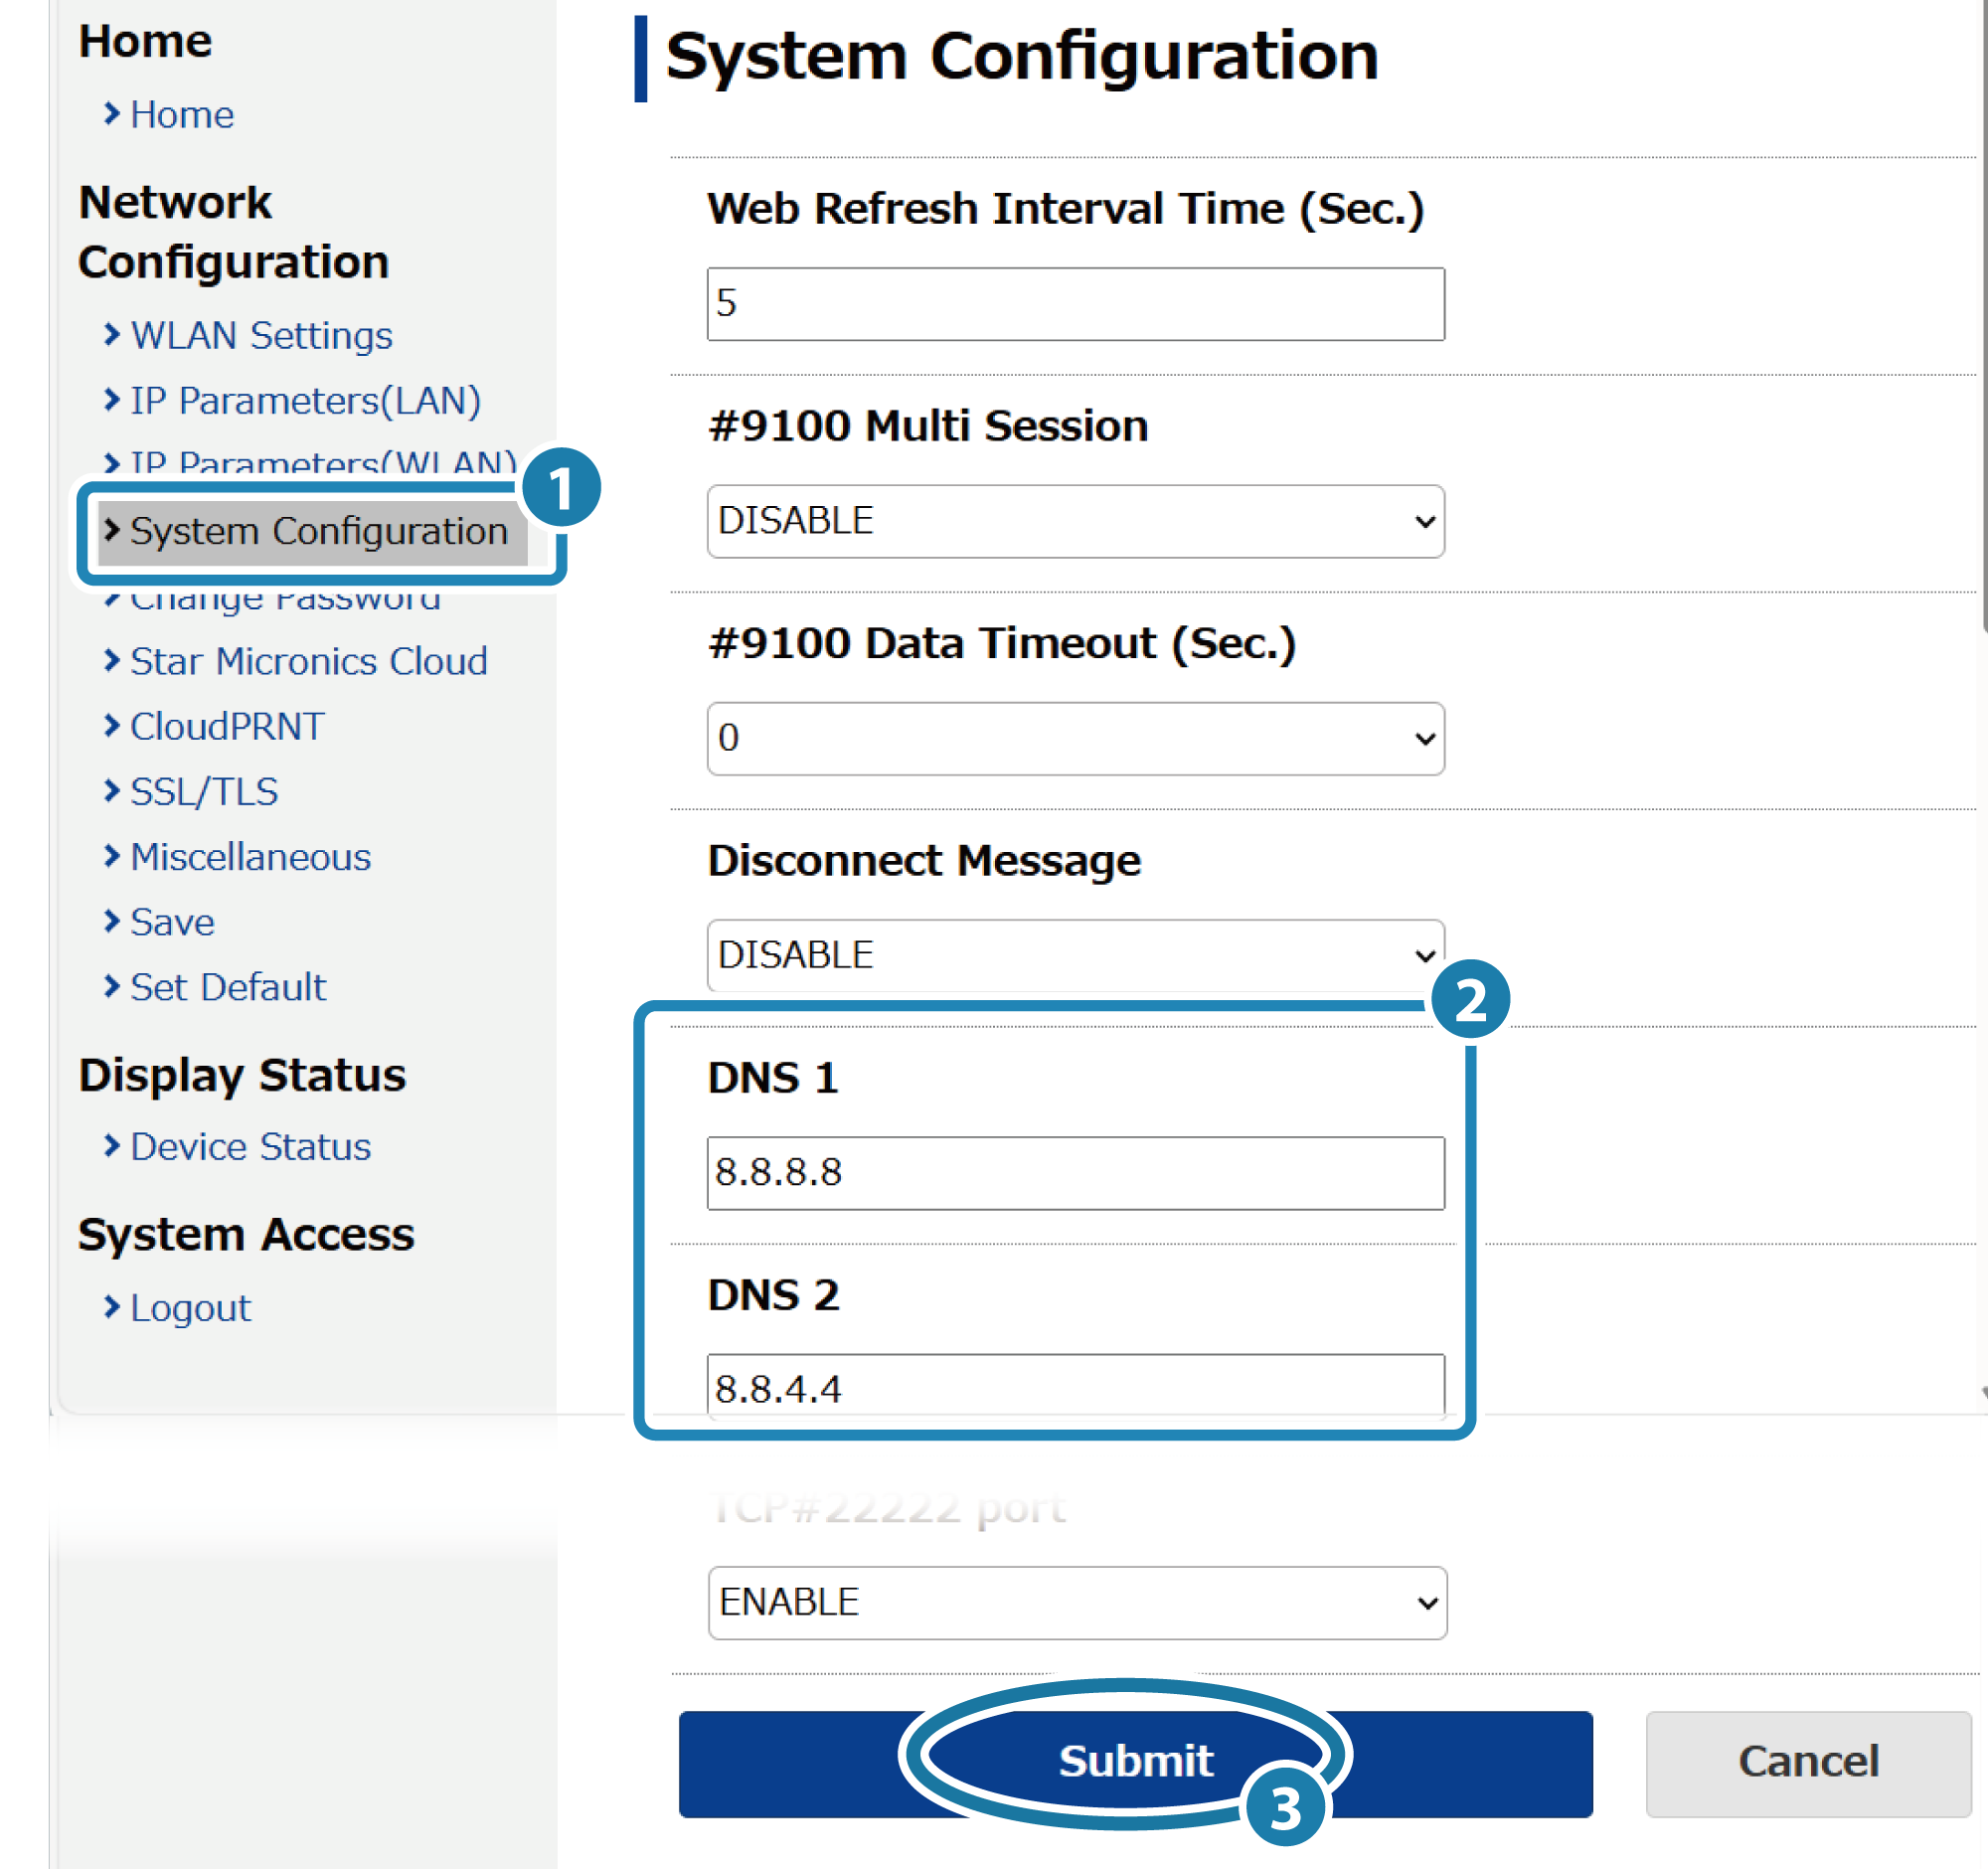
1. Open the printer settings screen
- Connect the printer to the same network as the host device that will be used for setup. Connect LAN Cable
- Check the printer IP address. Check Printer IP Address
- Open the printer settings screen (Web Configuration) via a web browser such as Google Chrome or Safari. Open Printer Settings Screen
2. Change DNS settings of printer
- From the menu or the menu button
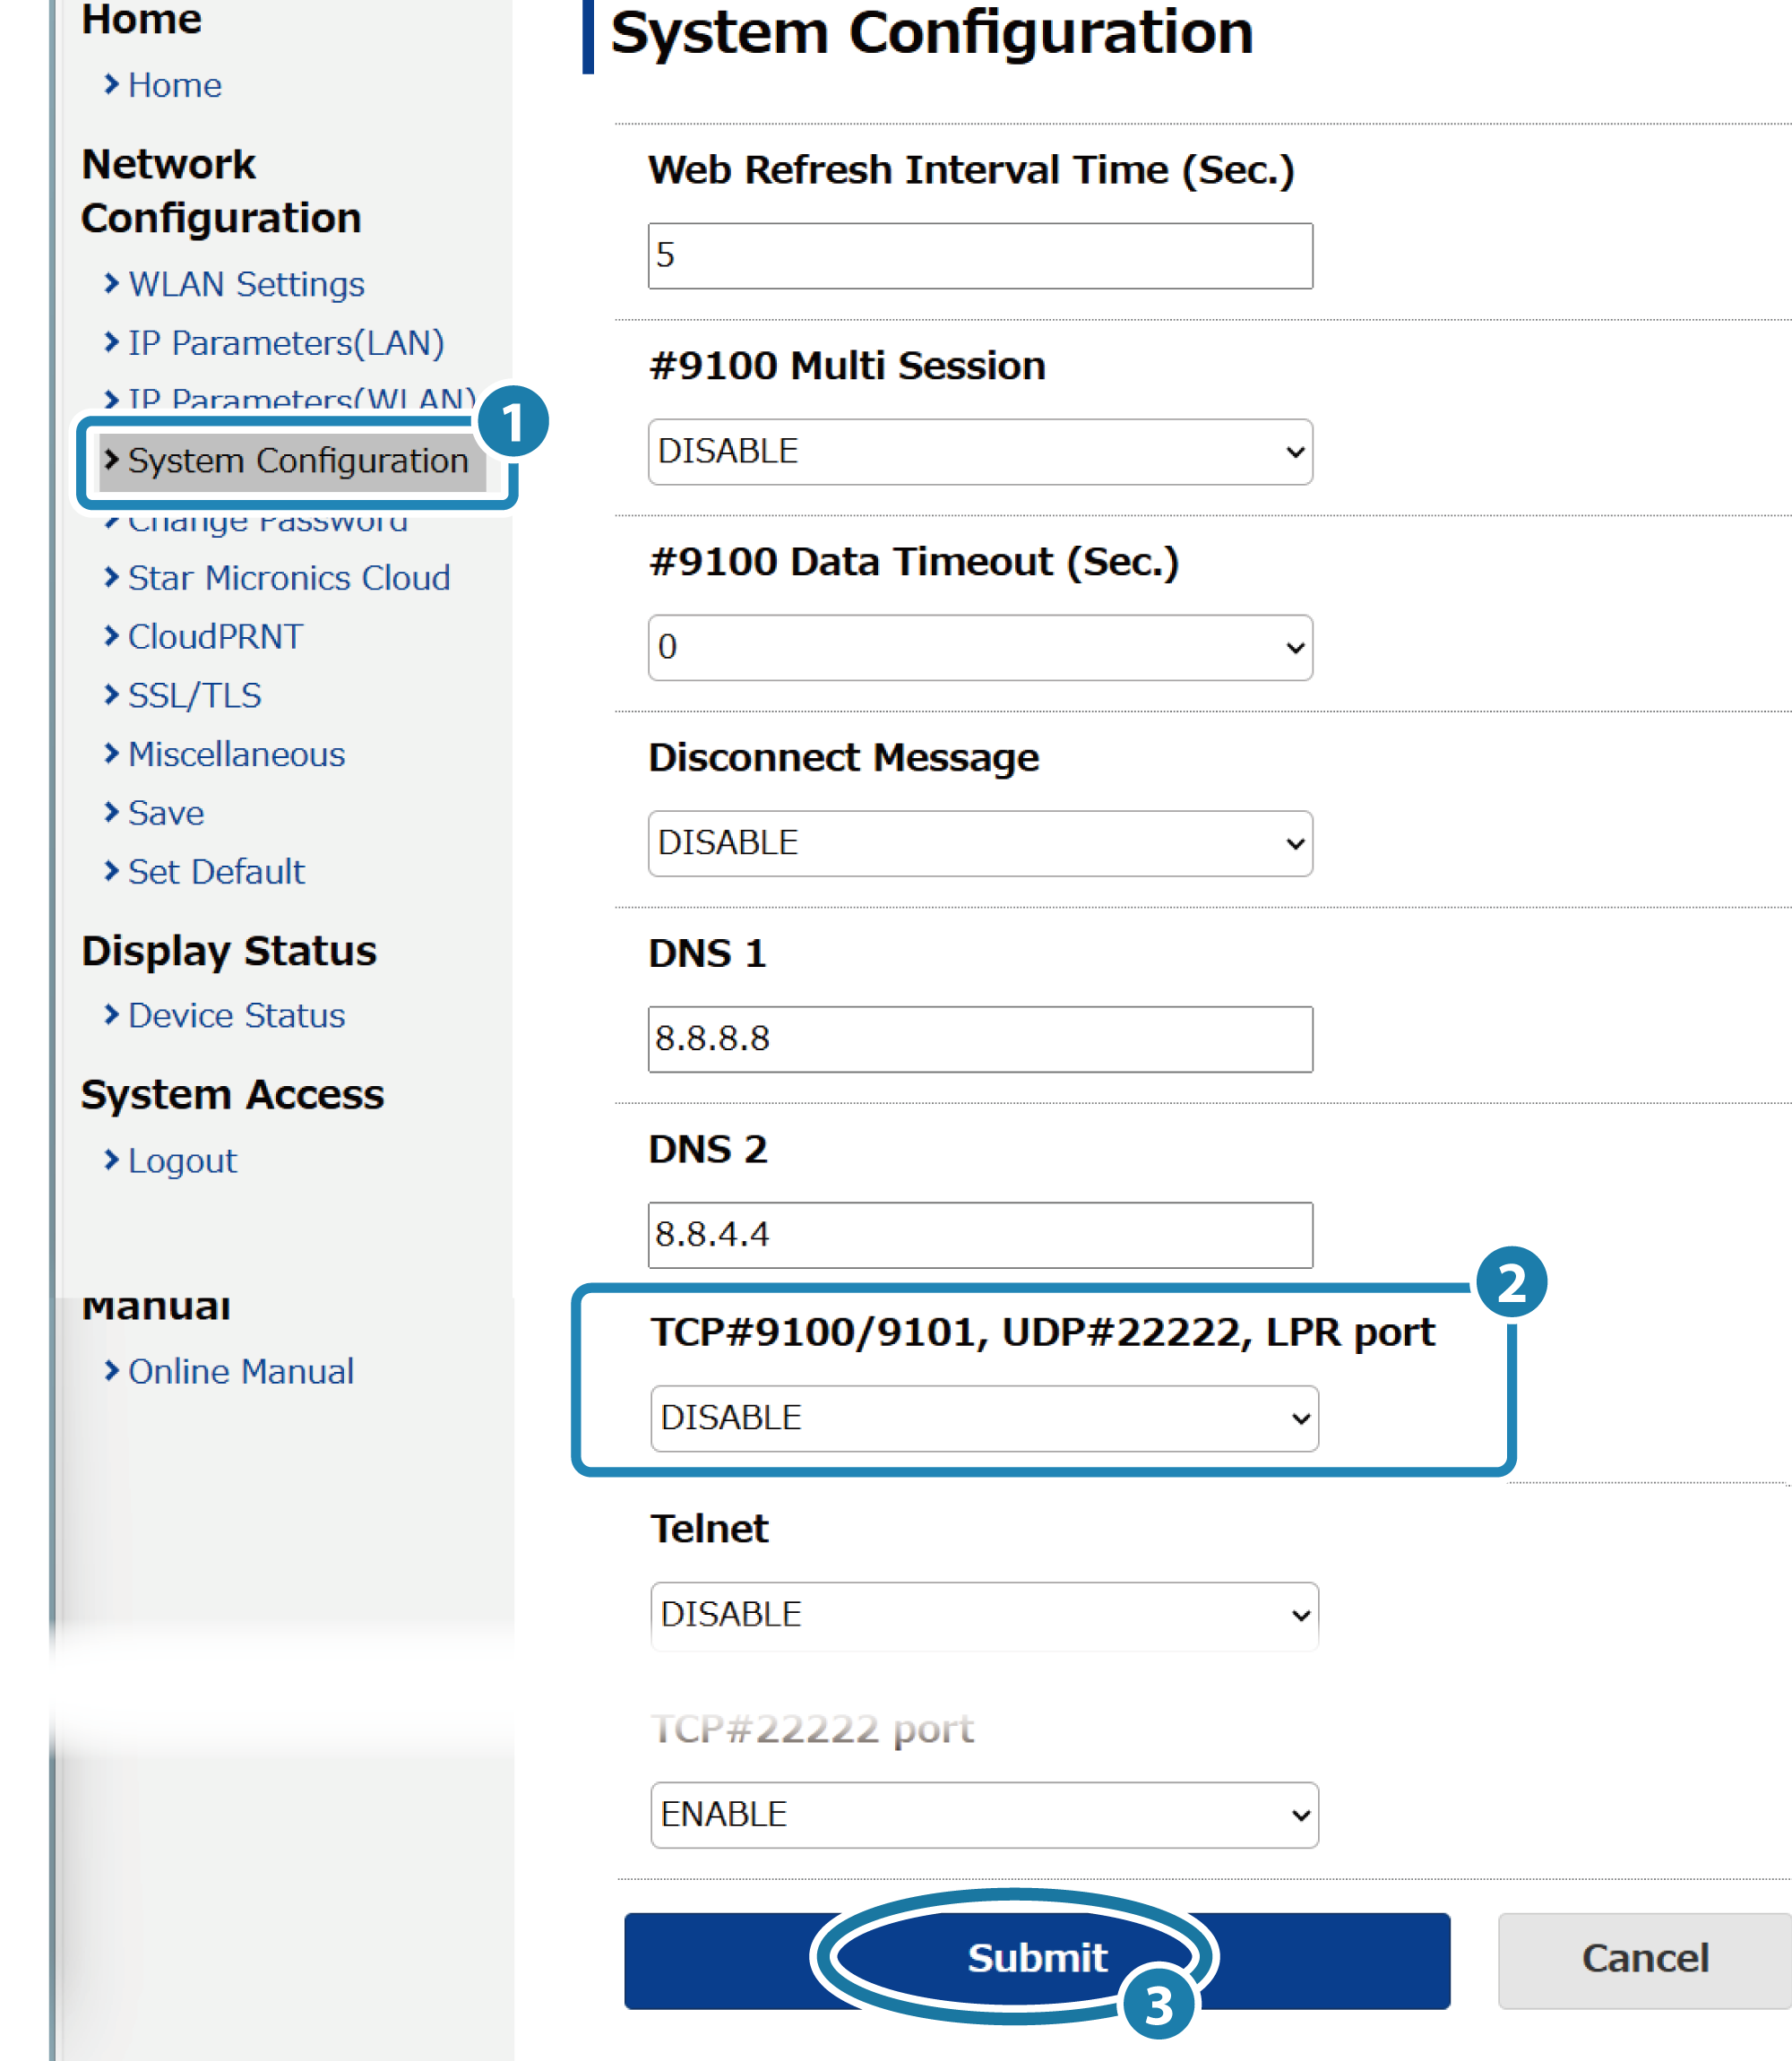
 displayed at upper left, open [System Configuration]
 and input specified DNS Server’s IP address
  , and tap [Submit]
  .
.
Note
Default settings of printer are as follows:
| DNS1 (Primary DNS Server) | 8.8.8.8 |
|---|---|
| DNS2 (Secondary DNS Server) | 8.8.4.4 |
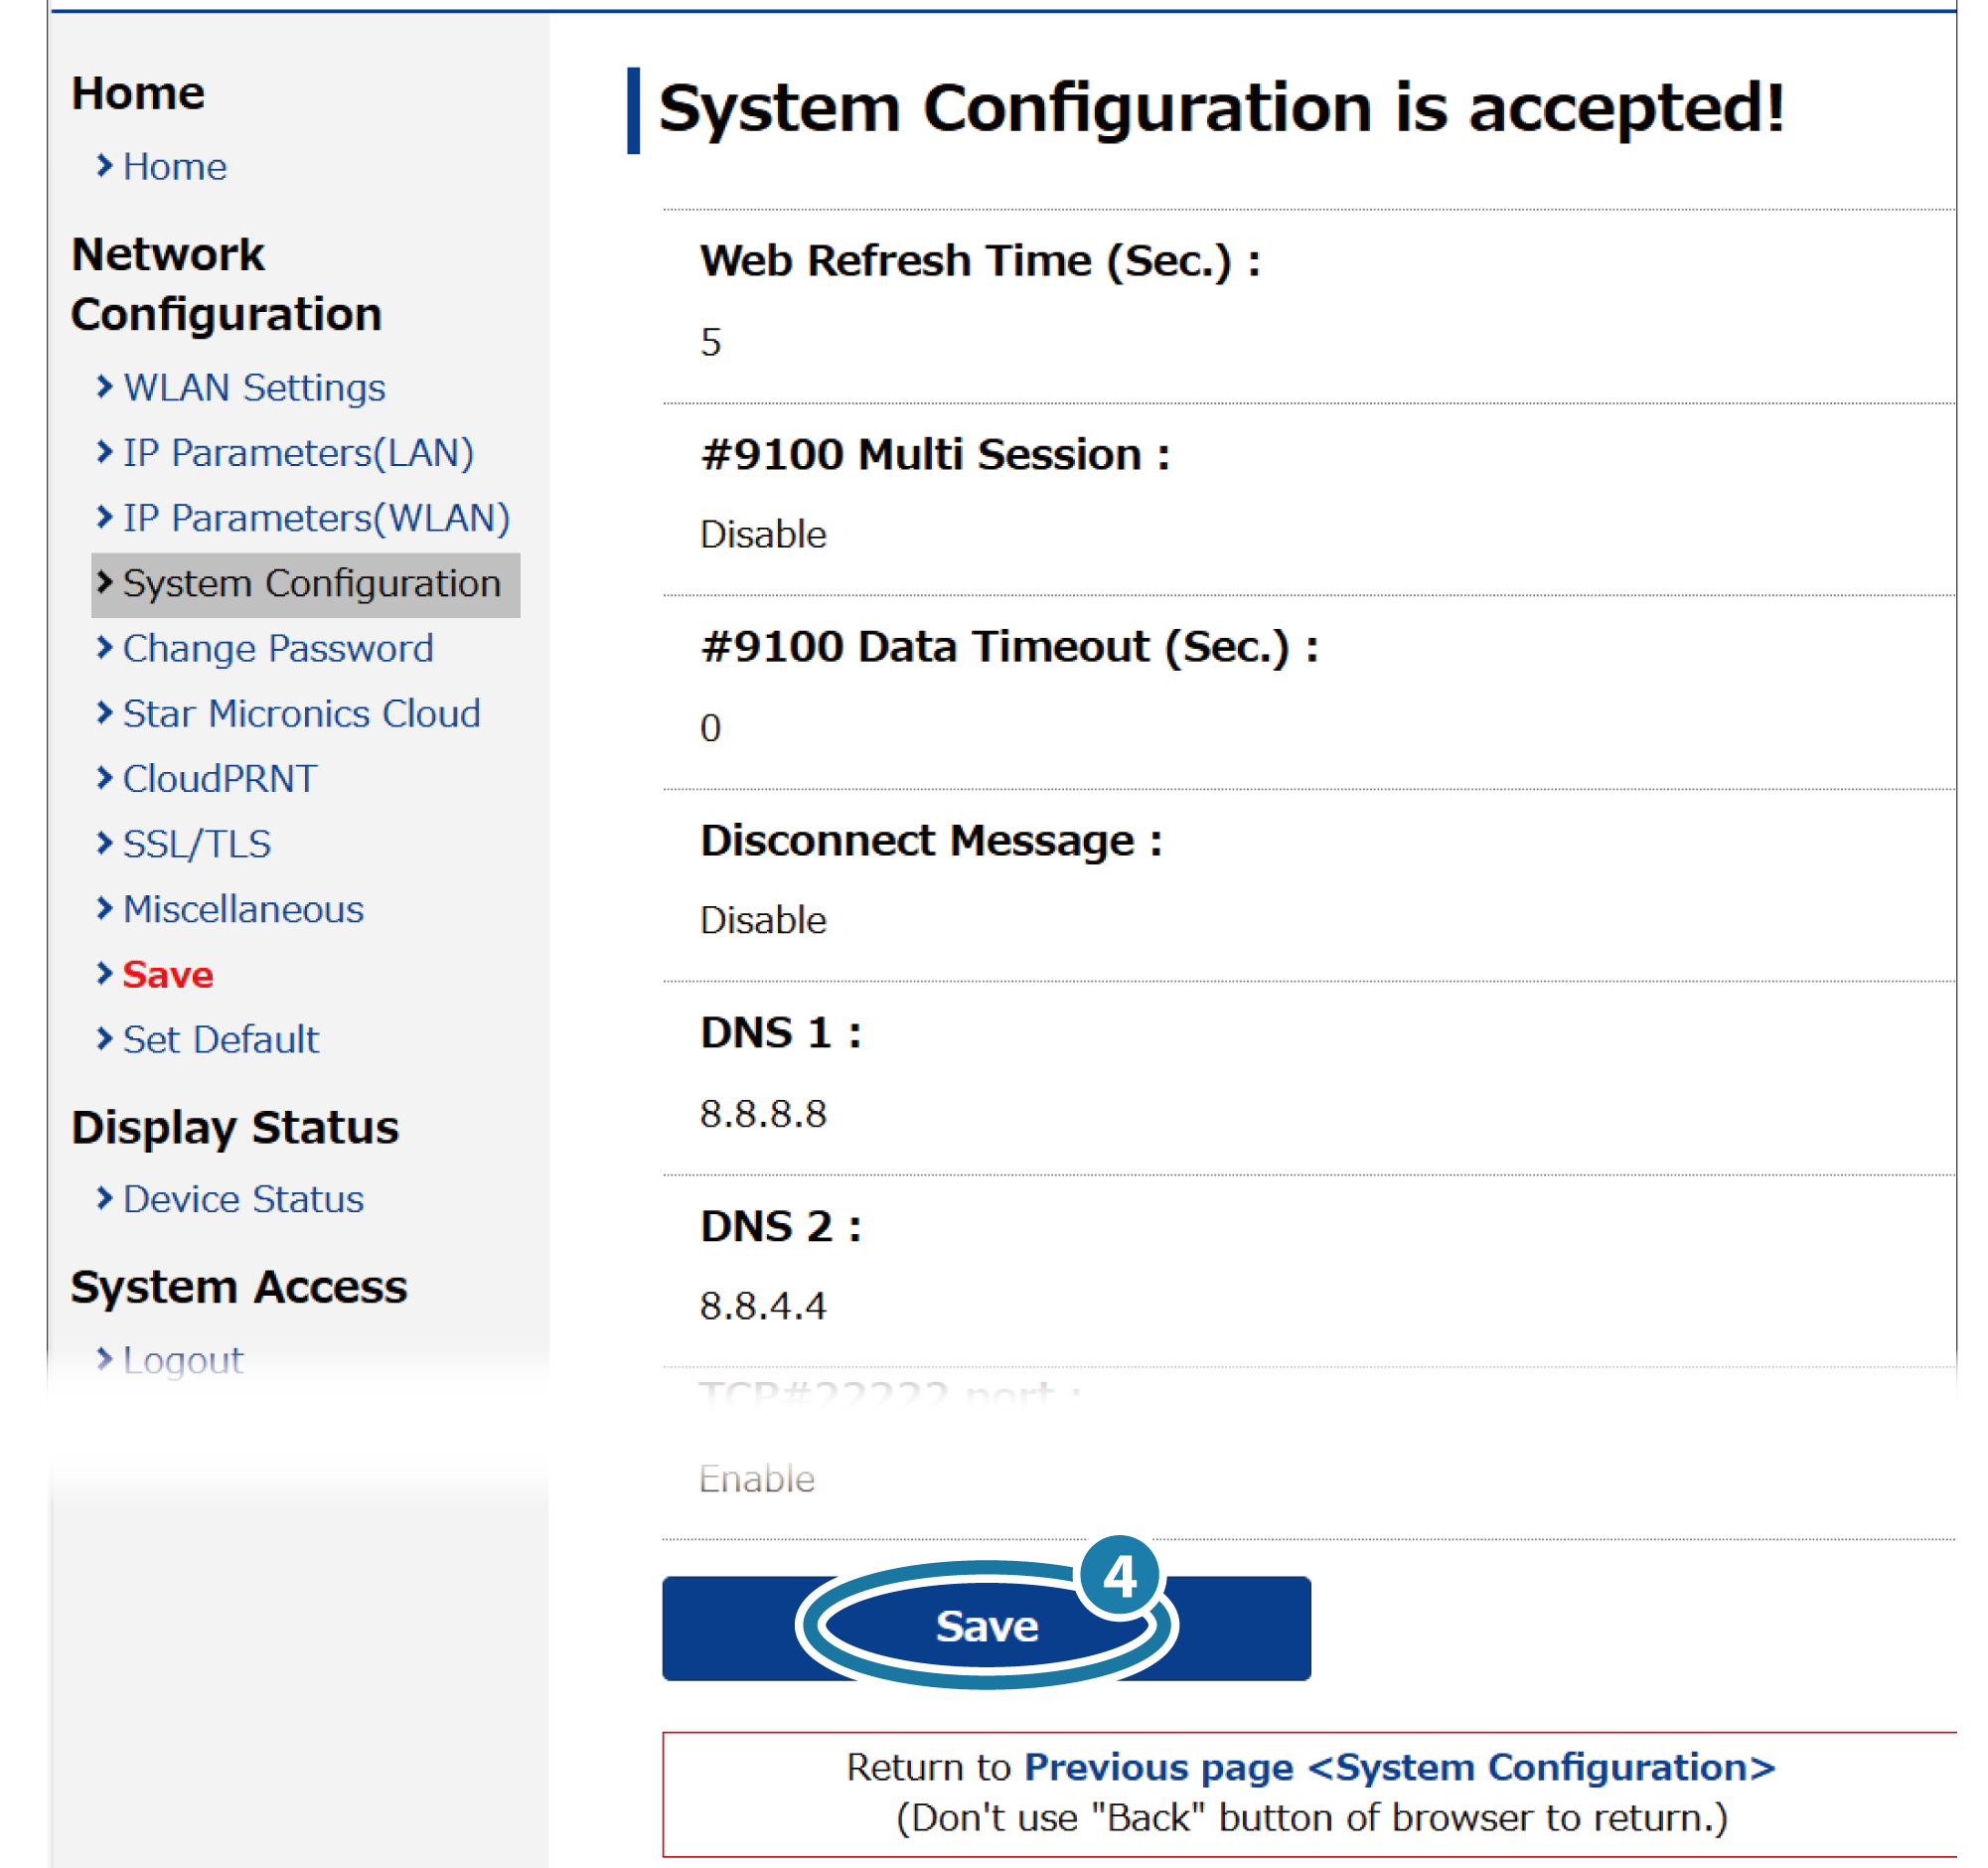
3. Save settings to printer
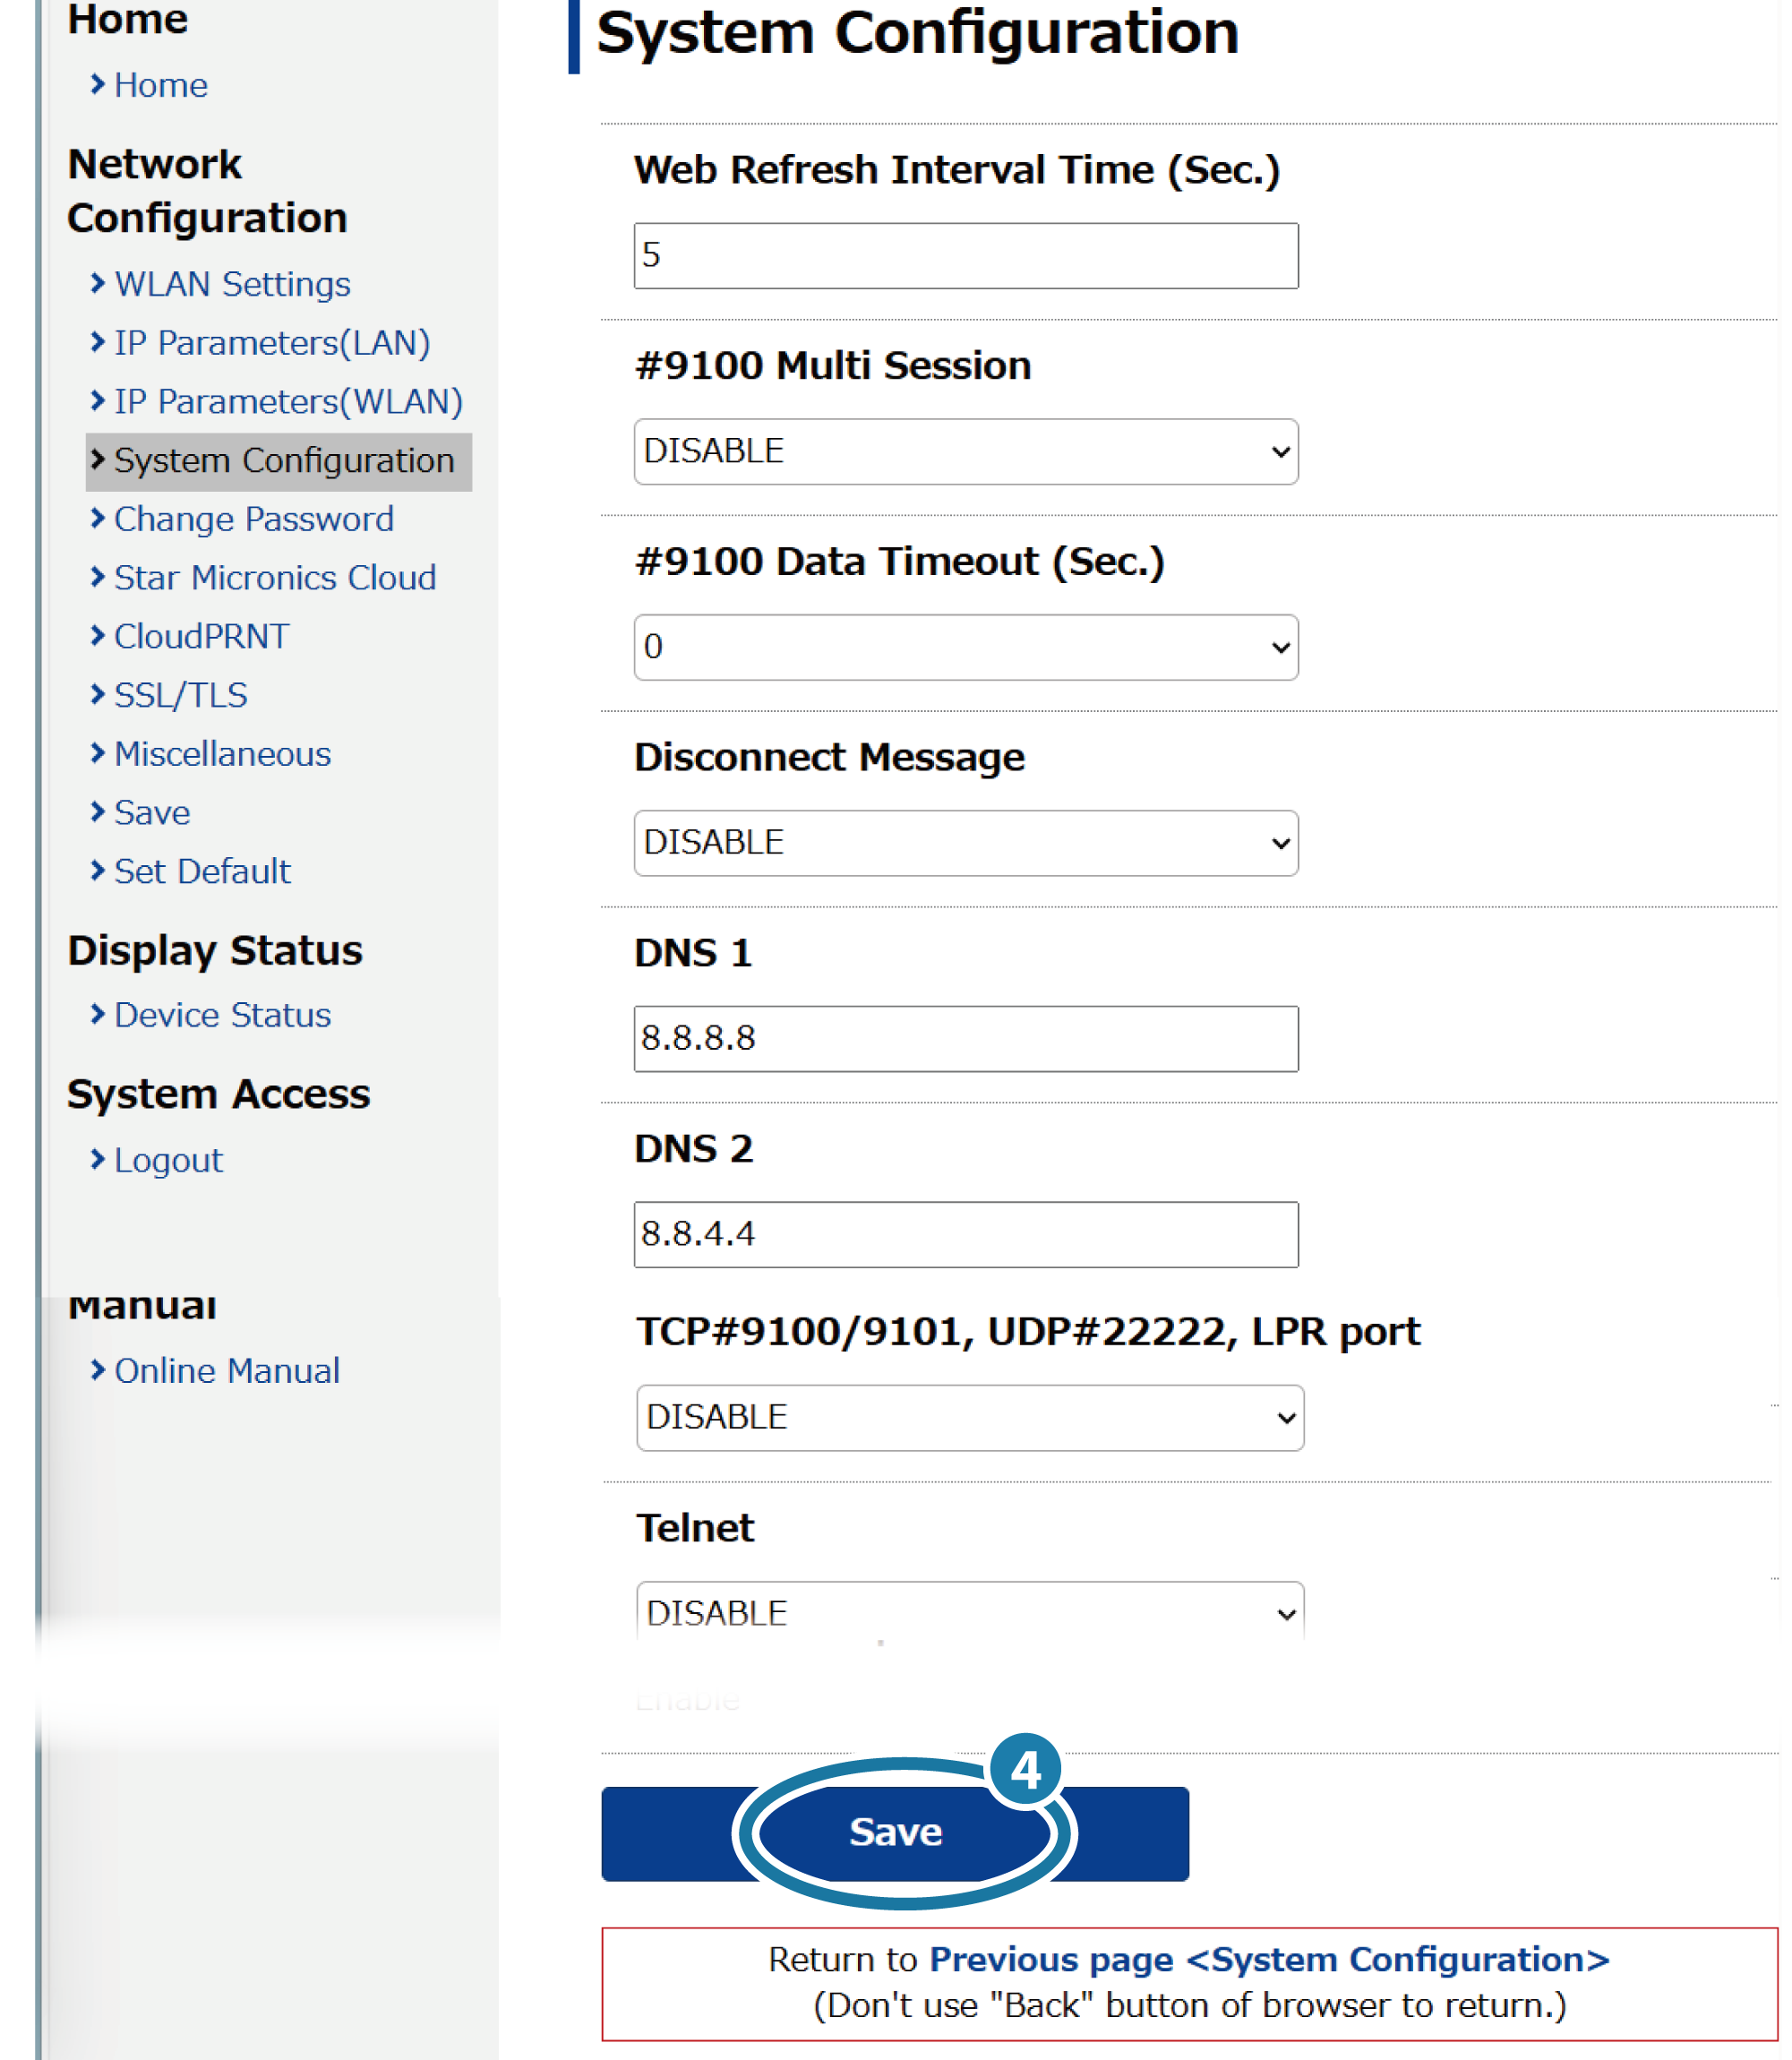
- Tap [Save]
 displayed at the bottom. The settings are saved to the printer, printed out and the setup will be complete.
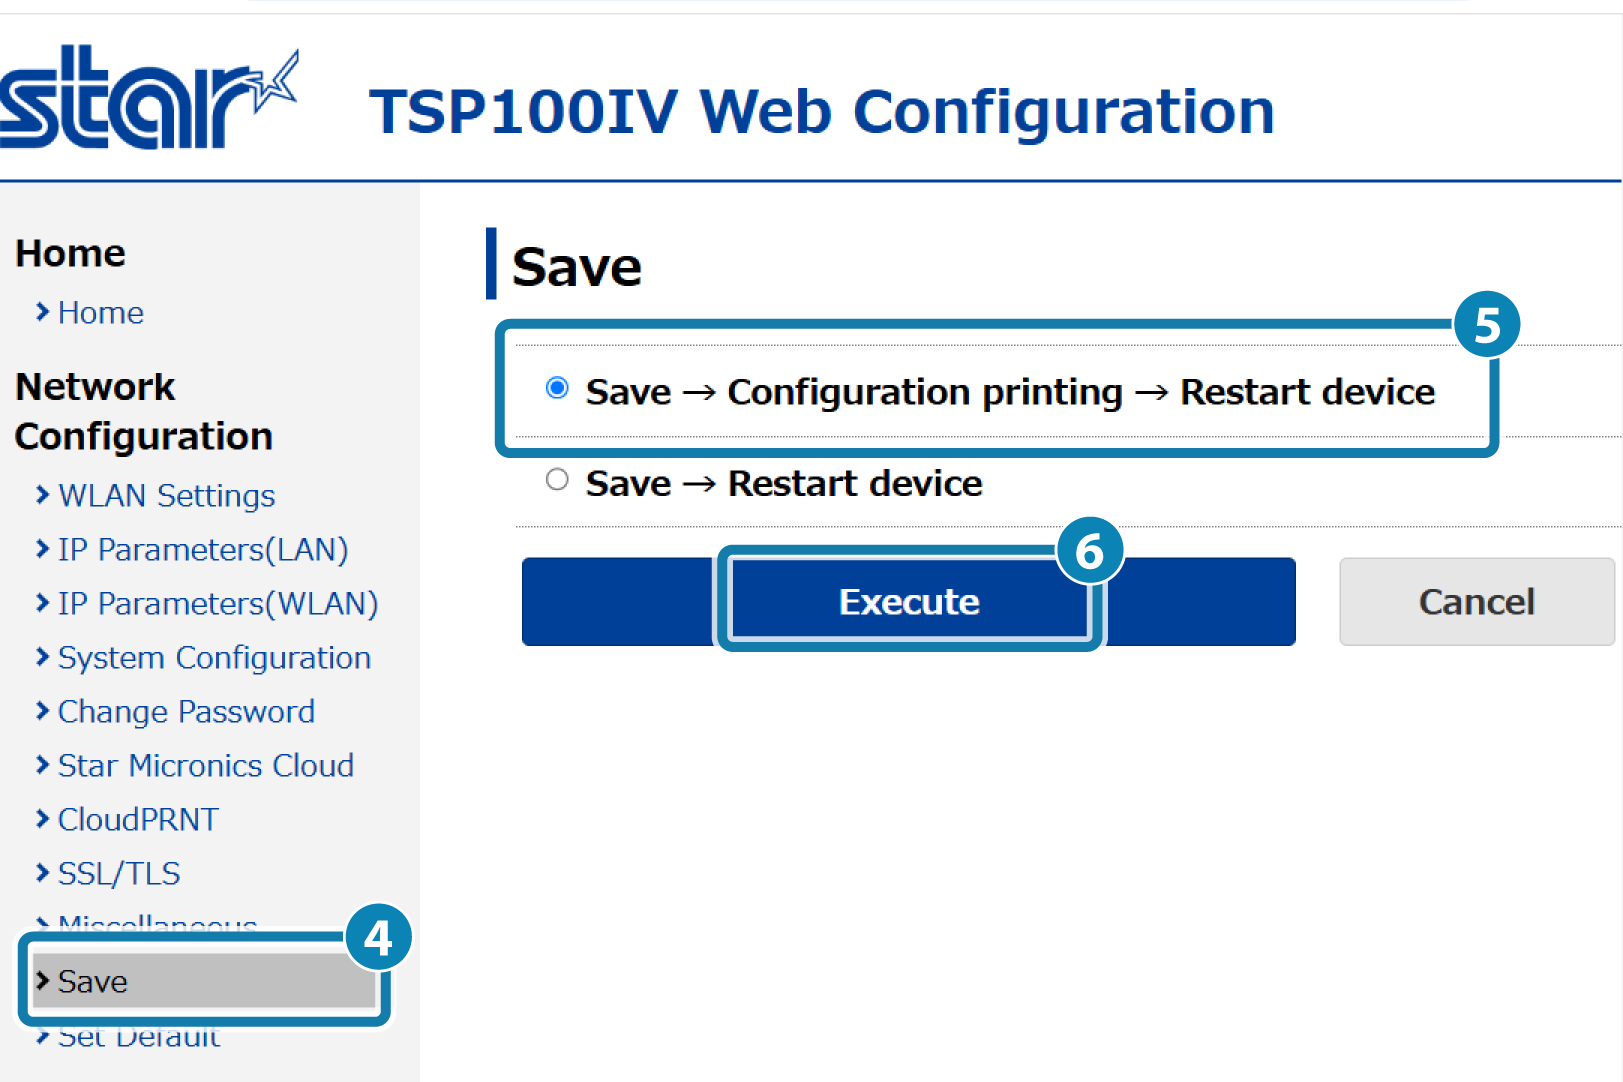
- If you select [Save] from the menu or menu button in the upper left, select SaveConfiguration PrintingRestart device and tap [Execute].
Similar to the above procedure, the settings are saved to the printer, printed out and the setup will be complete., select SaveRestart device
 , and tap [Execute]
  .
.
The settings are saved to the printer.
Enabling Telnet
1. Open the printer settings screen
- Connect the printer to the same network as the host device that will be used for setup. Connect LAN Cable
- Check the printer IP address. Check Printer IP Address
- Open the printer settings screen (Web Configuration) via a web browser such as Google Chrome or Safari. Open Printer Settings Screen
2. Enable the Telnet setting of the printer
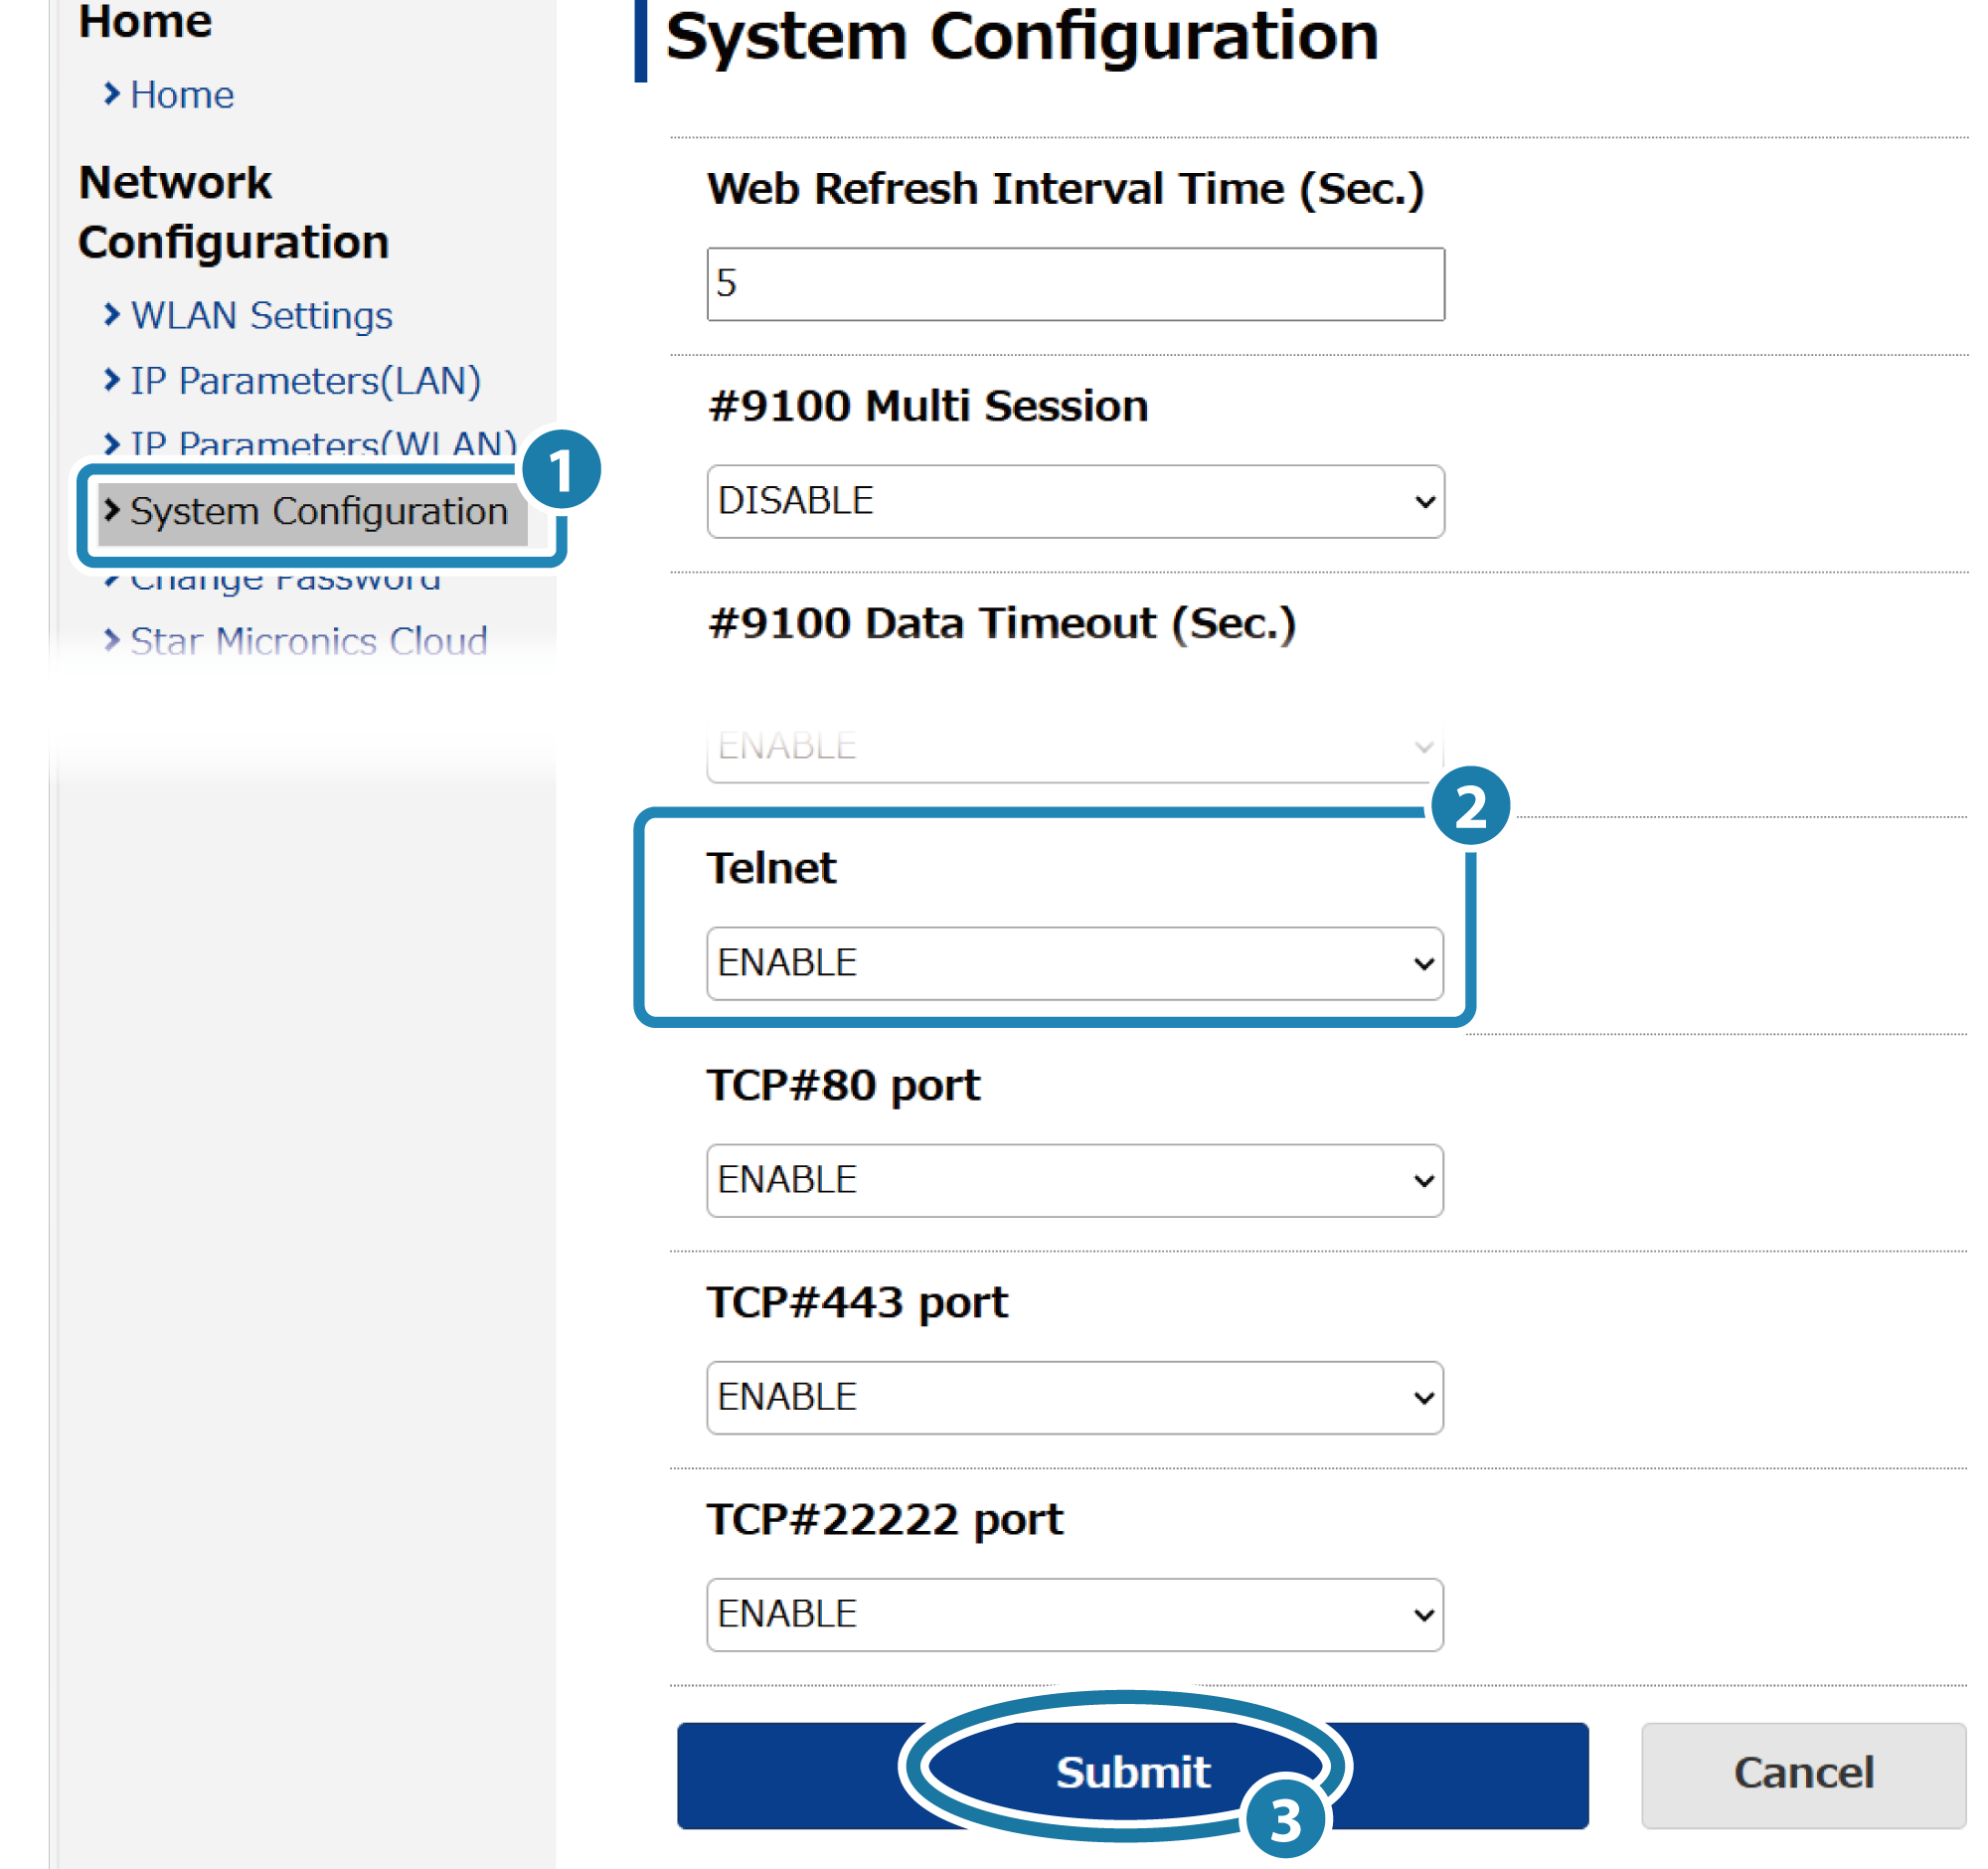
- From the menu or the menu button on the upper left of the screen, open [System Configuration],
change the Telnet setting to ’ENABLE’, and then tap [Submit].
Note
The initial settings of the printer differ depending on the printer firmware version (F/W Ver.).
| F/W Ver. 1.0 | Telnet: Enable (Fixed to Enable) |
|---|---|
| F/W Ver. 1.1 or later | Telnet: Disable |
3. Save settings to printer
- Tap [Save] displayed at the bottom. The settings are saved to the printer, printed out and the setup will be complete.

- If you select [Save] from the menu or the menu button in the upper left, open [Save], select SaveRestart device, and tap [Execute].
Similar to the above procedure, the settings are saved to the printer, printed out and the setup will be complete..
Disabling Local Network
1. Open the printer settings screen
- Connect the printer to the same network as the host device that will be used for setup. Connect LAN Cable
- Check the printer IP address. Check Printer IP Address
- Open the printer settings screen (Web Configuration) via a web browser such as Google Chrome or Safari. Open Printer Settings Screen
2. Disable the local network setting of the printer
- From the menu or the menu button on the upper left of the screen, open [System Configuration],
change the settings of TCP#9100/9101, UDP#22222, and LPR port to ’DISABLE’, and then tap [Submit].
3. Save settings to printer
- Tap [Save] displayed at the bottom. The settings are saved to the printer, printed out and the setup will be complete.
- If you select [Save] from the menu or the menu button in the upper left, open [Save], select SaveRestart device, and tap [Execute].
Similar to the above procedure, the settings are saved to the printer, printed out and the setup will be complete.