Advanced Settings (LAN)
Configure the settings of the DNS server and enable/disable Telnet and the local network.
It is convenient to use the dedicated app when setting a connection with a smartphone or tablet.
For details, refer to Use App.
If you do not use a dedicated app, setup is performed from the printer settings screen (Web Configuration).
Setting DNS
Enabling Telnet
Disabling local network
Setting DNS
1. Open the printer settings screen
- Connect the printer to the same network as the host device that will be used for setup. Connect LAN Cable
- Check the printer IP address. Check Printer IP Address
- Open the printer settings screen (Web Configuration) via a web browser such as Google Chrome or Safari. Open Printer Settings Screen
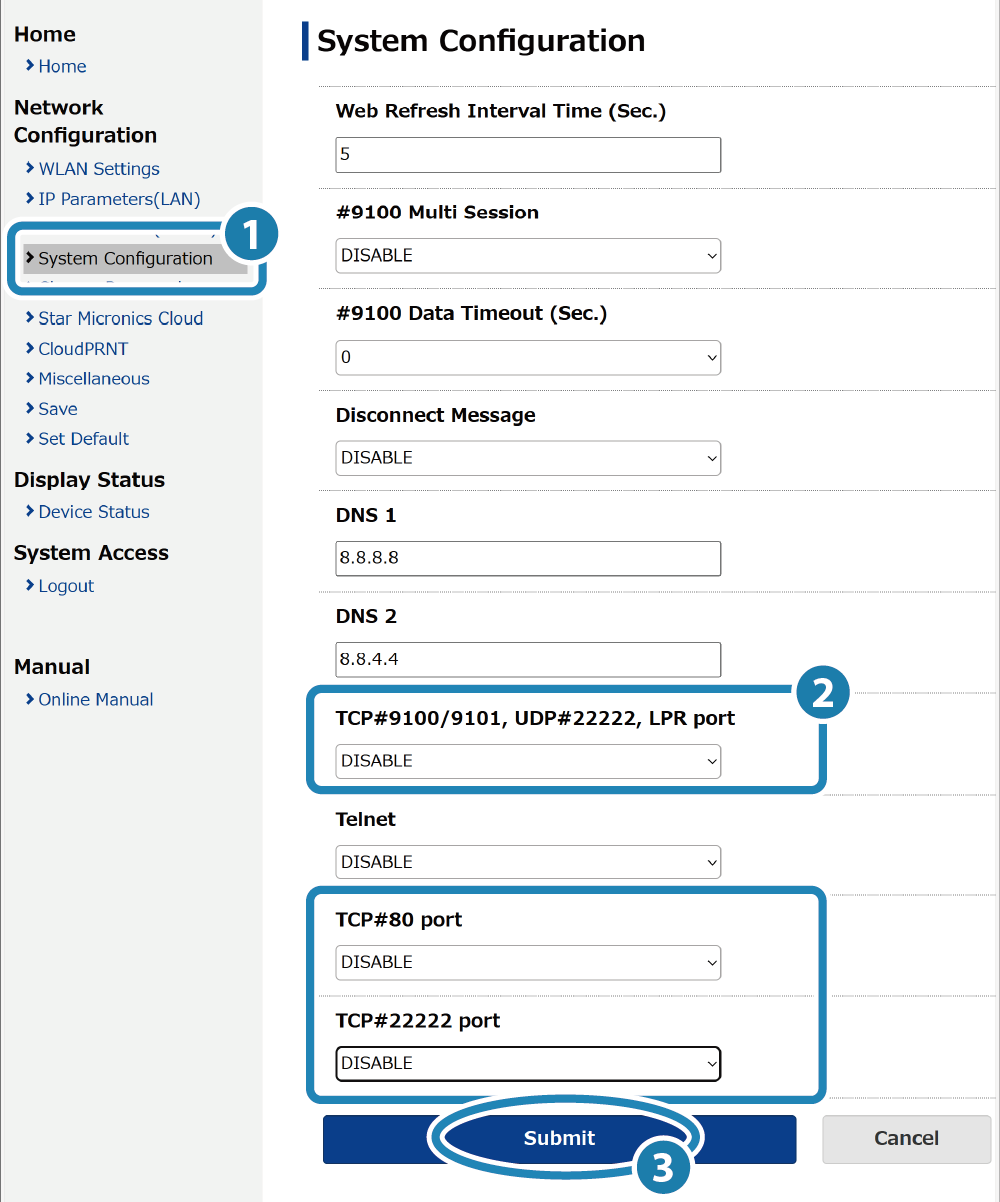
2. Change the printer DNS settings
- From the menu or the menu button
 at the upper left of the screen, open [System Configuration]
  , enter the IP address of the specified DNS server
  and tap [Submit]
  .
.
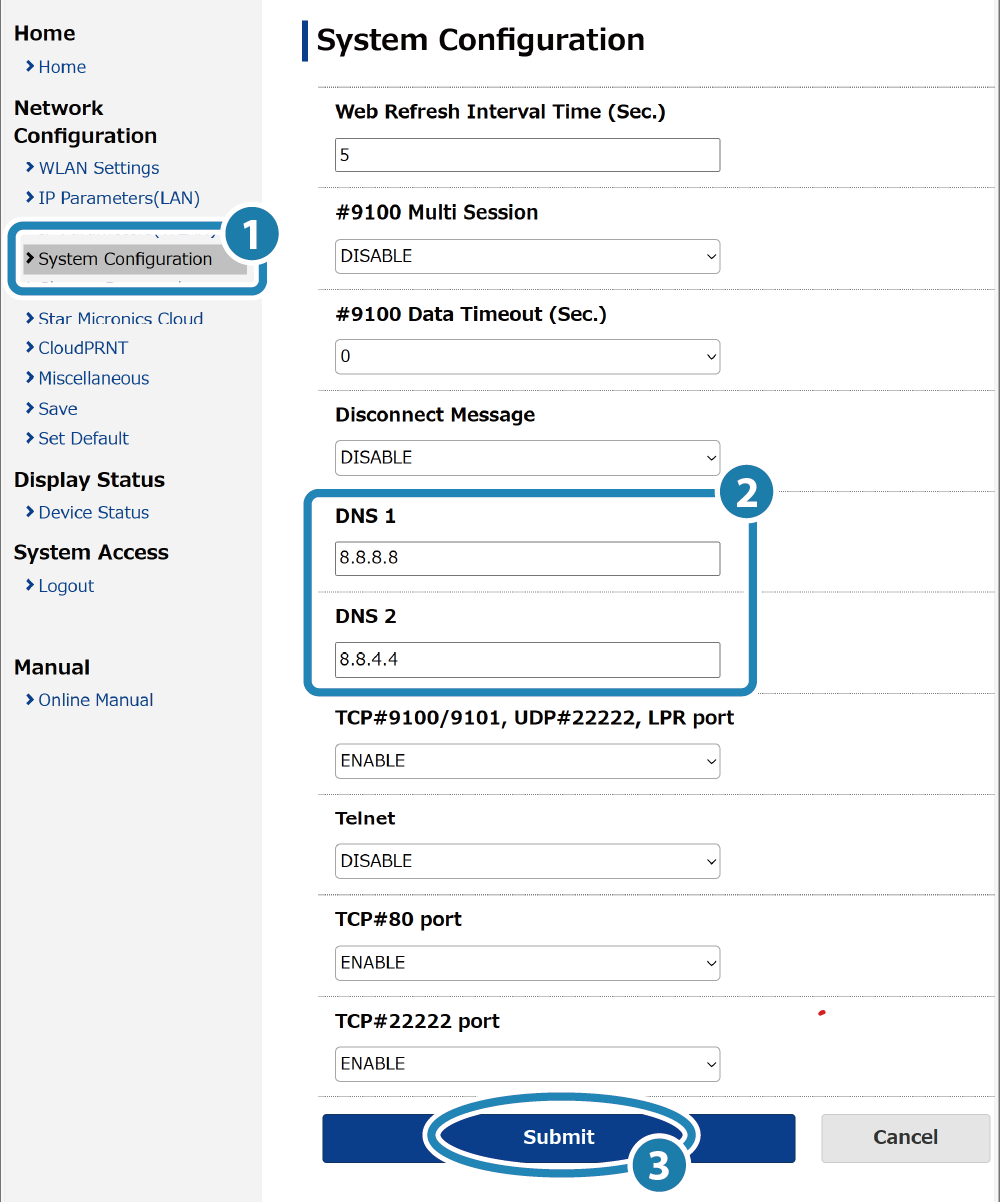
Note
The printer default settings are the following.
| DNS1 (primary DNS server) | 8.8.8.8 |
|---|---|
| DNS2 (secondary DNS server) | 8.8.4.4 |
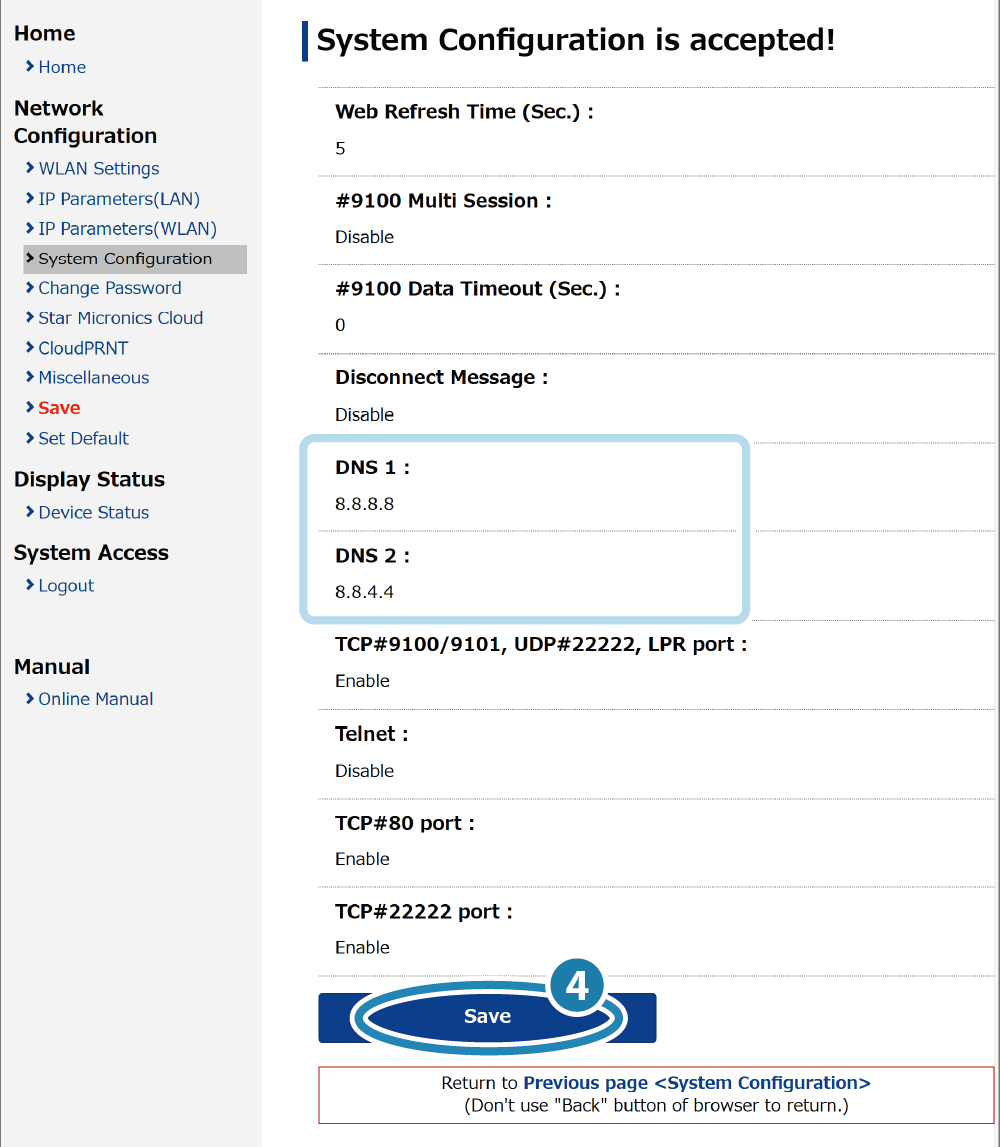
3. Save settings to printer
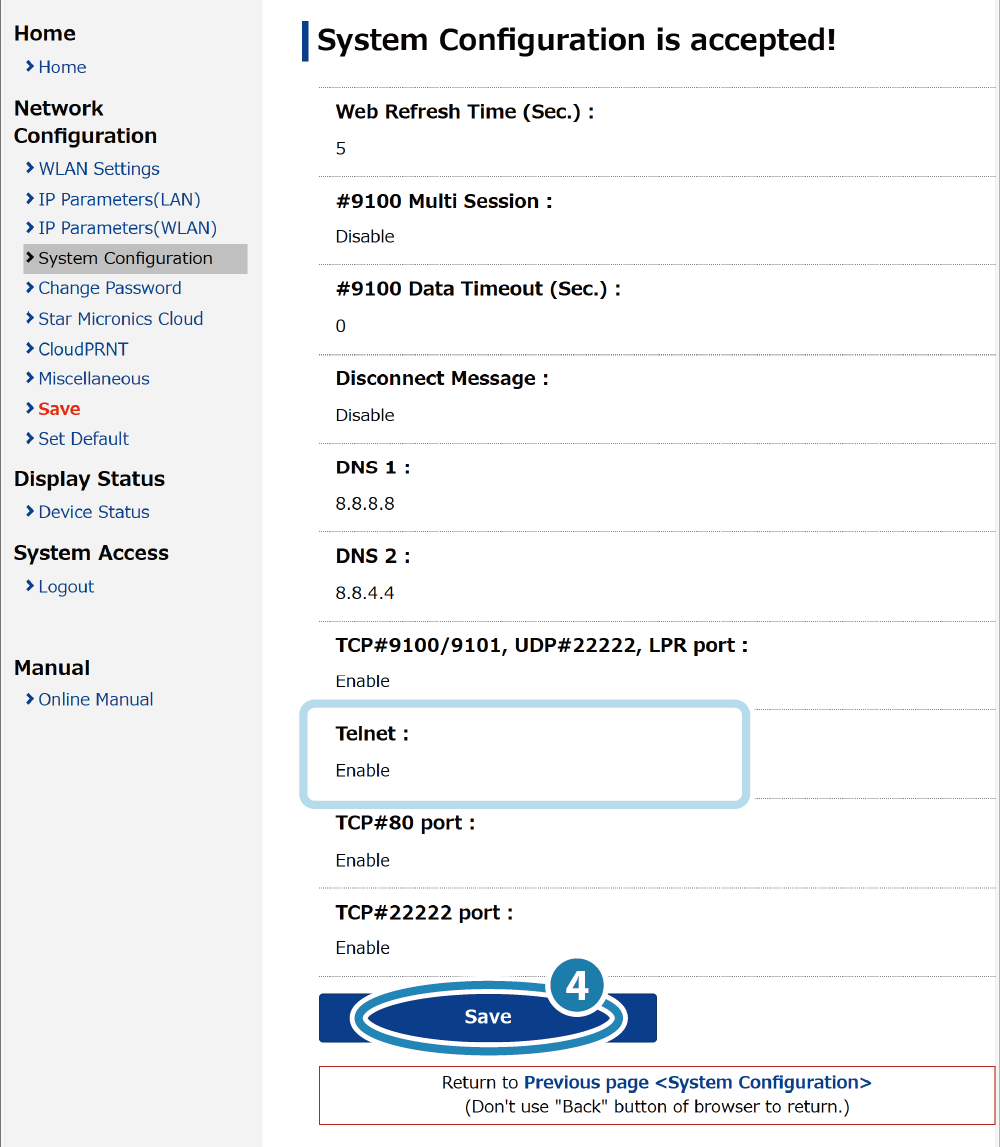
- A screen where you can check the entered details will appear.
Check the settings. If everything is correct, tap [Save]
 .
.
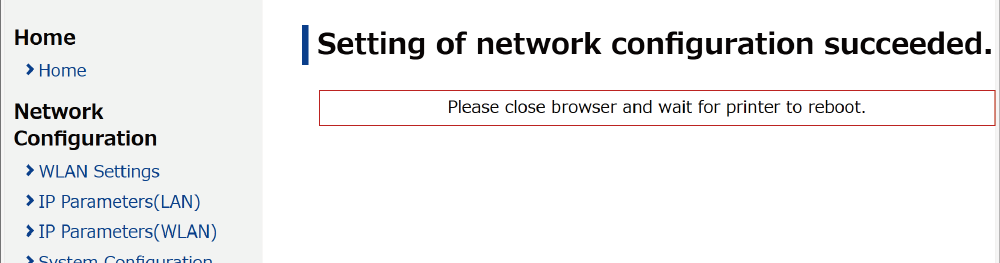
- When the settings are saved to the printer, the following is displayed, and the settings are completed.

Enabling Telnet
1. Open the printer settings screen
- Connect the printer to the same network as the host device that will be used for setup. Connect LAN Cable
- Check the printer IP address. Check Printer IP Address
- Open the printer settings screen (Web Configuration) via a web browser such as Google Chrome or Safari. Open Printer Settings Screen
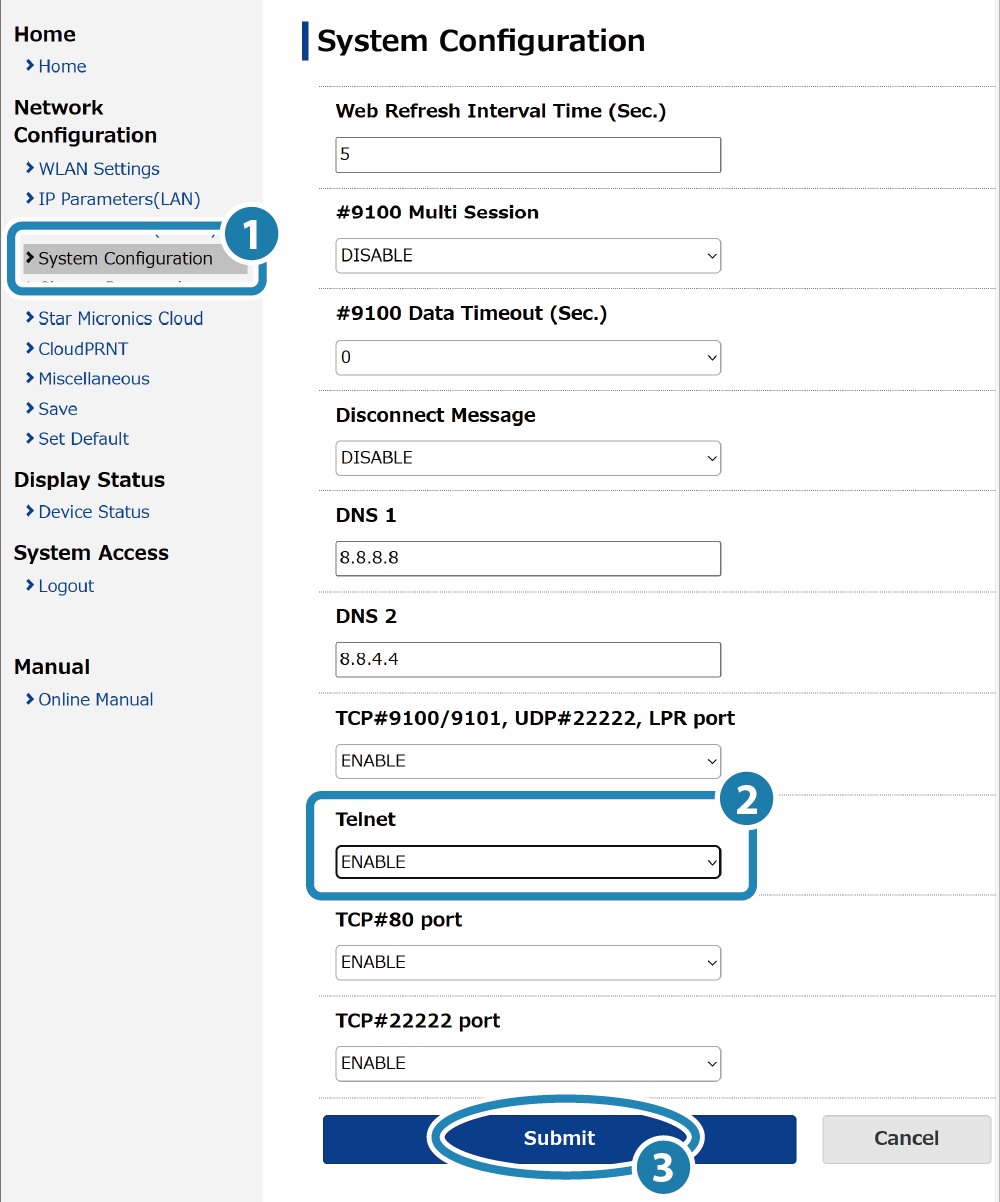
2. Enable the Telnet setting of the printer
- From the menu or the menu button on the upper left of the screen, open [System Configuration],
change the Telnet setting to ’ENABLE’, and then tap [Submit].
3. Save settings to printer
- A screen where you can check the entered details will appear.
Check the settings. If everything is correct, tap [Save].
- When the settings are saved to the printer, the following is displayed, and the settings are completed.

Disabling local network
1. Open the printer settings screen
- Connect the printer to the same network as the host device that will be used for setup. Connect LAN Cable
- Check the printer IP address. Check Printer IP Address
- Open the printer settings screen (Web Configuration) via a web browser such as Google Chrome or Safari. Open Printer Settings Screen
2. Disable the local network setting of the printer
- From the menu or the menu button on the upper left of the screen, open [System Configuration], change the settings of TCP#9100/9101, UDP#22222, LPR Port, TCP#80 port, TCP#22222 port to “DISABLE”, and then tap [Submit].
3. Save the settings to the printer
- A screen where you can check the entered details will appear.
Check the settings. If everything is correct, tap [Save].
- When the settings are saved to the printer, the following is displayed, and the settings are completed.