Paper Setup
This printer supports different media depending on the model.
Check your model first and select the tab to display.
Check Model
The standard model supports four paper (media) types.
Configure the media settings before using this product for the first time and after changing the paper type to be used. Media Settings
Use paper that meets the specifications of the printer. Paper Roll Specifications
Configure paper guide settings according to the paper roll width you use. Paper guide settings
Note
When changing paper type after you have started printing operations (for example, switching from the linerless label to the die cut label), clean the head, cutter, platen and feed path. Otherwise, paper feeding, printing and cutting may not be performed correctly. Cleaning
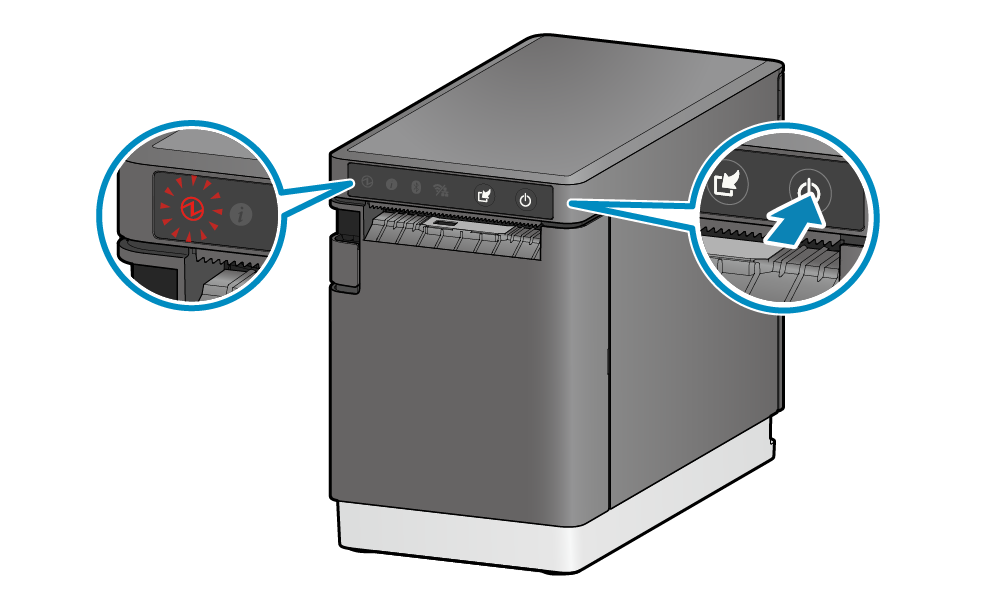
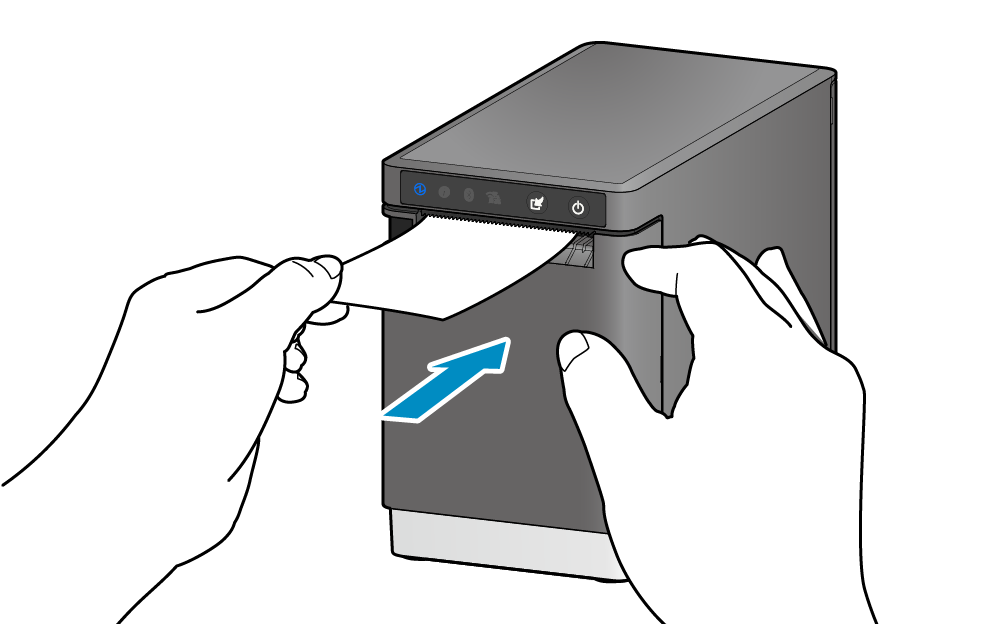
1. Turn the power on
- Press the Power button on the front of the main unit to turn the power on.
- Set the paper with the power on to automatically feed, position, and cut the paper.
- If the printer is out of paper, the Power LED flashes red.
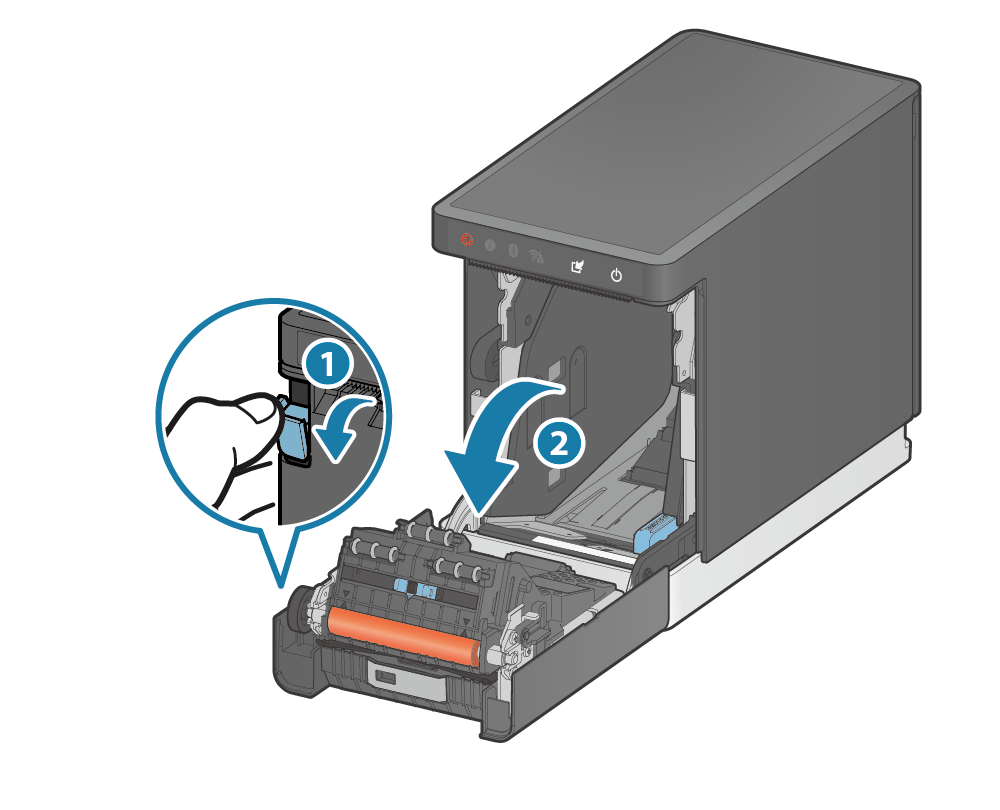
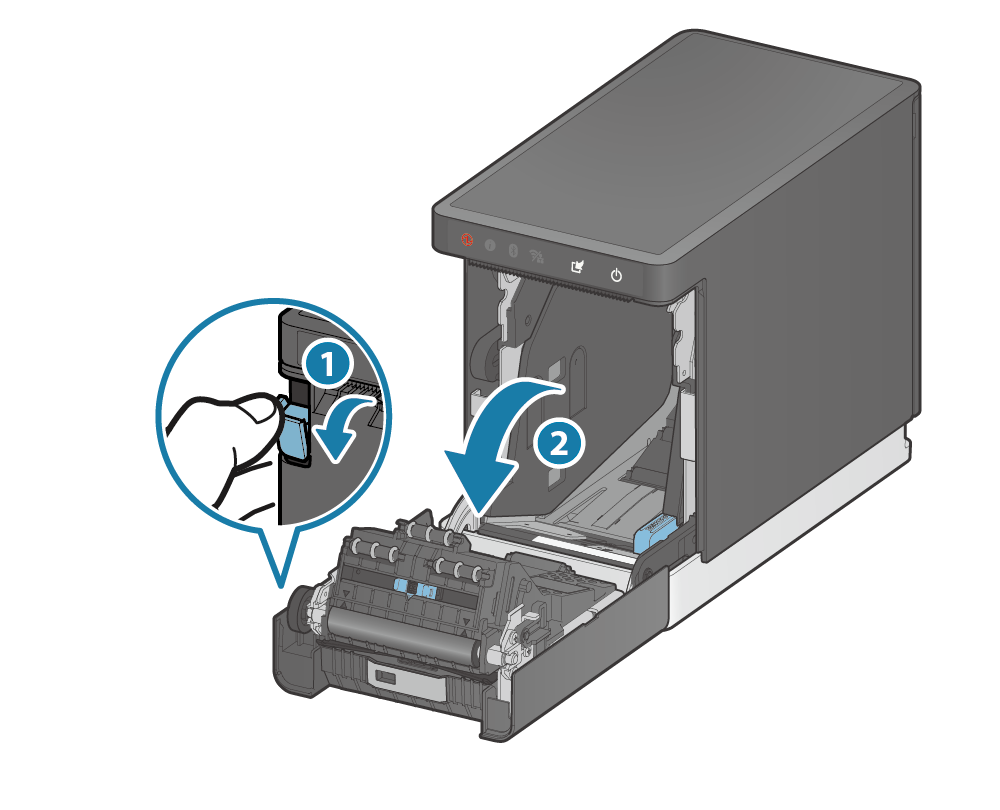
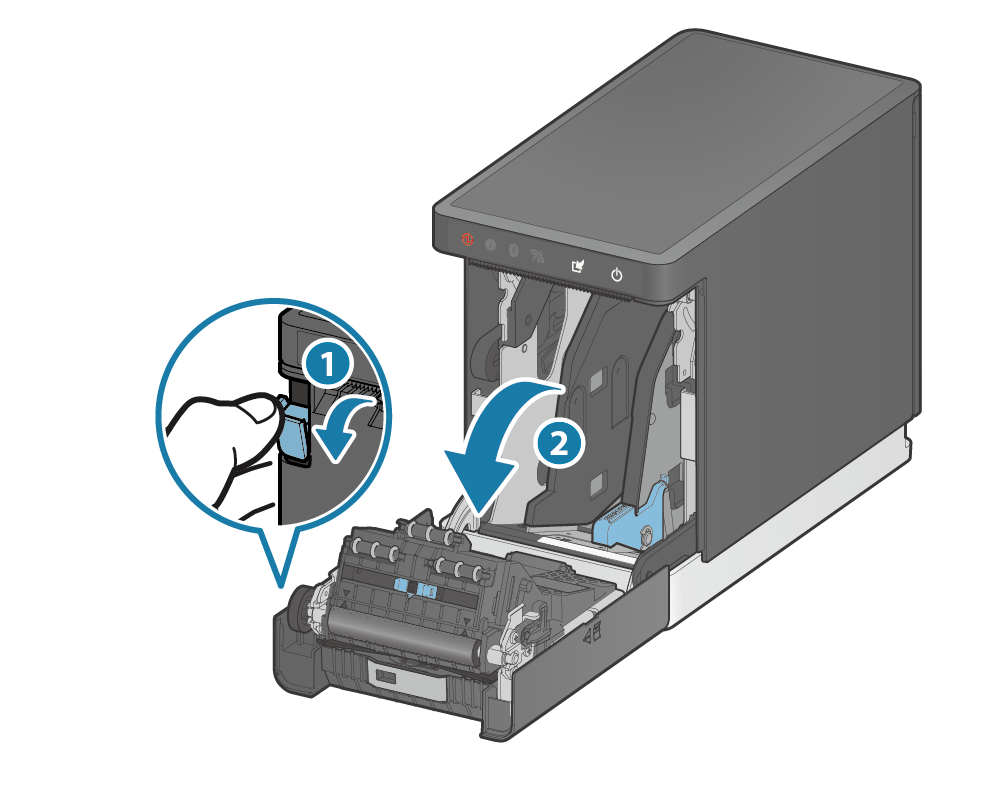
2. Open the printer cover
- Pull the cover opening lever
 to open the printer cover
  .
. - If you feel uneasy about stickiness of glue on the paper transportation path, clean it. Cleaning
Caution
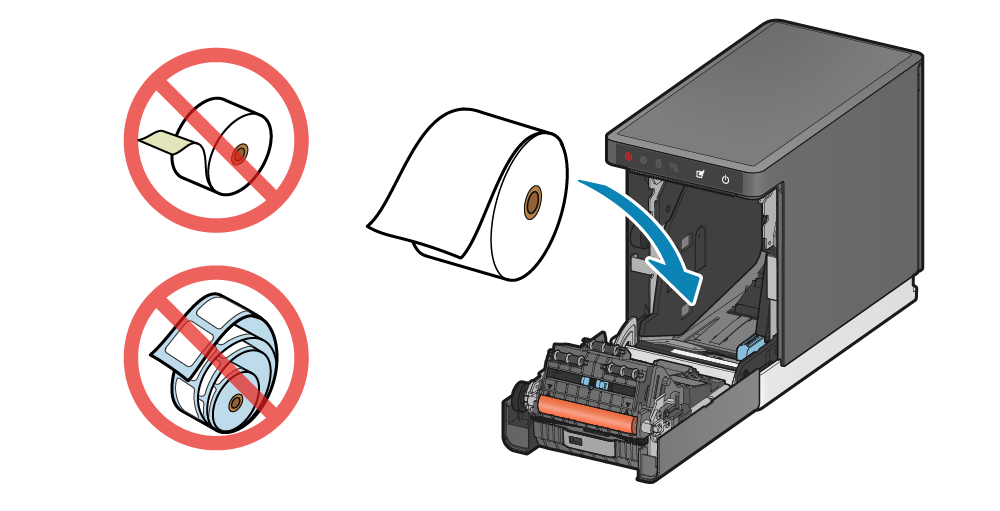
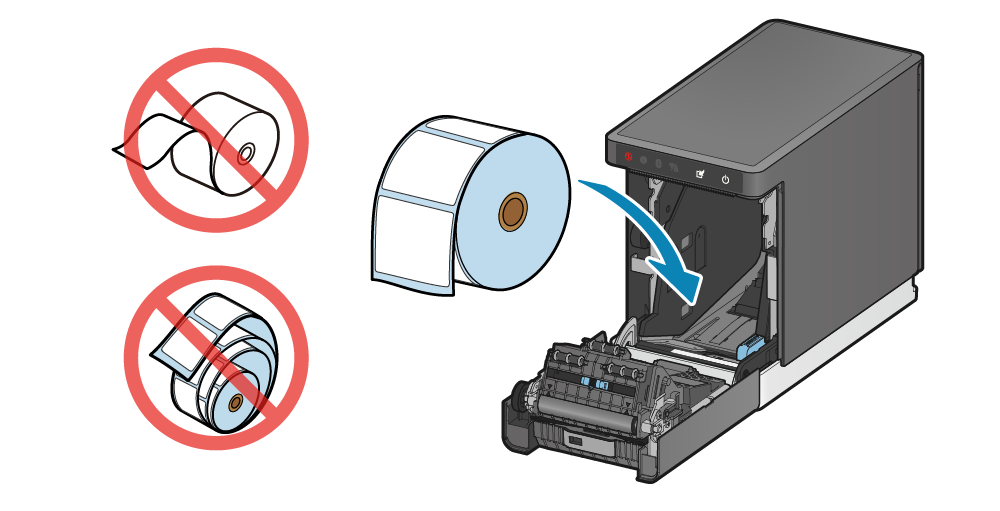
When replacing paper, remove the paper core remaining in the printer.
3. Set the paper
- Set the paper roll in the direction as shown in the illustration.
- If the paper roll is loose, tighten it before setting it in the printer to prevent paper jams.
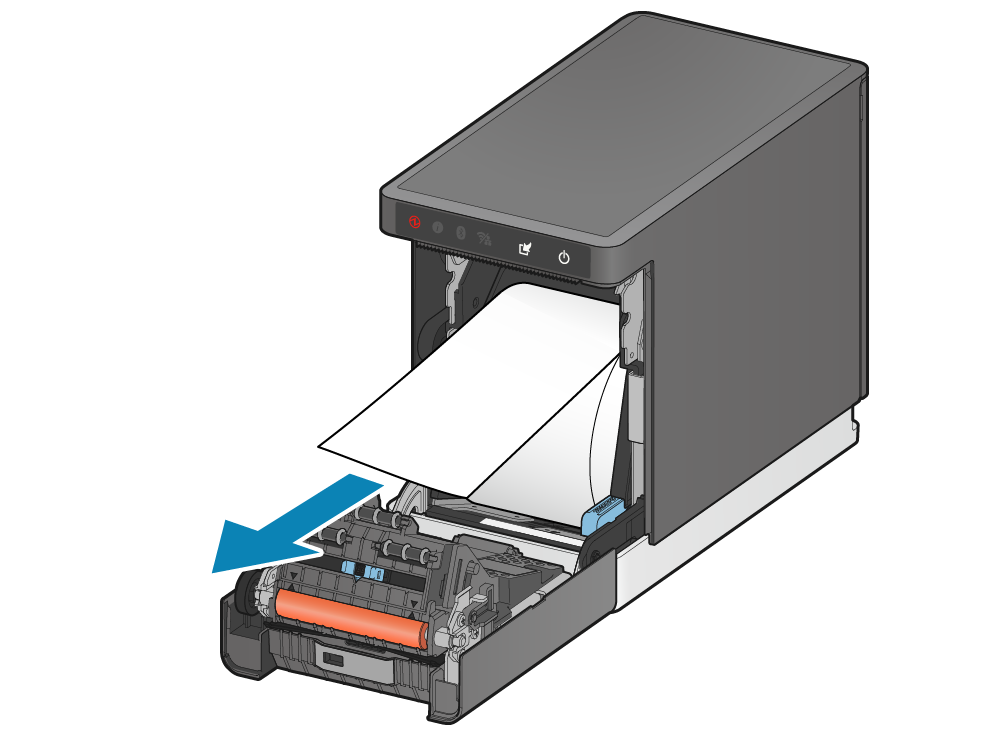
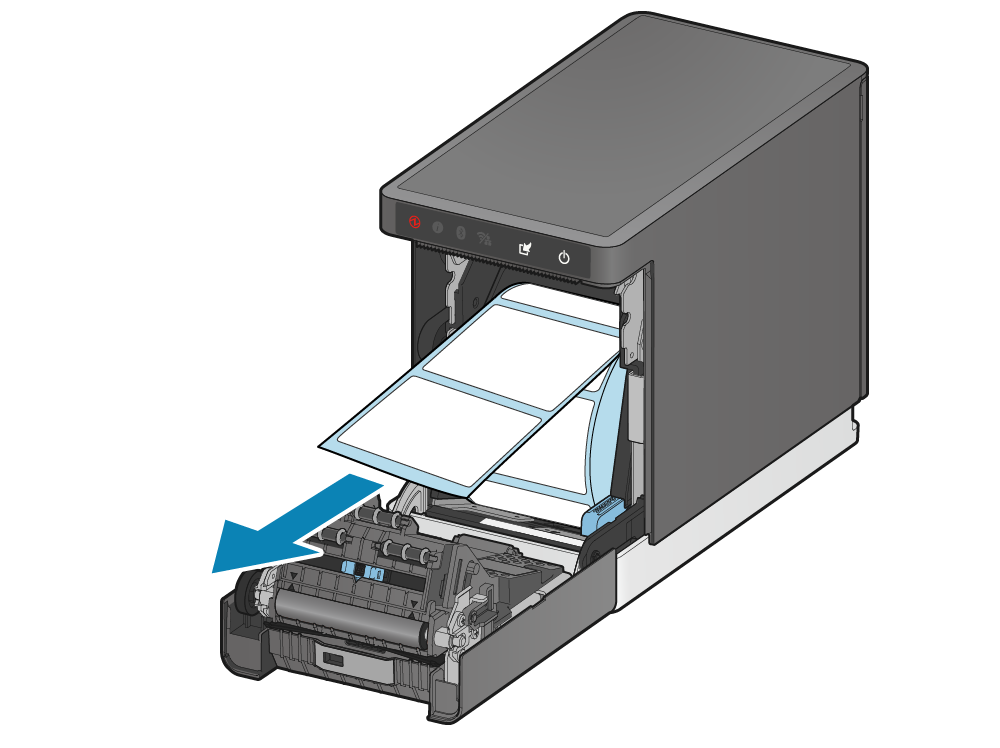
4. Close the printer cover
- Pull out the edge of the paper roll horizontally.
- While keeping the paper roll level, close the printer cover.
Caution
When using a linerless label, be careful that the adhesive side does not stick to the printer.
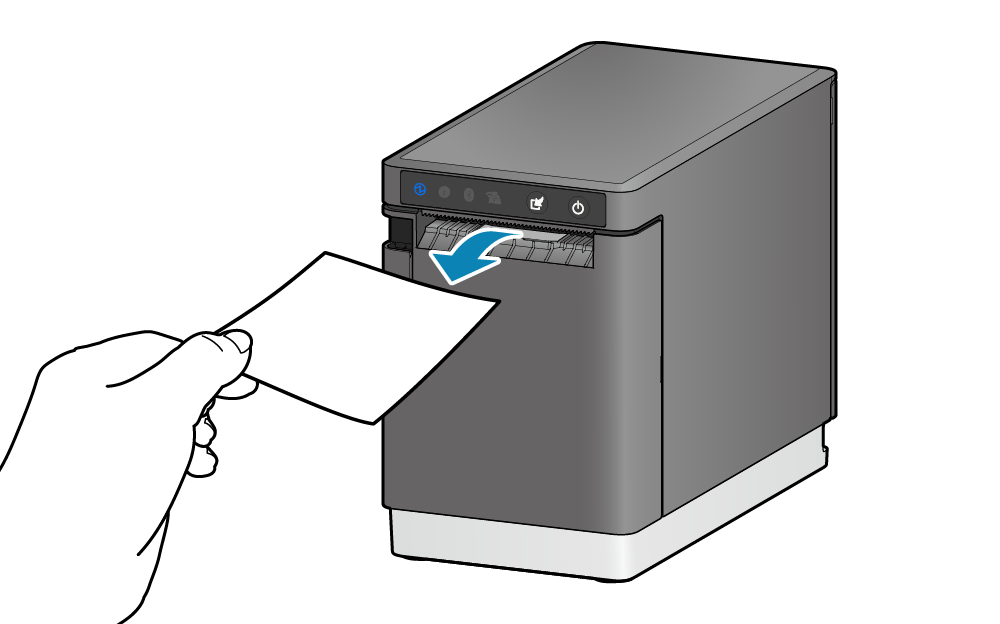
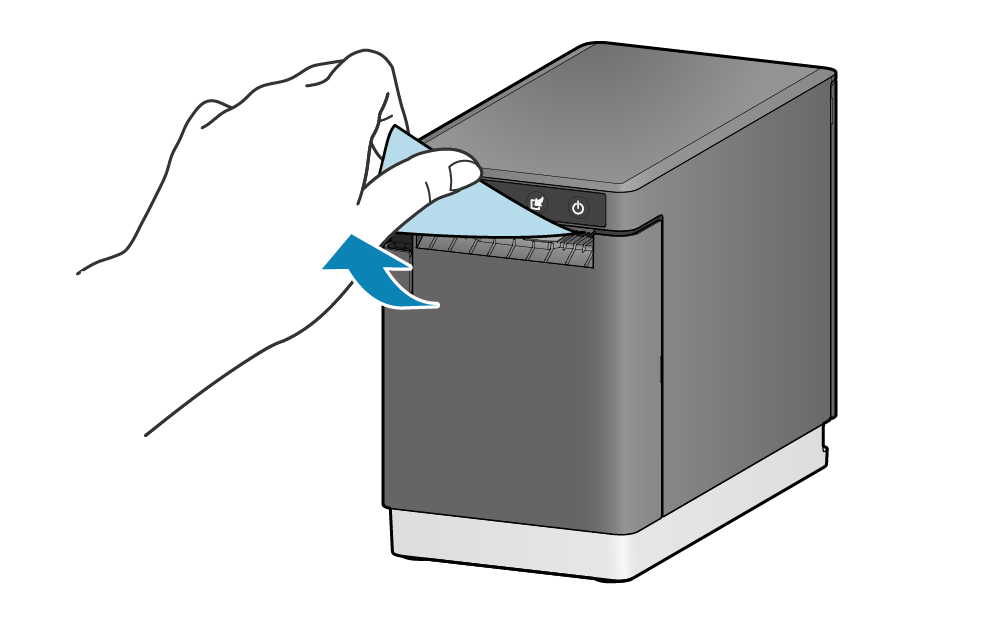
- Remove the discharged paper.
Paper guide settings
Use the following procedure to set the paper roll guide according to the label roll paper width you use.
Note
If you cannot print correctly, contact the seller.
1. Open the printer cover
- Pull the cover opening lever toward you and open the printer cover .

2. Set the paper guide
- While pushing the paper guide lever
 , slide it to left and right sides
  .
. - Align the ▼ mark (top ▼) on the paper guide with the ▲ mark of the paper width you use.
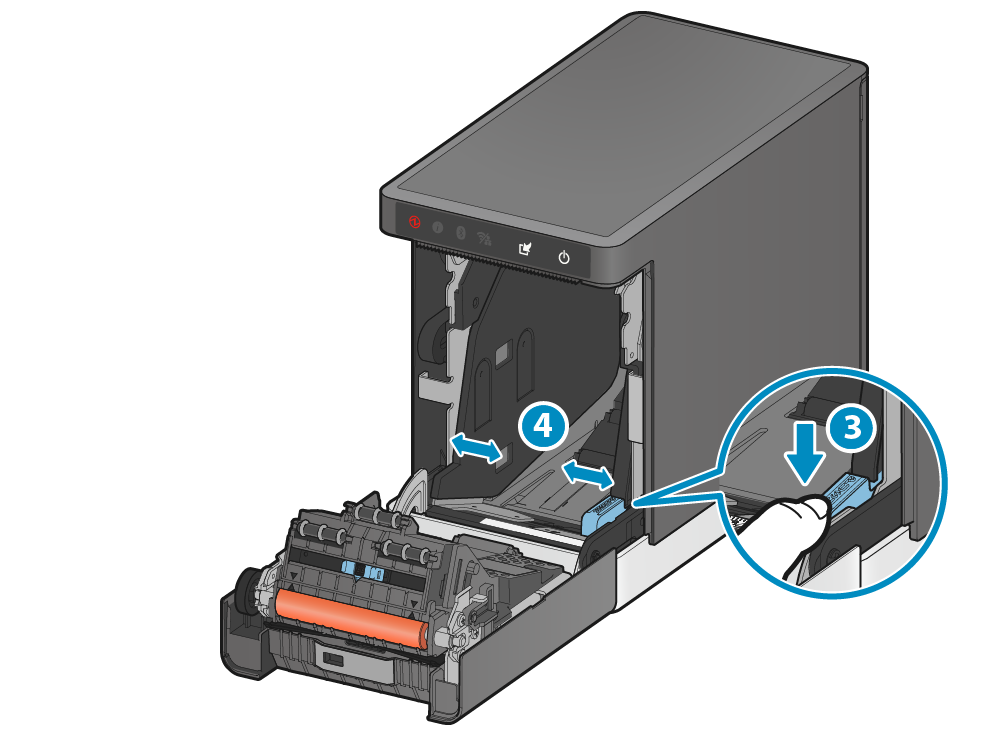
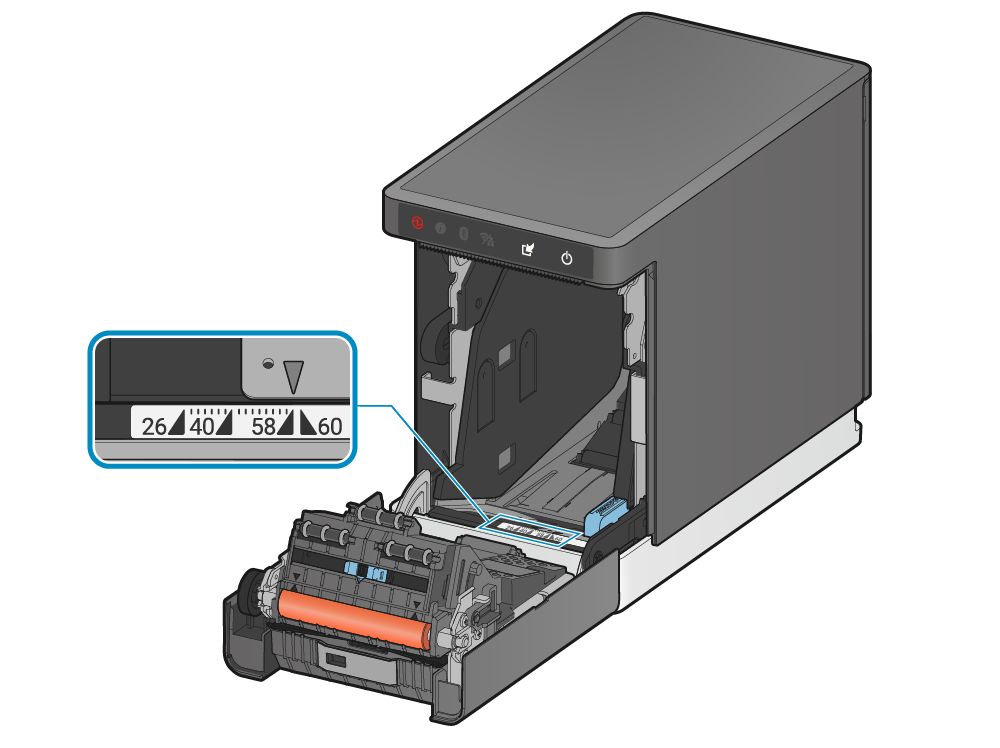
Illustration: When using a 58 mm wide label roll
The LBL model supports die cut label and receipt paper.
Configure the media settings before using this product for the first time and after changing the paper type to be used. Media Settings
Use paper that meets the specifications of the printer. Paper Roll Specifications
Configure paper guide settings according to the paper roll width you use. Paper guide settings
1. Turn the power on
- Press the Power button on the front of the main unit to turn the power on.
- Set the paper with the power on to automatically feed and position the paper.
- If the printer is out of paper, the Power LED flashes red.
2. Open the printer cover
- Pull the cover opening lever to open the printer cover .
Caution
When replacing paper, remove the paper core remaining in the printer.
3. Set the paper
- Set the paper roll in the direction as shown in the illustration.
- If the paper roll is loose, tighten it before setting it in the printer to prevent paper jams.
4. Close the printer cover
- Pull out the edge of the paper roll horizontally.
- While keeping the paper roll level, close the printer cover.

- Use the tear bar to cut the paper.
Paper guide settings
Use the following procedure to set the paper roll guide according to the label roll paper width you use.
1. Open the printer cover
- Pull the cover opening lever toward you and open the printer cover .
2. Set the paper guide
- While pushing the paper guide lever , slide it to left and right sides .
- Align the ▼ mark (top ▼) on the paper guide with the ▲ mark of the paper width you use.
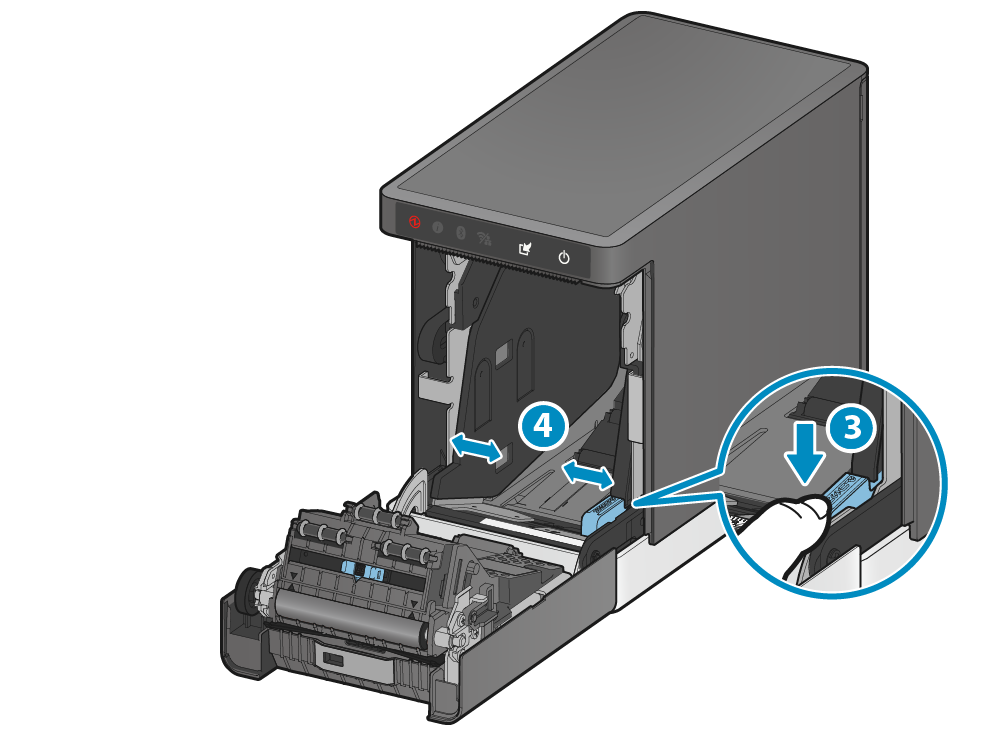
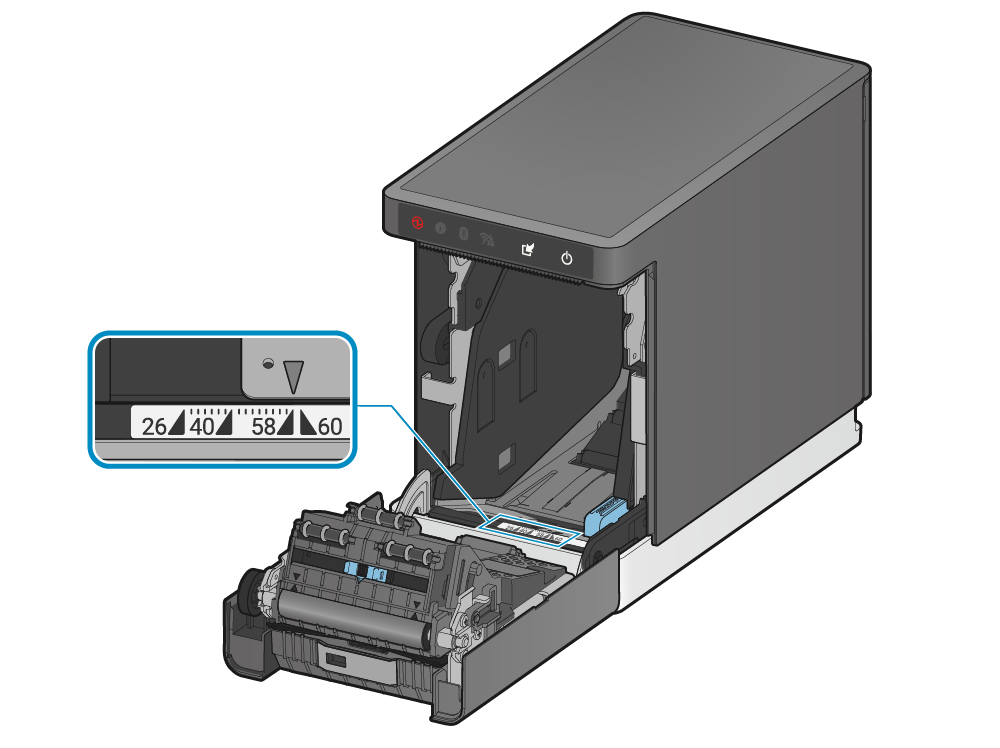
Illustration: When using a 58 mm wide label roll
Refer to here for consumable parts.