Connect USB Cable
Connect the USB cable to carry out communication between the printer and host device via the USB port.
There are some restrictions related to simultaneously connecting multiple devices to a single printer. Make appropriate connections to suit your environment.
Precautions for Using Multi-interface
When connecting a tablet, smartphone, or other device for the purpose of charging only, and when connecting a USB-connectable product, refer to Set Up External Devices.
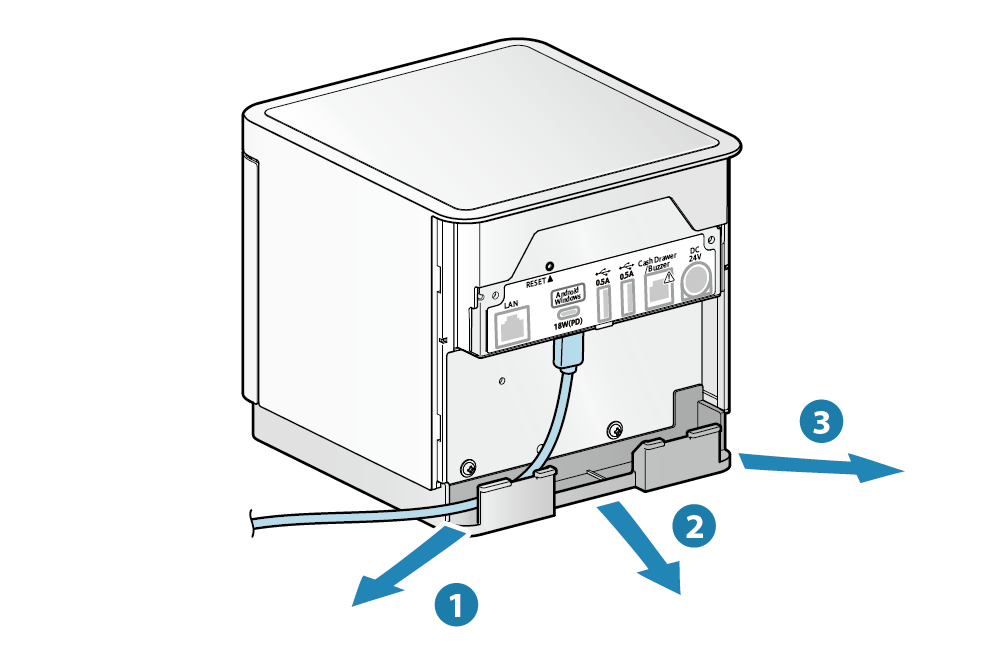
Before and after connecting the cable to the rear panel, remove and mount the rear cover respectively.
Remove/Mount Rear Cover
The connection method varies depending on the operating system of the PC, smartphone, or tablet you want to use.
Refer to the information appropriate to the usage environment.
Windows
iOS <MCP31LB, MCP31L, MCP31LBNH, MCP31LNH>
Android
Windows
When printing from a Windows PC or tablet, follow the steps below to make a connection.
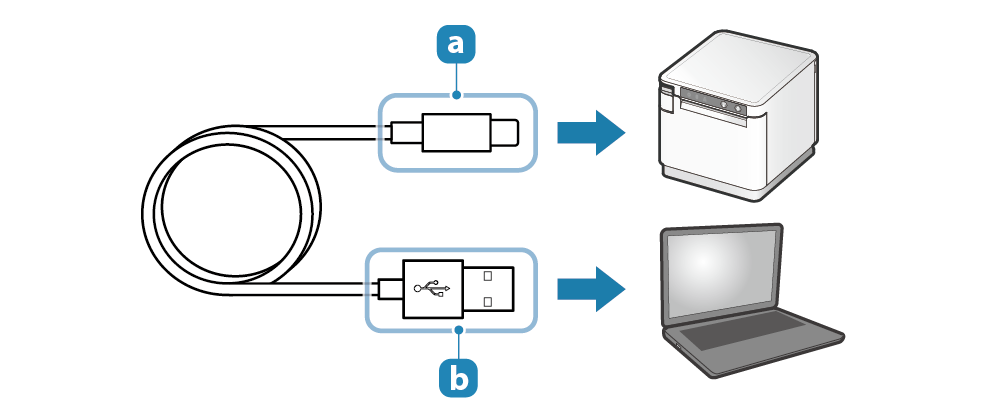
1. Prepare a USB cable
- When using a PC, prepare a USB cable (A-B) to connect the printer. When using a tablet, prepare a USB cable that matches the connector shape of the tablet.
- PC
- Tablet
 | Printer-side plug | USB-B |
 | Device-side plug | USB-A or standard cable for the device you are using |
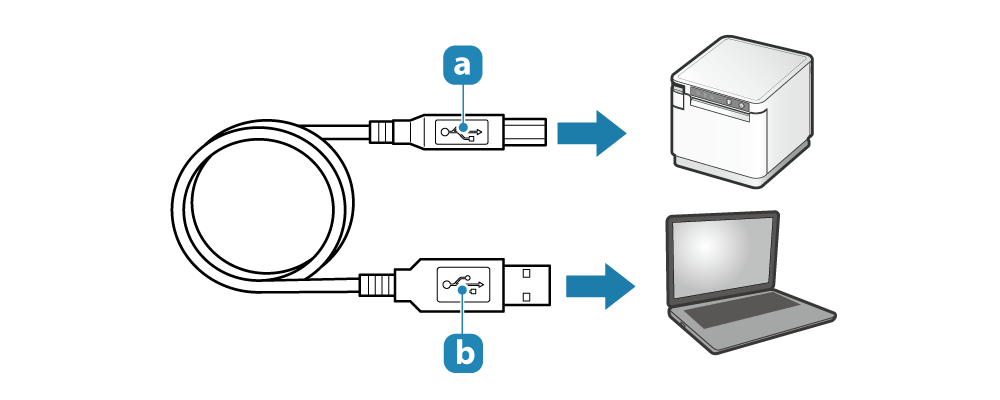
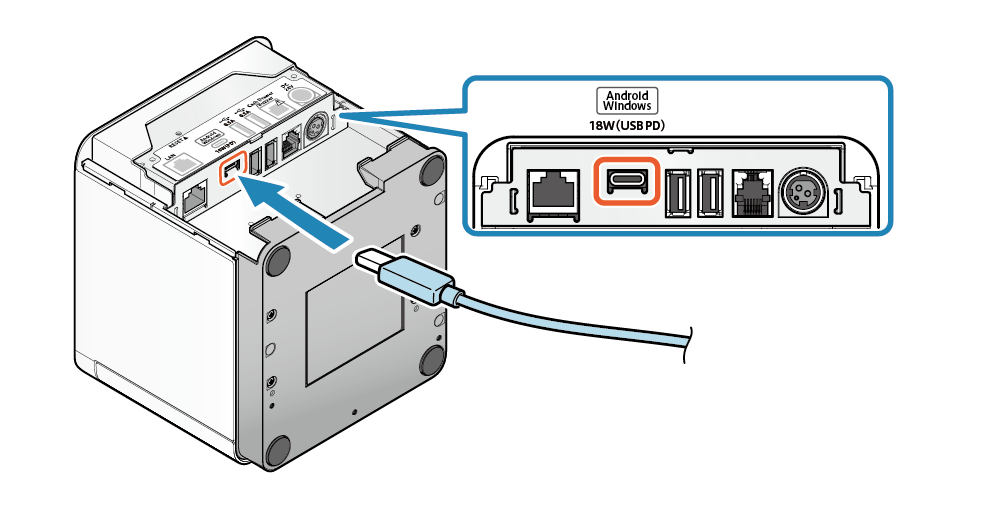
2. Connect the USB cable to the printer
- Connect the USB cable to the printer USB-B port.
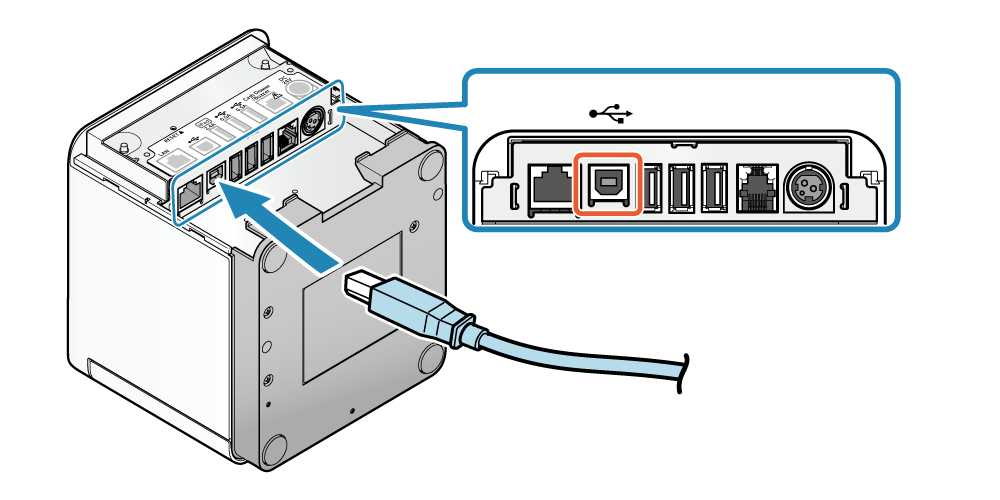
Example: MCP31L, MCP31LB
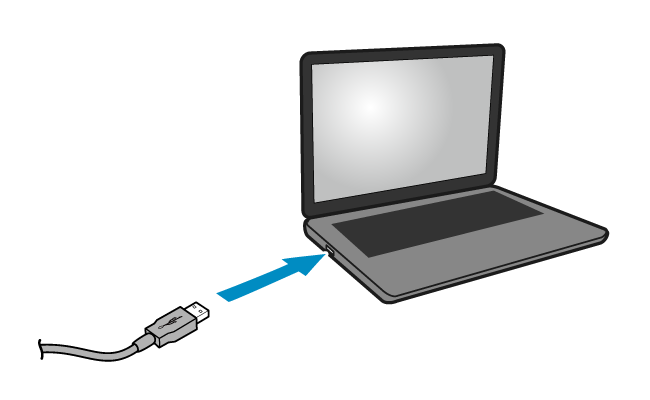
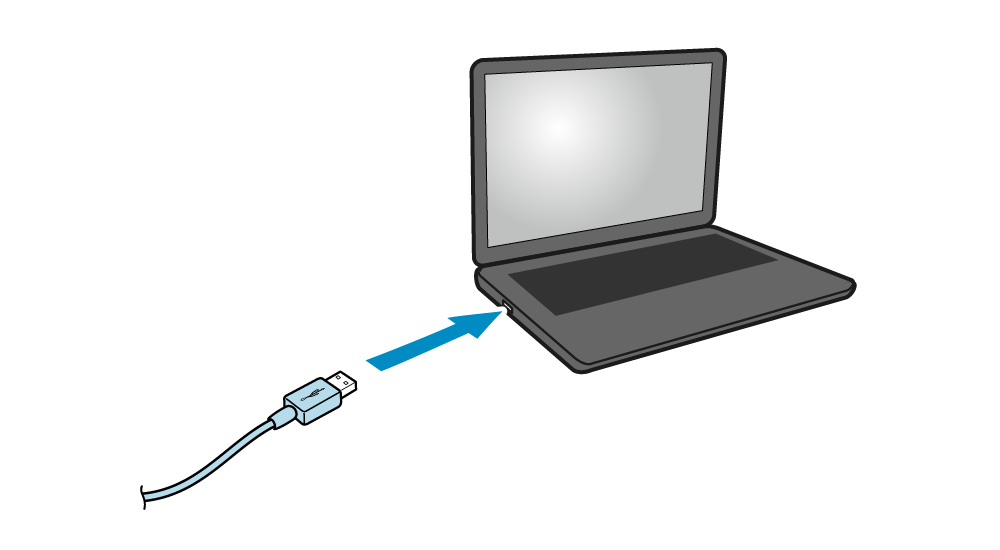
3. Connect the USB cable to the PC or tablet
- Connect the other plug to the PC or tablet.
4. Connect USB cable
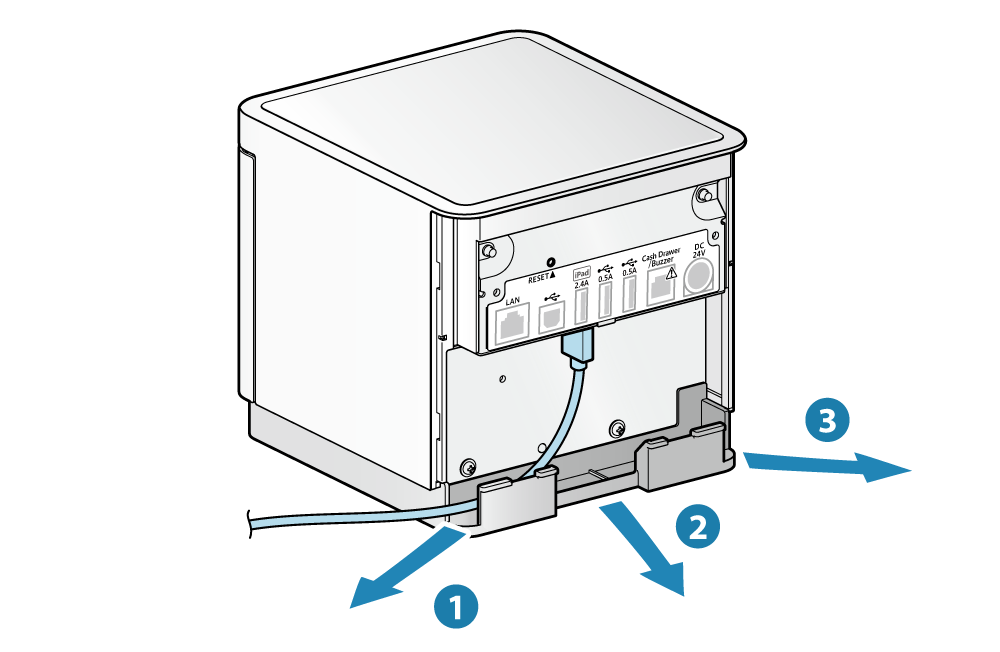
- Cable outlets are provided in 3 locations (right, left, and back), and cables can be connected to suit the location where the device is placed.

Note
iOS <MCP31LB, MCP31L, MCP31LBNH, MCP31LNH>
When connecting an iPad, iPhone, or iPod touch for printing or power supply (maximum 2.4A), follow the steps below to make a connection.
This is applicable to iPad, iPhone, and iPod touch that are equipped with the USB connector.
Caution
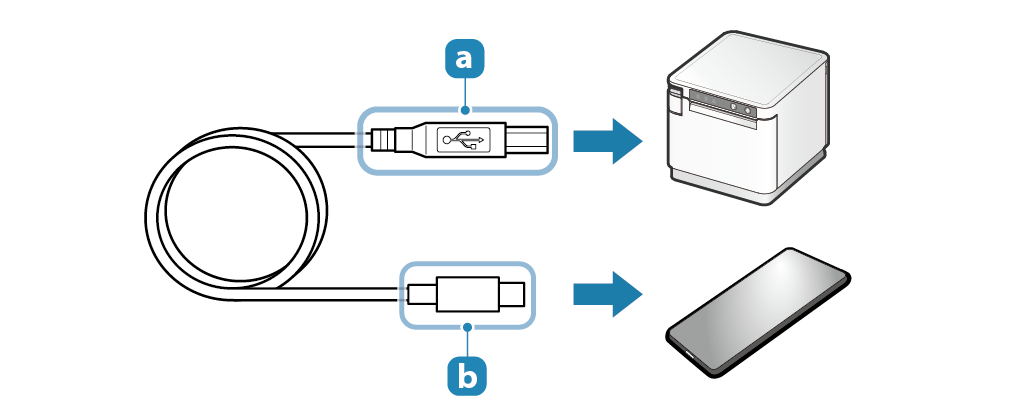
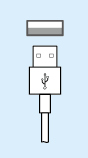
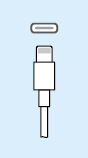
1. Prepare a USB cable
- Use a USB cable that is available commercially or that came with the smartphone or tablet.
| Printer-side plug | USB-A |
| Device-side plug | Lightning or USB-C |
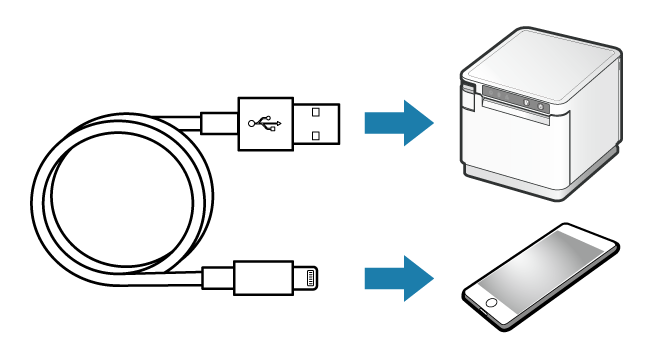
2. Connect the USB cable to the printer
- Connect the USB cable to the USB-A (2.4A) port of the printer.
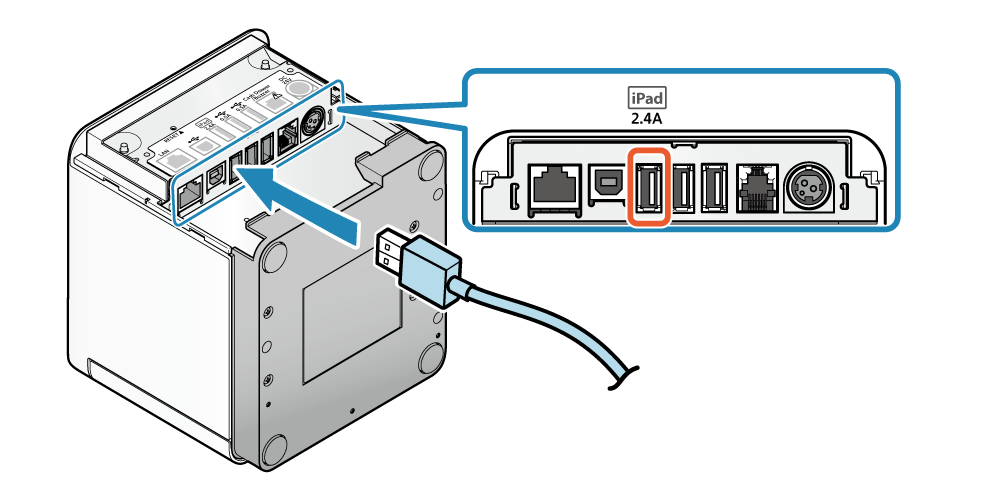
Example: MCP31L, MCP31LB
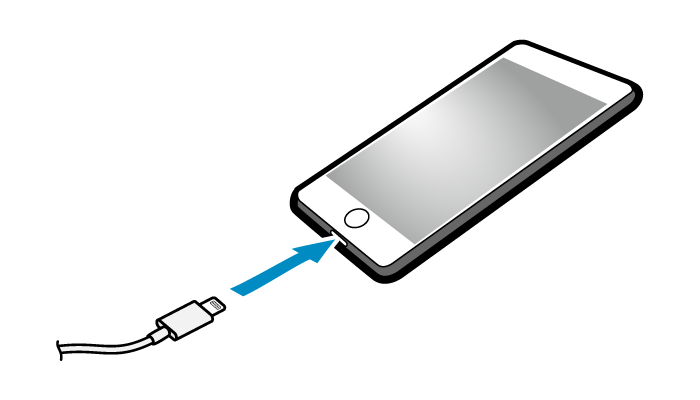
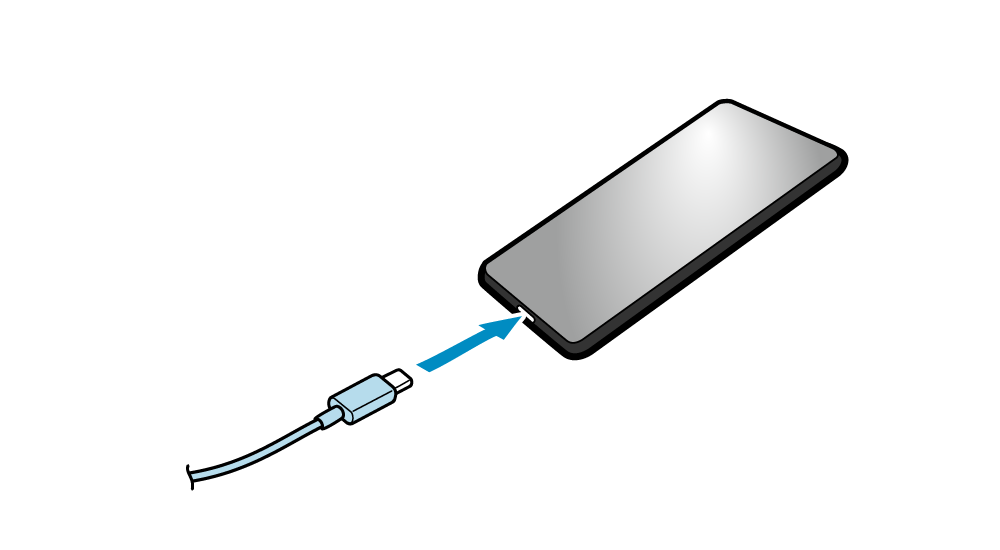
3. Connect the USB cable to the smartphone or tablet
- Connect the other plug to the smartphone or tablet.
4. Connect USB cable
- Cable outlets are provided in 3 locations (right, left, and back), and cables can be connected to suit the location where the device is placed.
Note
Android
When printing from the Android tablet or smartphone, follow the steps below to make a connection.
Caution
When performing USB communication with a device equipped with USB micro-B, it is necessary to use a USB adapter.
Some devices may not support the use of a USB adapter. Be sure to perform full operation checks in advance before using.
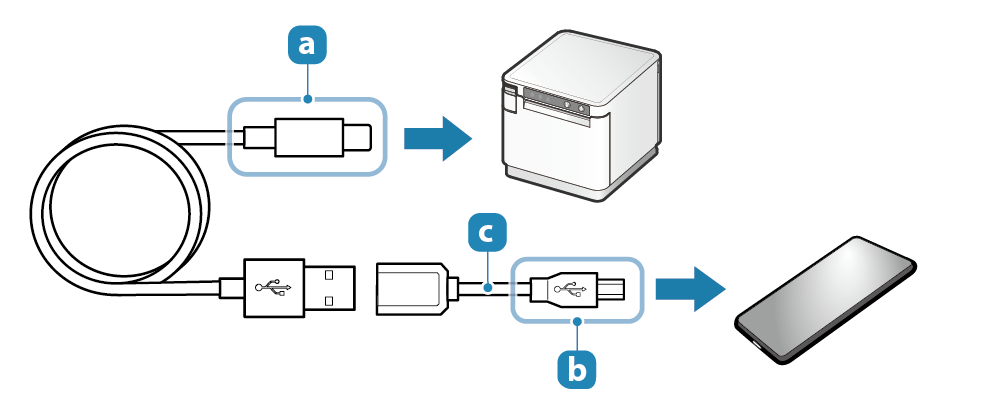
1. Prepare a USB cable and USB adapter
- Prepare a USB cable and USB adapter according to the connector shape of the smartphone/tablet that you use.
| Printer-side plug | USB Type-B |
| Device-side plug | Product based on the standard that matches the device you use |
 | USB adapter | According to the device you use (when necessary) |
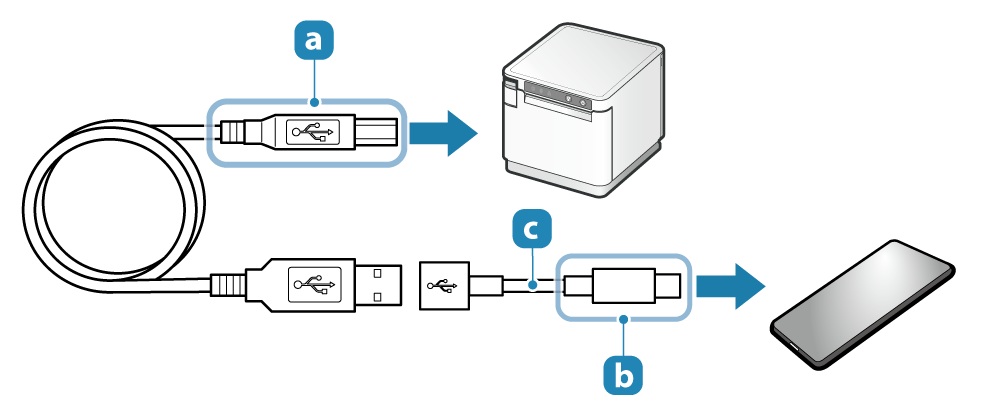
2. Connect the USB cable to the printer
- Connect the USB cable to the printer USB-B port.
Example: MCP31L, MCP31LB
3. Connect the USB cable to the smartphone or tablet
- Connect the other plug to the smartphone or tablet.
4. Connect USB cable
- Cable outlets are provided in 3 locations (right, left, and back), and cables can be connected to suit the location where the device is placed.
Note
Connect the USB cable to carry out communication or power supply between the printer and host device via the USB port.
When connecting a tablet, smartphone, or other device for the purpose of charging only, and when connecting a USB-connectable product, refer to Set Up External Devices.
When using a Windows driver, always install the Windows driver before connecting the USB cable.
Setup - Install Driver
Before/after connecting the cable to the rear panel, remove/mount the rear cover.
Remove/Mount Rear Cover
The response of the printer after connecting the cable varies depending on the interface of the PC, tablet, or smartphone used, and on the type of USB cable used. When performing communication, it is necessary to use a cable which supports the communication for the interface of that device.
Select the interface of the host device that is used.
USB-CUSB PD supported
USB cable
USB-C ↔ USB-C (included in package)
Printer response
Communication + power supply
USB-CUSB PD not supported
USB cable
USB-C ↔ USB-C (included in package)
Printer response
Communication or power supply*
* If communication is not possible after the cable is connected, it is necessary to switch the USB-C function at the printer. For details, refer to Switch USB-C Function.
USB-CiPad Pro
USB cable
USB-C ↔ USB-C (included in package)
Printer response
Communication not possible (power supply only)
USB micro-B
USB cable
USB micro-B ↔ USB-C
Printer response
Communication not possible (power supply only)
USB micro-B
USB cable + USB adapter
[USB micro-B ↔ USB-A (female)] ↔ USB-A (male) ↔ USB-C
Printer response
Communication only
USB-A
USB cable
USB-A ↔ USB-C
Printer response
Communication only
Lightning
USB cable
Lightning ↔ USB-C
Printer response
Power supply only
Connecting a host device equipped with USB-C
This product supports USB PD (USB Power Delivery)* and if the connected host device also supports USB PD, then it is possible to simultaneously perform printing and power supply (maximum 18W).
If the connected host device does not support USB PD, then the printer will perform either printing or power supply (maximum 15W). When connecting for the purpose of communicating with the printer, switch the printer USB-C function to “Communication” before use. For details, refer to Switch USB-C Function.
* USB PD (USB Power Delivery):
This is the standard for power supply using USB. You can check whether or not the device you are using supports USB PD by using the special app from an Android device. For details, refer to Use App.
1. Prepare a USB cable
- Prepare the USB cable (C-C) that was provided with the printer.
| Printer-side plug | USB-C |
| Device-side plug | USB-C |

2. Connect the USB cable to the printer
- Connect the USB cable connector to the printer USB-C port.
3. Connect the USB cable to the host device
- Connect the other plug to the tablet, smartphone, or PC.
4. Connect USB cable
- Cable outlets are provided in 3 locations (right, left, and back), and cables can be connected to suit the location where the device is placed.
Note
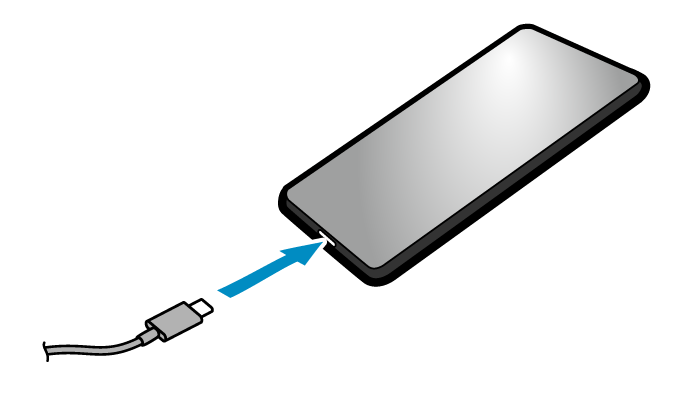
Connecting a host device equipped with USB micro-B
When printing from a host device equipped with a USB micro-B port, follow the steps below to make a connection.
Caution
When performing USB communication with a device equipped with USB micro-B, it is necessary to use a USB adapter.
Some devices may not support the use of a USB adapter. Be sure to perform full operation checks in advance before using.
1. Prepare a USB cable and USB adapter
- Prepare a USB cable (A-C) and USB adapter (USB micro-B - USB-A female).
| Printer-side plug | USB-C |
| Device-side plug | USB micro-B |
| USB adapter | USB micro-B ↔ USB-A |
2. Connect the USB cable to the printer
- Connect the USB cable to the printer USB-C port.
3. Connect the USB cable to the host device
- Connect the other plug to the tablet or smartphone.

4. Connect USB cable
- Cable outlets are provided in 3 locations (right, left, and back), and cables can be connected to suit the location where the device is placed.
Note
Connecting a host device equipped with USB-A
When printing from a host device equipped with a USB-A port, follow the steps below to make a connection.
1. Prepare a USB cable
- Prepare the USB cable (A-C).
| Printer-side plug | USB-C |
| Device-side plug | USB-A |
2. Connect the USB cable to the printer
- Connect the USB cable to the printer USB-C port.
3. Connect the USB cable to the host device
- Connect the other plug to the PC or tablet.
4. Connect USB cable
- Cable outlets are provided in 3 locations (right, left, and back), and cables can be connected to suit the location where the device is placed.
Note