Initialize Communication Settings (Network/Bluetooth)
You can reset the network and Bluetooth settings of the printer to their default settings.
If you fail to configure the communication settings, follow the steps below to initialize the communication settings.
Also, when disposing of products, please initialize the network communication settings of the product from the viewpoint of information protection.
Caution
- Do not turn power off the printer when initializing. The initialization process will not finish correctly.
Note
To initialize the Bluetooth settings, the device name (mC-Print3-XXXXX) is required when you delete the Bluetooth settings on the host device side such as a tablet or PC. Before starting initialization, check [Dev Name] of *** Bluetooth Information *** printed via Self-Printing.
1. Turn power off
- Hold down the Power button on the right side of the operation panel on the front of the printer for 1 second or more.
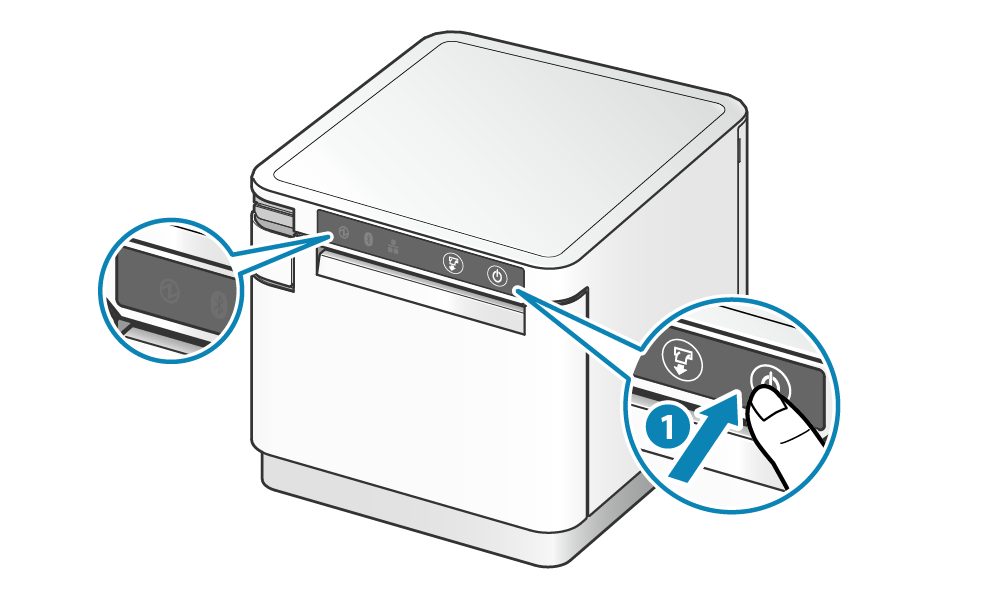
2. Initialize communication settings of the printer
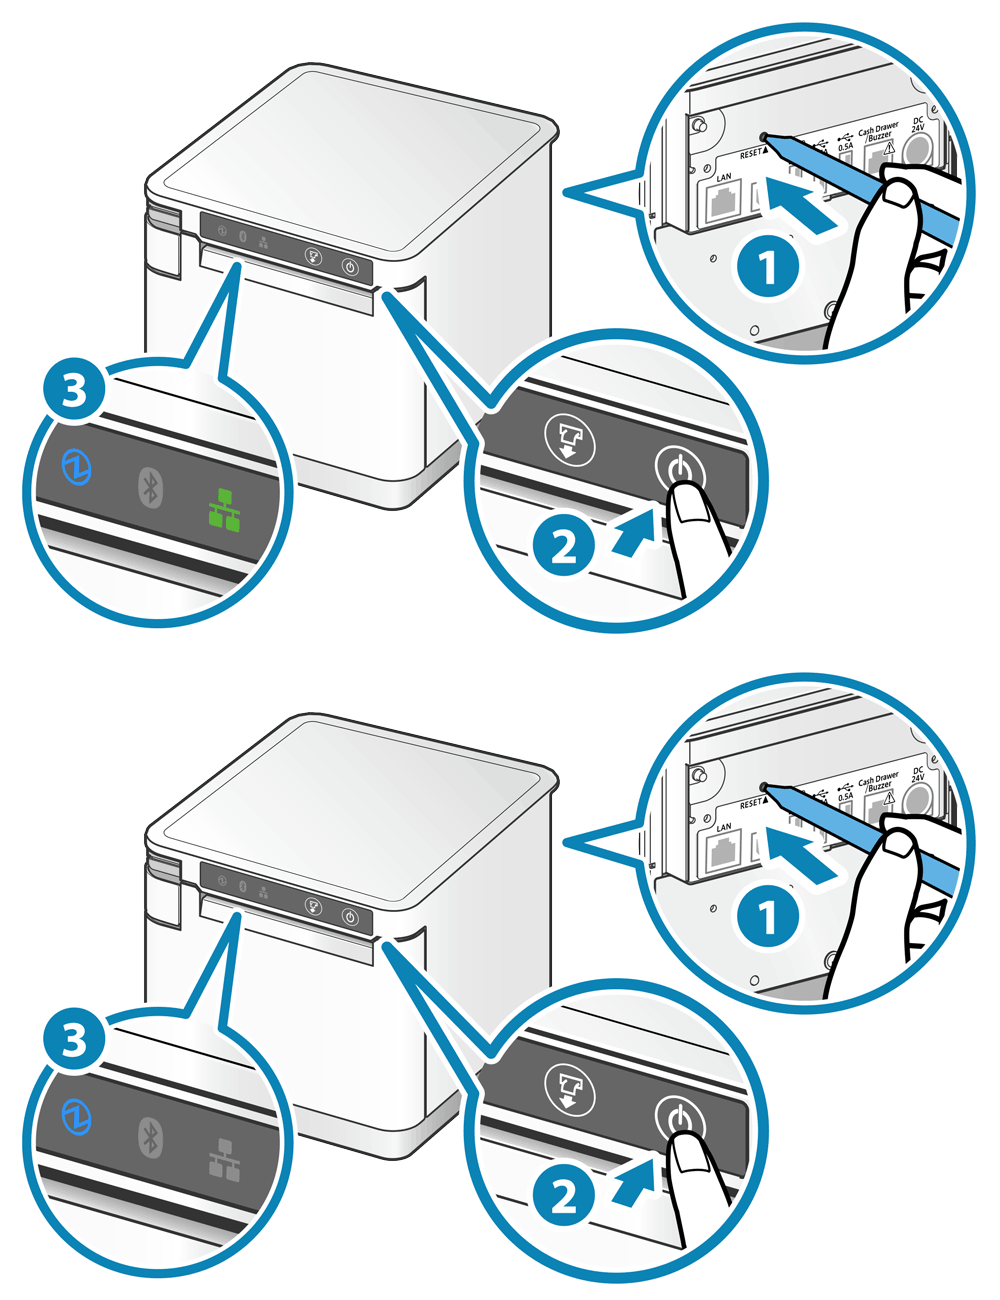
- Insert a pen that has a fine point into the tiny hole. While holding down the RESET switch on the rear of the printer
 , press and release the Power button
  on the right side of the operation panel on the front of the printer.
 - Hold down the RESET switch until the Network LED (green) in the center of the operation panel flashes
 .
. - When you press the FEED button
 of the MCP31LB, MCP31LBNH, MCP31CB model, the type of communication setting to be initialized is changed
 .
.
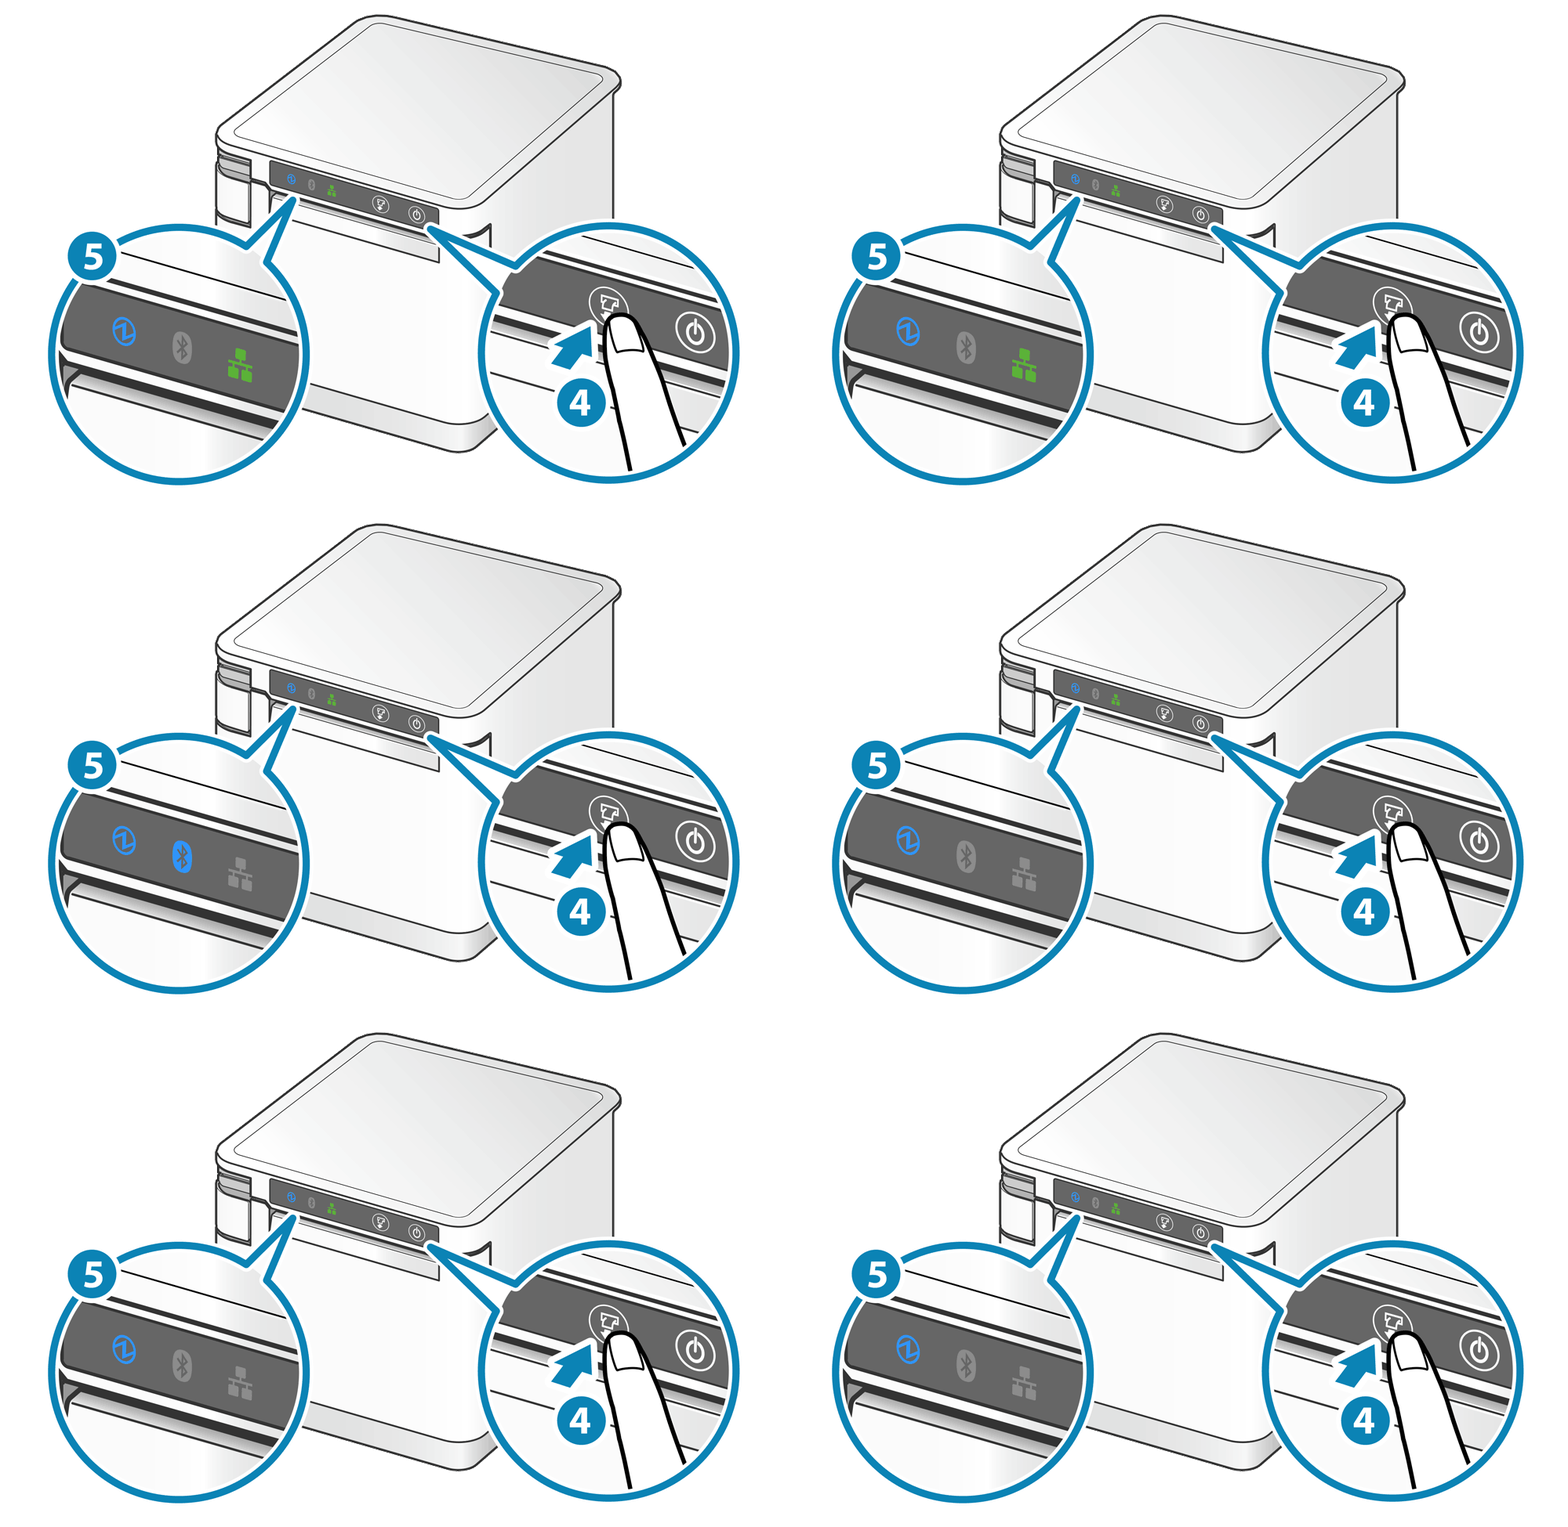
Select the desired communication setting using LED
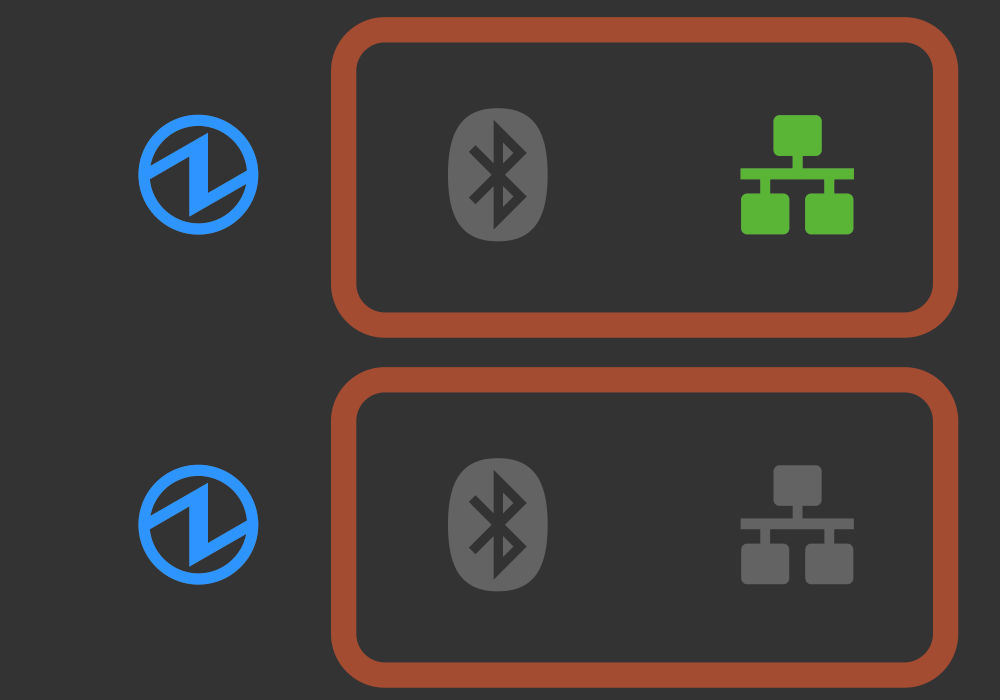
When the network settings are initialized, the printer network settings which were changed in Telnet or Web Configuration are restored to their default settings.
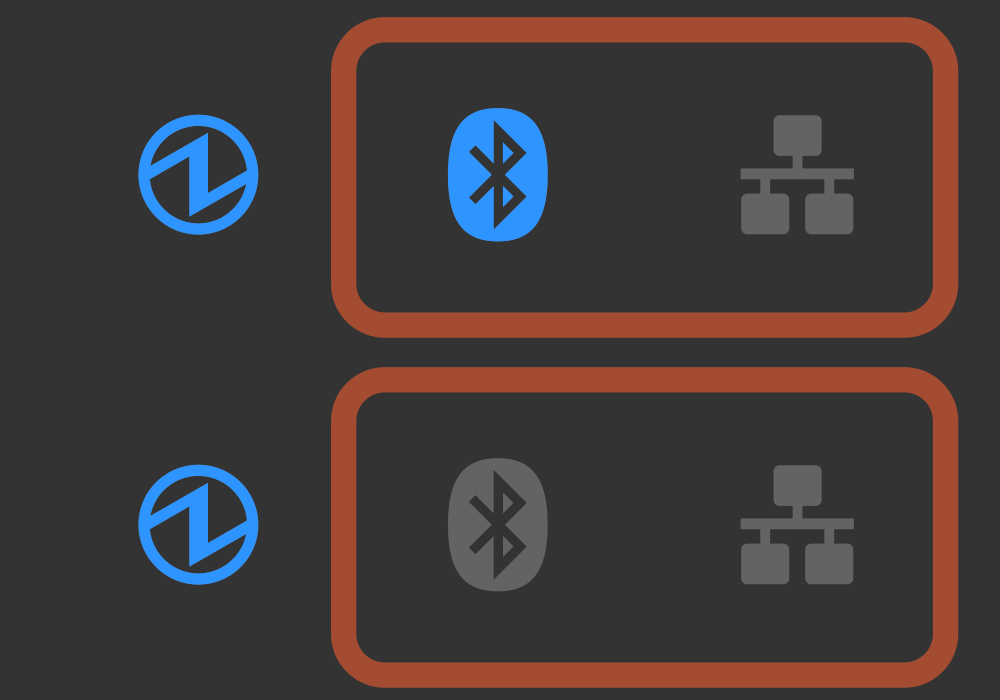
When the Bluetooth settings are initialized, the following items will be restored to their default settings.
MCP31LB, MCP31LBNH
- Device name
- iOS port name
- New pairing permission settings
- Auto Connection settings
- Pairing information
MCP31CB
- Device name
- New pairing permission settings
- Pairing information
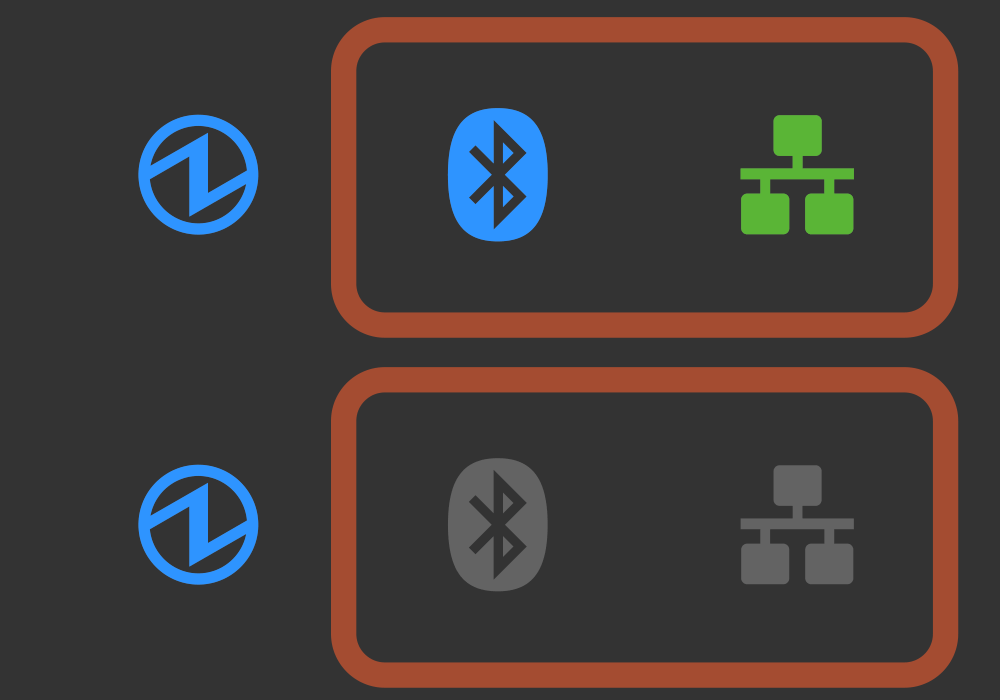
Initialize both the network settings and Bluetooth settings.
Refer to the above (Initialize Network Settings and Initialize Bluetooth Settings).
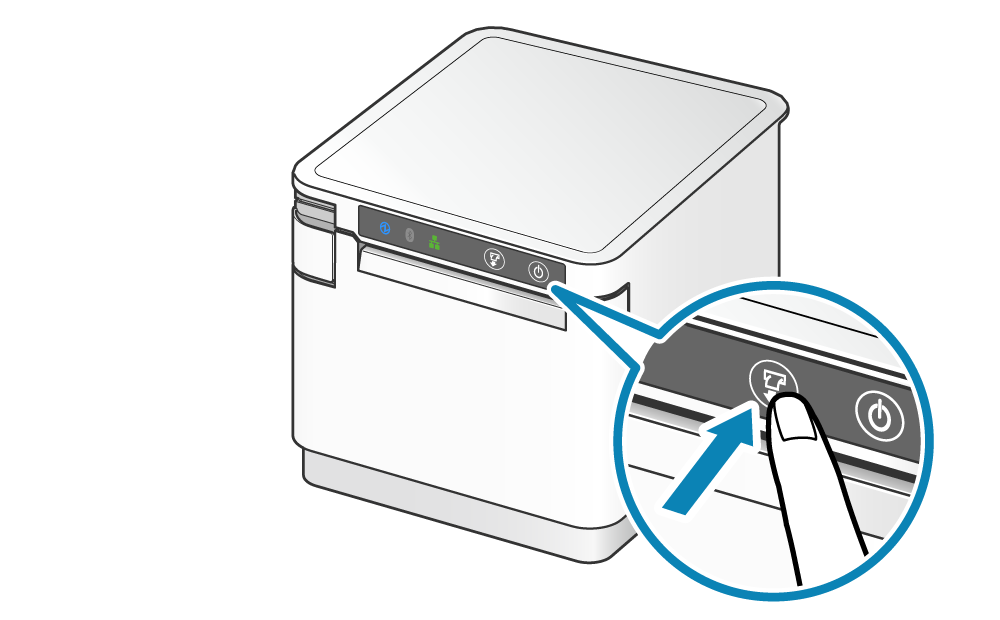
- When the LED display is changed to the desired communication setting mode, hold down the FEED button to execute initialization of communication settings.
- When initialization is completed, the printer is reset.
- When only the initialization of network settings is performed, the procedure is then completed.
Note
If the Bluetooth settings are initialized, follow Step 3 and after to delete the printer settings on the tablet side.
3. When the Bluetooth settings are initialized, delete "connection settings" on the host device side
When the Bluetooth settings of the printer are initialized, the connection settings for the printer on the host device side also become unavailable. Delete the setting that was configured to connect to the target printer on the host device side, and make a connection again.
The deletion method varies depending on the OS of the device you are using.
iOS
Android
Windows
iOS
- Open the setting screen of the tablet (such as iPad), and select Bluetooth.
- Tap
 of the desired device name (mC-Print3-XXXXX).
If the device name was changed, then select of the device name that it was changed to.
 - Tap "Forget This Device" to delete the setting for connection with the main unit.
Android
- Open the setting screen of the tablet and select Bluetooth.
- Tap the setting button of the desired device name (mC-Print3-XXXXX) from the device list.
If the device name was changed, then select the device name that it was changed to. - Tap "Forget" to delete the setting for connection with the main unit.
Windows
Windows11
- Open [Settings], select [Bluetooth & devices] - [Devices].
- Select the device name (mC-Print3-XXXXX) to be removed from the other devices list, and tap or click [Remove Device].
- Tap or click "Yes" to delete the setting for connection with the main unit.
Windows10
- Open [Settings], select [Devices] - [Bluetooth].
- Select the device name (mC-Print3-XXXXX) to be removed from the other devices list, and tap or click [Remove Device].
- Tap or click "Yes" to delete the setting for connection with the main unit.
Windows8.1 / 7
- Open the control panel from the Start menu.
- Start "Devices and Printers", right-click the icon of the device to be deleted, and click "Remove Device" from the menu displayed.
- Click [Yes] to delete the setting for connection with the main unit.
4. Restart tablet
- Restart the tablet (iPad, Android tablet, etc.) that was connected to the main unit.
5. Reconnect to the tablet
- Restart the power of the main unit and connect (pair) it with the tablet again.
Connect Tablet/PC (Bluetooth)