Connect USB Cable
Connect the USB cable for USB communication or for communication + charging between the printer and PC/tablet.
When connecting a tablet, smartphone, or other device for the purpose of charging only, refer to Set Up External Devices.
The printer-side connection port varies depending on the operating system of the PC, tablet, or smartphone you will use.
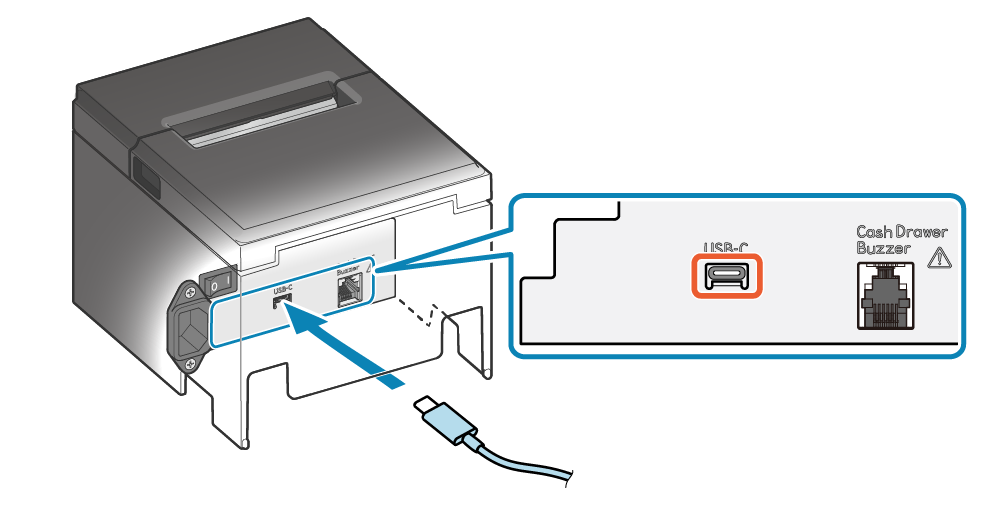
USB-C port
When communicating (printing) from a Windows, Mac, or Linux PC/tablet, follow the steps below and connect to the USB-C port (Windows USB-C) on the printer.
The USB-C port supports communication only. When connecting a tablet, smartphone, or other device for the purpose of charging, use the USB-A port.
Set Up External Devices: USB-A port
When using a Windows driver, install the Windows driver. Install Driver
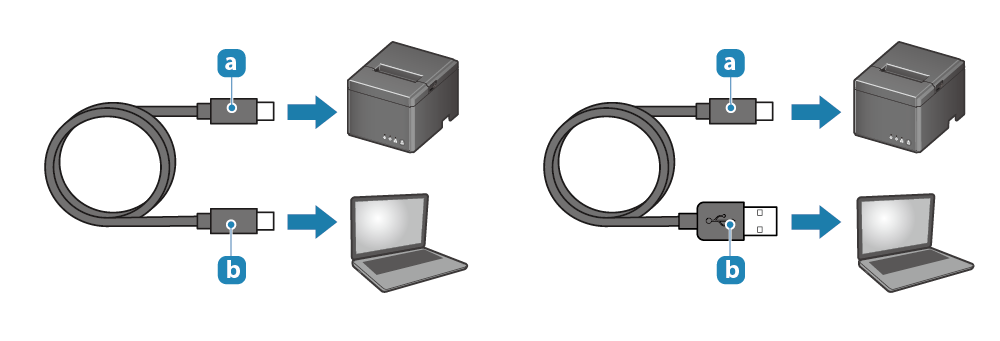
1. Prepare a USB cable
- Prepare a cable that conforms to the USB2.0 standard according to the device which is used.
 | Printer-side plug | USB-C |
 | Device-side plug | USB-A or USB-C |
Caution
When using a commercially-available USB cable, be sure to perform full operation checks before beginning actual use.
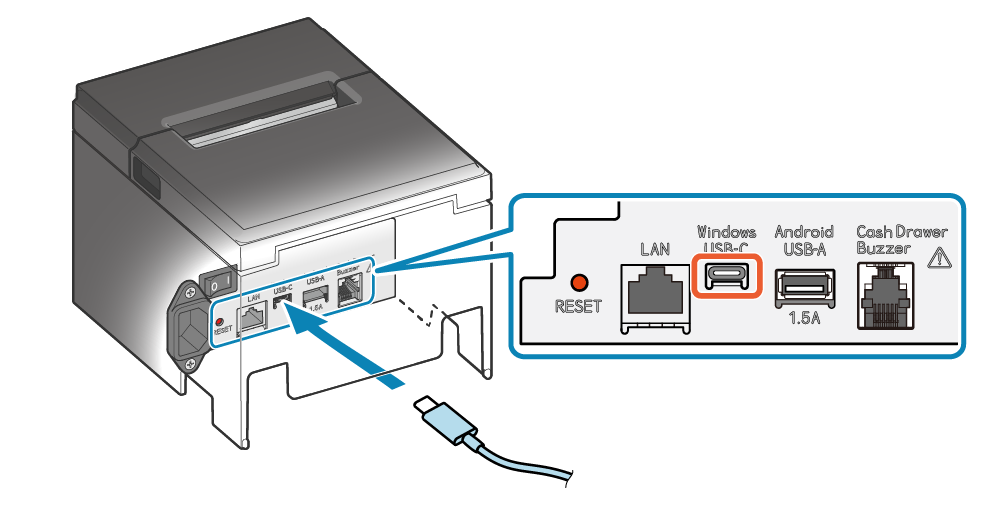
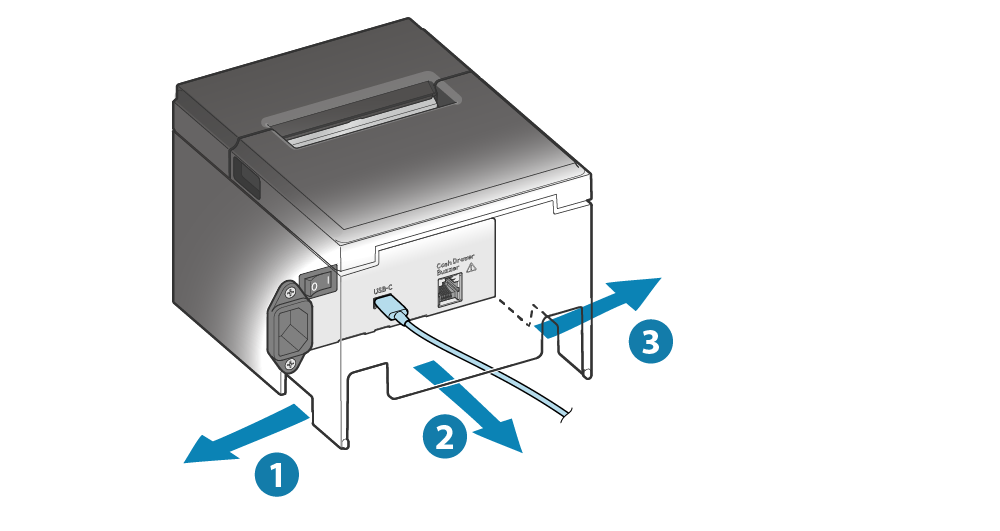
2. Connect the USB cable to the printer
- Connect the USB cable to the printer USB-C port (Windows USB-C).
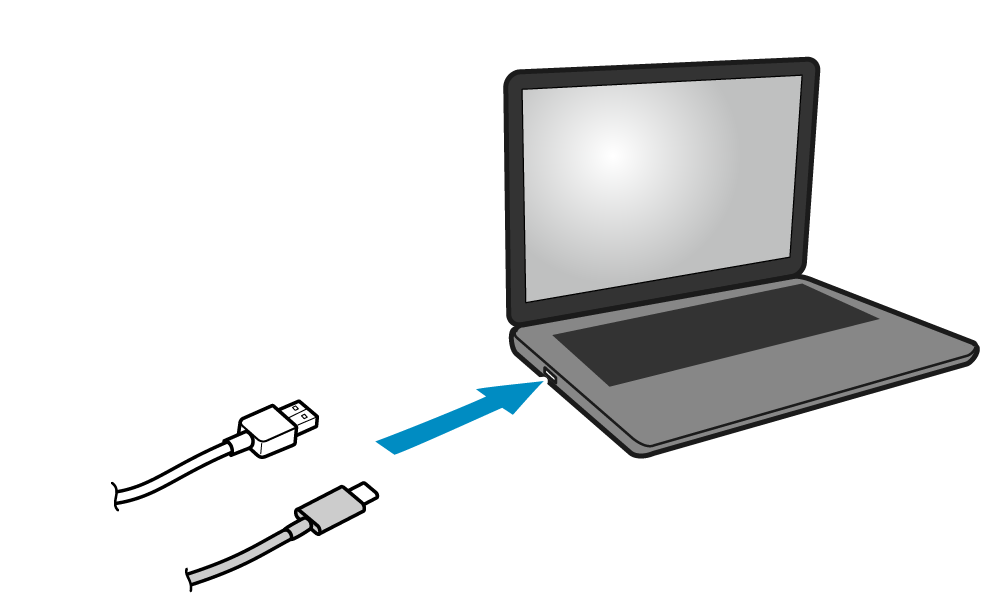
3. Connect the USB cable to the PC, tablet, or other device
- Connect the other plug to the PC, tablet, or other device.
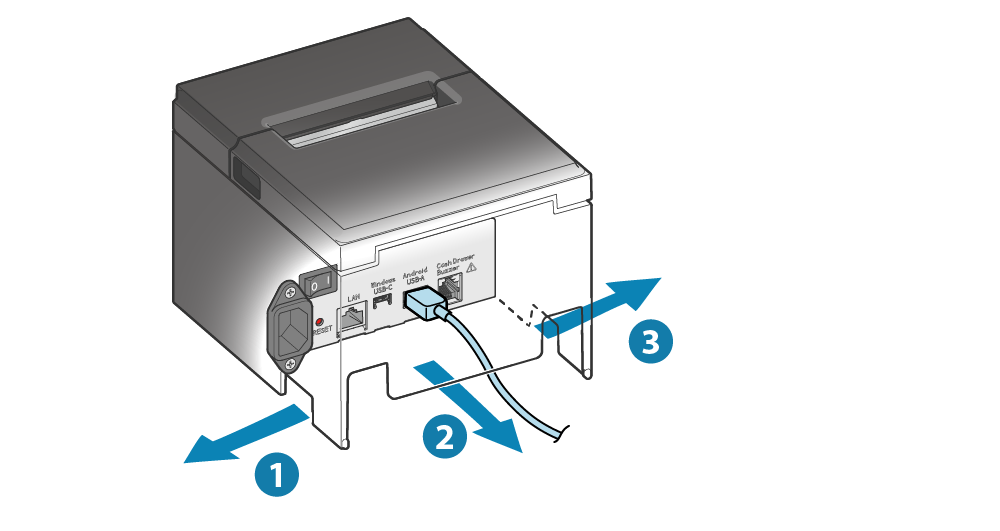
4. Route the USB cable
- Cable outlets are provided in 3 locations (right, left, and back), and cables can be routed to suit the location where the device is placed.

Note
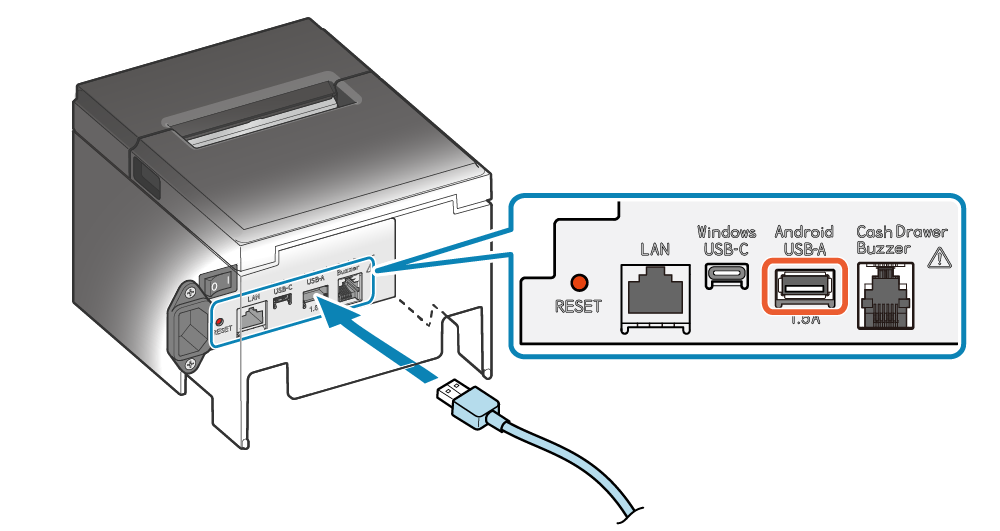
USB-A port
When communicating (printing) from an Android tablet or smartphone, follow the steps below and connect to the USB-A port (Android USB-A) on the printer.
At the same time as communication with the printer, power (max. 1.5A) is also supplied to the Android tablet or smartphone.
Caution
- Android charging and connection can only be used when the operation mode is “Standard Mode”.Check Operation Mode
- When connecting an Android device to the USB-A port (Android USB-A) for the purpose of communication, start the Android device, connect the USB cable to the printer, and then turn ON the printer power.
- Be sure to fully verify operation with the actual device before beginning actual use.
1. Prepare a USB cable
- Prepare a cable that conforms to the USB2.0 standard and supports 1.5 A or more according to the device which is used.
| Printer-side plug | USB-A |
| Device-side plug | USB-C or micro-B |
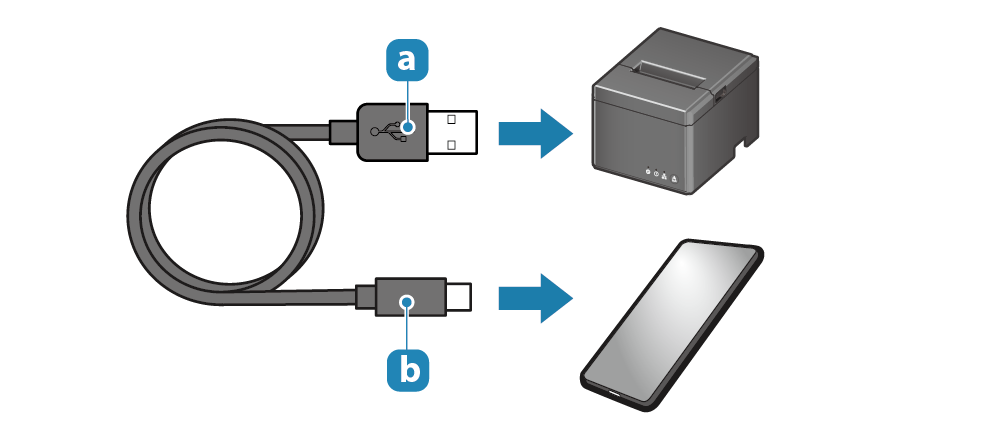
2. Connect the USB cable to the printer
- Connect the USB cable to the printer USB-A port (Android USB-A).
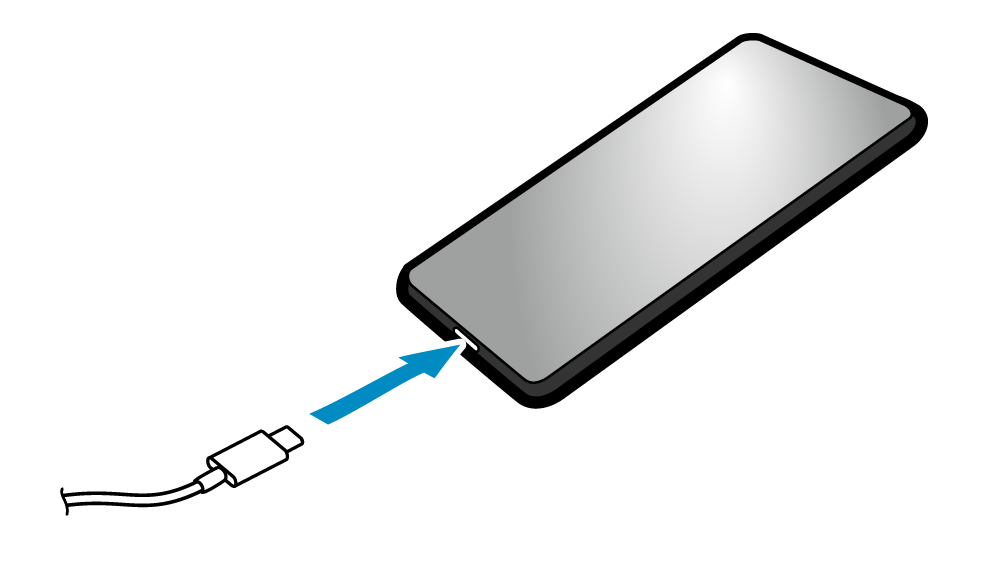
3. Connect the USB cable to the tablet or smartphone
- Connect the other plug to the Android tablet or smartphone.
4. Route the USB cable
- Cable outlets are provided in 3 locations (right, left, and back), and cables can be routed to suit the location where the device is placed.
Note
Connect the USB cable for USB communication or for communication + charging between the printer and PC/tablet.
USB-C port
When communicating (printing) from a Windows, Mac, or Linux PC/tablet, follow the steps below and connect to the USB-C port (Windows USB-C) on the printer.
The USB-C port supports communication only.
When using a Windows driver, install the Windows driver. Install Driver
1. Prepare a USB cable
- Prepare a cable that conforms to the USB2.0 standard according to the device which is used.
| Printer-side plug | USB-C |
| Device-side plug | USB-A or USB-C |
Caution
When using a commercially-available USB cable, be sure to perform full operation checks before beginning actual use.
2. Connect the USB cable to the printer
- Connect the USB cable to the printer USB-C port (Windows USB-C).
3. Connect the USB cable to the PC or tablet
- Connect the other plug to the PC or tablet.
4. Route the USB cable
- Cable outlets are provided in 3 locations (right, left, and back), and cables can be routed to suit the location where the device is placed.
Note