Part Names and Functions
This section explains the names and functions of parts that are related to the basic operations of the main unit.
Front of main unit
Back of main unit
Inside of main unit
Bottom of main unit
 LED
LED- Indicates the printer status.
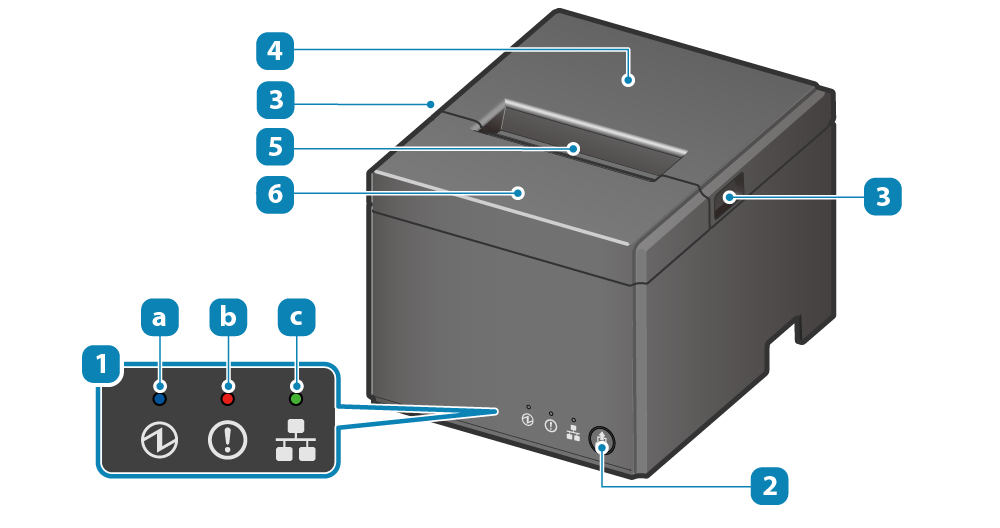
 Power LED (Blue) Power LED (Blue) |
 Error LED (Red) Error LED (Red) |
 Network LED (Green) Network LED (Green) |
- LED
- Indicates the printer status.
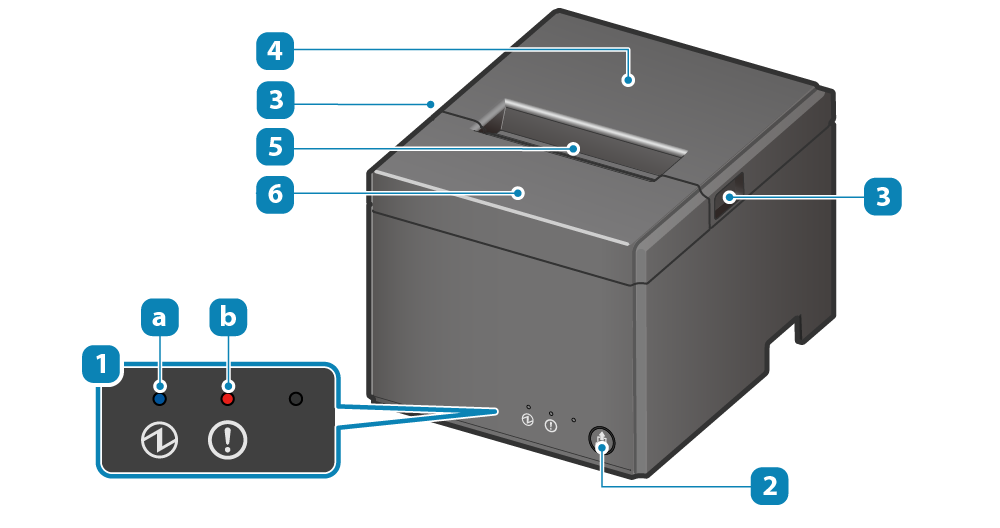
| Power LED (Blue) |
| Error LED (Red) |
 FEED button
- Press this button to feed paper. Also, use this button to perform Self-Printing.
Self-Printing  Cover open groove
- Hook your finger in this groove to open the printer cover when setting the paper roll.
Paper Setup  Printer cover
- Opens/Closes when setting the paper roll.
 Paper exit
- The printed paper is ejected from here.
 Front cover
- Remove the cover in order to clear a cutter error.
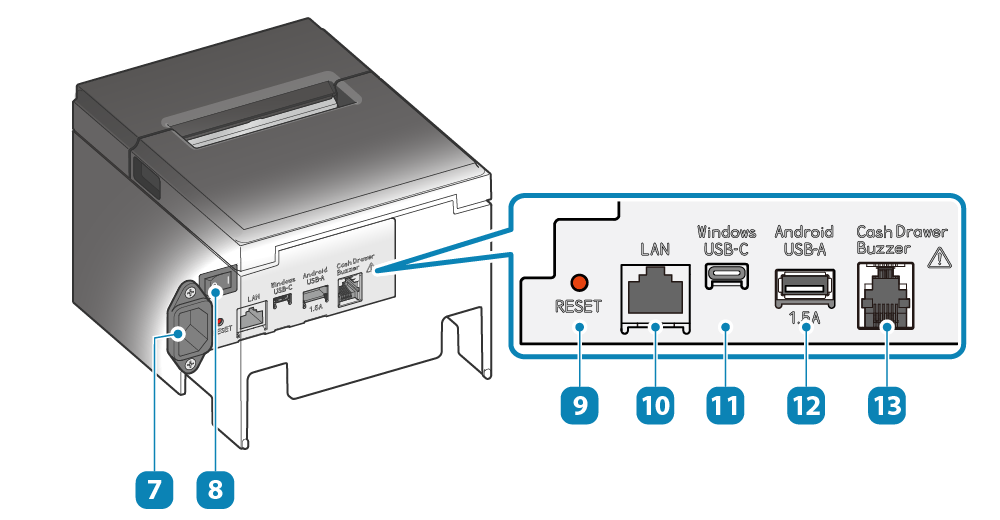
 Power socket
- Connect the power cable that comes with the main unit.
Connect Power Cable  Power switch
- Turns the power on/off.
Turn On/Off Power  Reset switch
- Initializes the main unit network settings.
This manual describes the procedure by using a printer cover that is easier to operate.
Initialize Communication Settings  LAN port
- Connects the LAN cable.
Connect LAN Cable  USB-C port
- Connects a Windows/macOS/Linux device via the USB cable.
Connect USB Cable  USB-A port
- Connect an Android device to the main unit for communication and power supply.
Connect USB Cable
Set Up External Devices  Connector to drive external device
- Connects a buzzer or cash drawer.
Set Up External Devices - External device drive connector
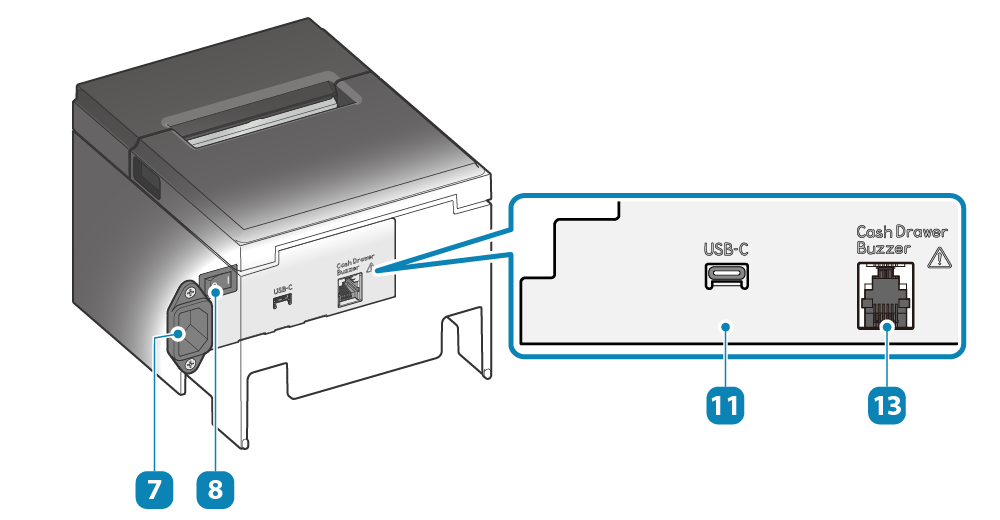
- Power socket
- Connect the power cable that comes with the main unit.
Connect Power Cable - Power switch
- Turns the power on/off.
Turn On/Off Power - USB-C port
- Connects a Windows/macOS/Linux device via the USB cable.
Connect USB Cable - Connector to drive external device
- Connects a buzzer or cash drawer.
Set Up External Devices - External device drive connector
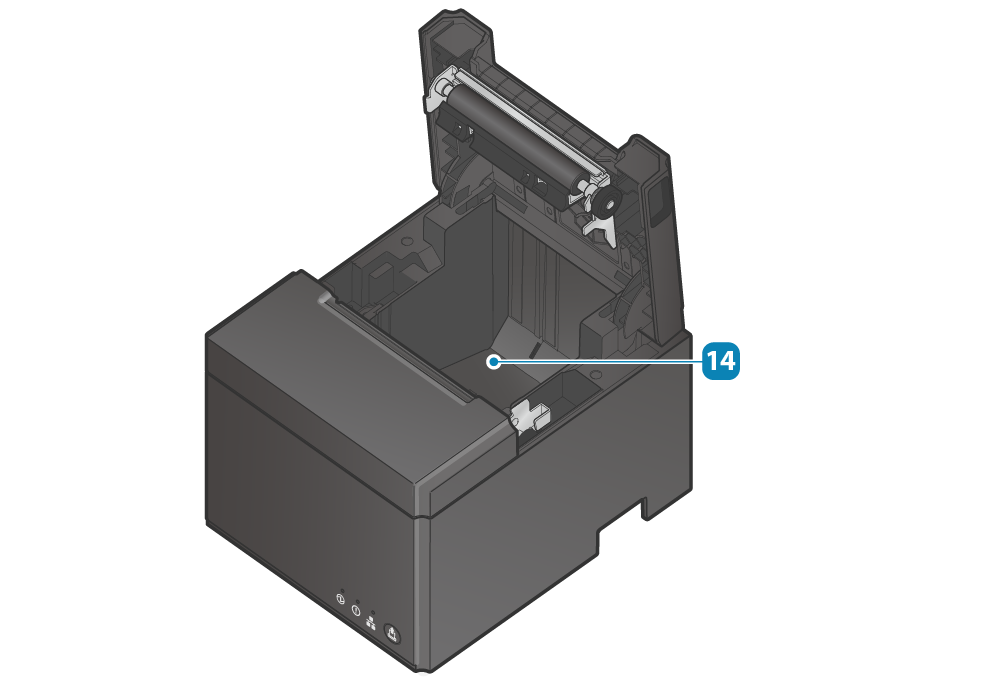
 Paper roll holder
Paper Setup
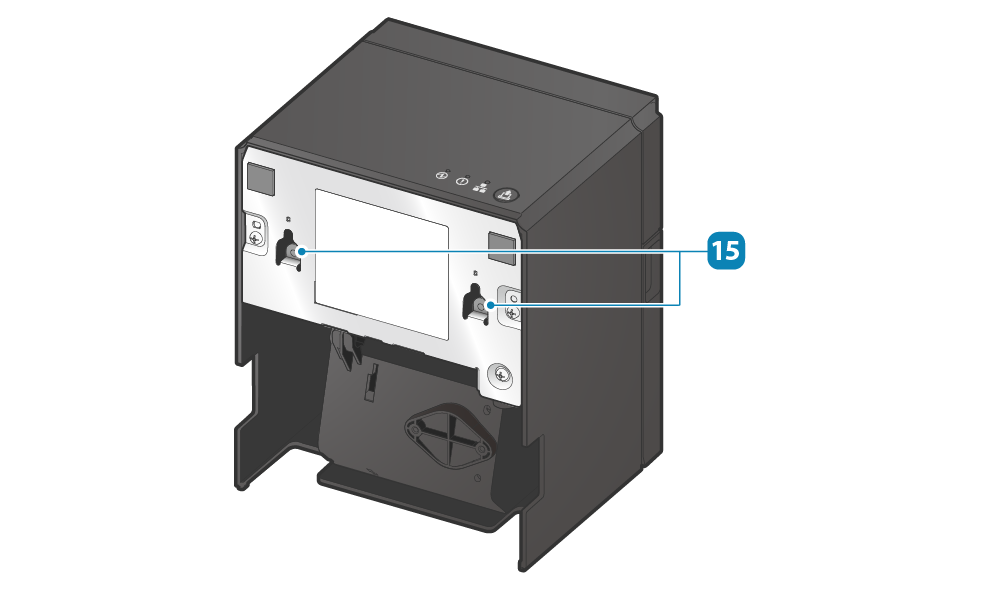
 Wall-mounting holes
Wall-mounting holes