Connect Cables
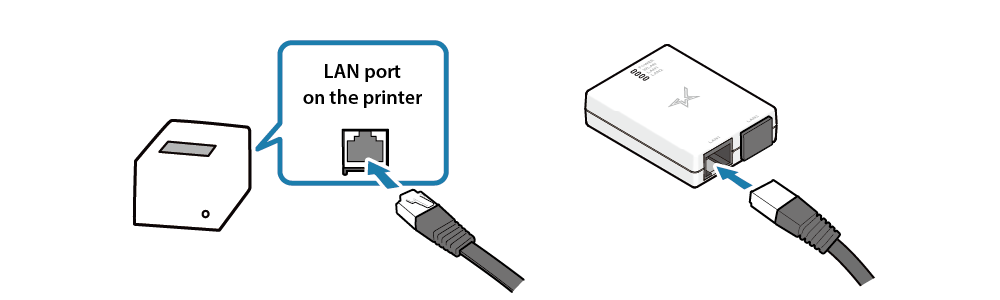
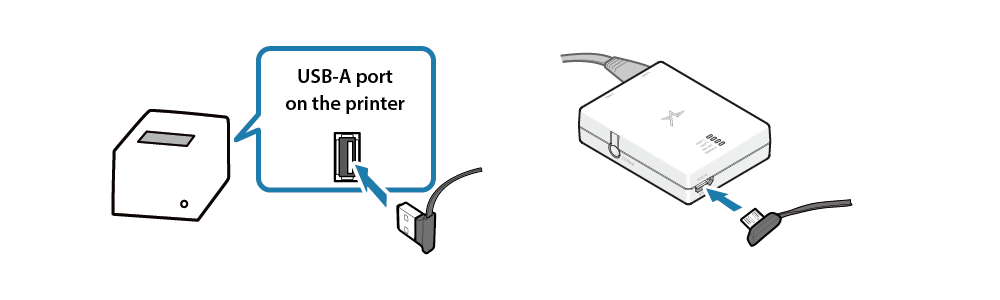
Use the provided LAN cable and USB cable to connect the printer and Wireless LAN Unit.
Caution
- This product uses the USB port for power supply. Data communication is performed via the LAN ports. Be sure to connect both cables.
- Before beginning installation, be sure to turn OFF the power at the printer to be connected, and then disconnect the power plug from the electric outlet.
- Be sure to connect a Star Micronics compatible printer to the LAN1 port.
1. Use the provided LAN cable to connect the printer and the Wireless LAN Unit.
2. Use the provided USB cable to connect the printer and the Wireless LAN Unit.
Note
When using a MCP21LB/LBNH or MCP31L/LB/LNH/LBNH, connect to the USB-A port (iPad 2.4A) at the position shown in the figure below.
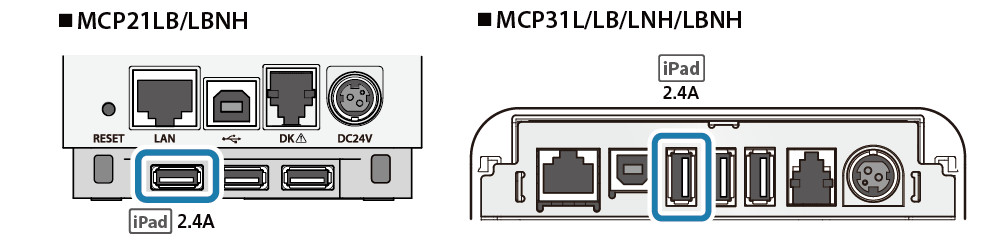
Example: MCP21LB, MCP31L/LB
Caution
When using mC-Print3
- Install the rear cover onto mC-Print3 before using it.
When using mC-Print2
- Due to physical restrictions, it is impossible to use the USB-A port (0.5A) located next to the port where the provided USB-A cable is connected (iPad 2.4A).