Use Star SteadyLAN
The contents to be displayed and procedures vary depending on the operating system of the host device (PC, smartphone, or tablet) you want to use.
Select the operating system for display.
SteadyLAN function
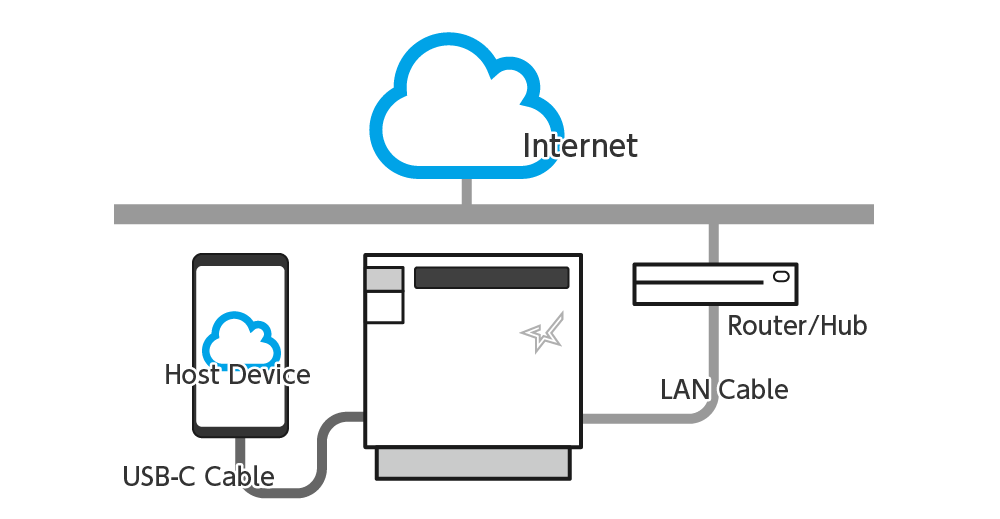
By using a USB cable to connect a host device such as a PC/tablet such as a tablet/smartphonesuch as an iPhone/iPad that supports USB PD (USB Power Delivery) to an mC-Print3 that is connected to a network, it is possible to use the Internet from the host device without using Wi-Fi communications.
At the same time, the device can communicate with the printer via USB communication or LAN communication, and power is supplied from the printer.
This not only simplifies the wiring, but because all parts of the solution are wired, more stable network connections are possible.
This function has been tested with iOS 10.1.1 and later.
This function is supported by Android 9.0 or later.
This function is supported by Windows 10 or later. Before using this function, install the printer driver. Use App
Even when using a host device that does not support USB PD, network connection is possible via the USB cable when the USB connection type supports communication. (However power supply is not performed.)
SteadyLAN is "Disabled" in the factory default setting of the printer. Follow the procedure below and configure the settings before use.
When using a single iOS device, this function cannot be used simultaneously via Bluetooth communication.
Caution
When the SteadyLAN is "Enabled" and the host device is connected to a USB-C port on mC-Print3 that is connected by cable to a network, host device network communication takes priority over the wireless LAN, and the device switches to a wired LAN connection via USB-C. The SteadyLAN function wired LAN connection provides stable communication but may have a slower communication speed than the wireless LAN.
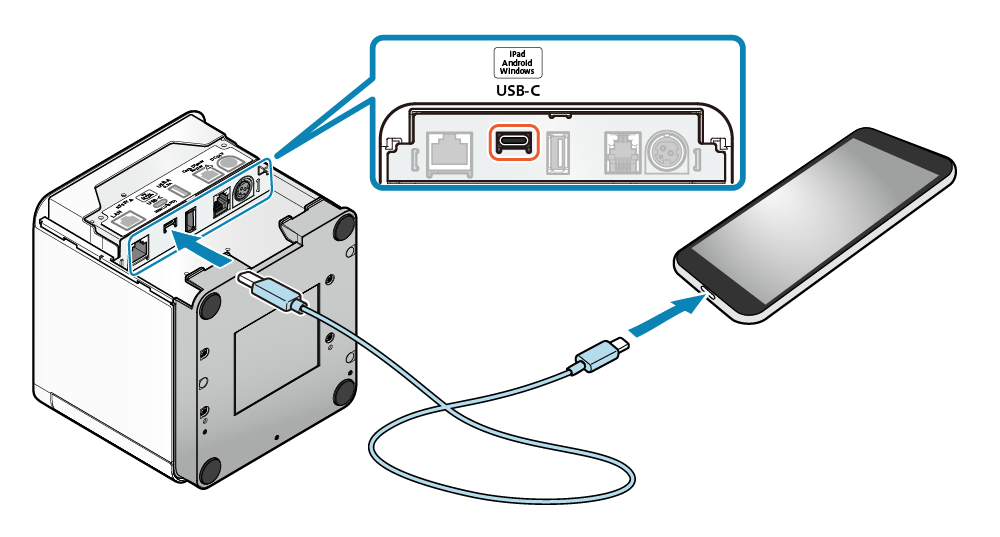
1. Connect the USB cable to the printer
- Connect the USB cable (C-C) or the USB cable (C-A) that was commercially available or was provided with the smartphone or tablet, or the Lightning cable (C-Lightning) to the USB-C port on the printer.
Note
When using a USB cable (C-A), power supply is not performed.
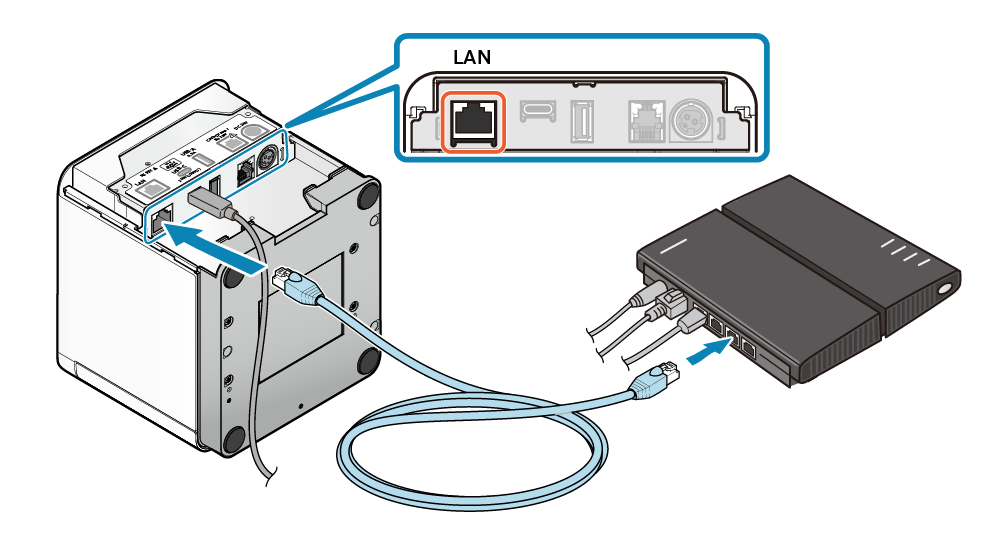
2. Connect the printer to the network
- Connect the LAN cable to the printer LAN connector, and connect the plug on the other end to the hub, router, or other network device.
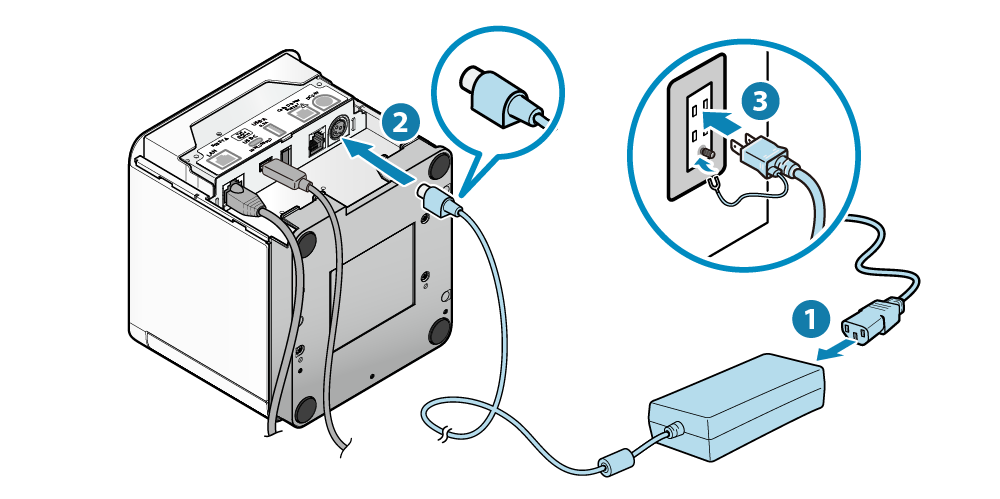
3. Connect the AC adapter to the printer
- Connect the power cable to the AC adapter
 and connect the AC adapter plug to the printer
  . Then insert the power cable plug into the outlet
  .
.
4. Turn ON the printer power
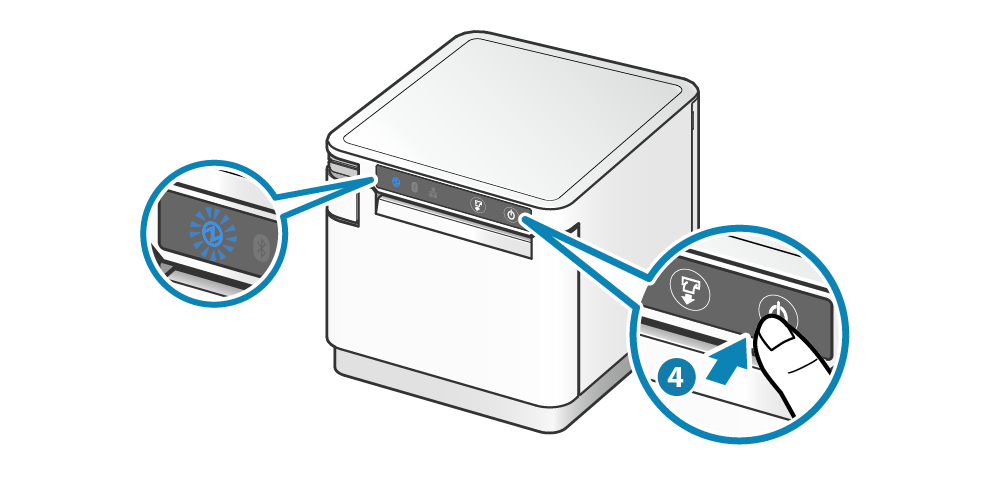
- Press the Power button on the right side of the operation panel on the front of the main unit. When the Power LED lights up, release the Power button.
5. Enable SteadyLAN
- Use the special app to configure the printer network and SteadyLAN settings.
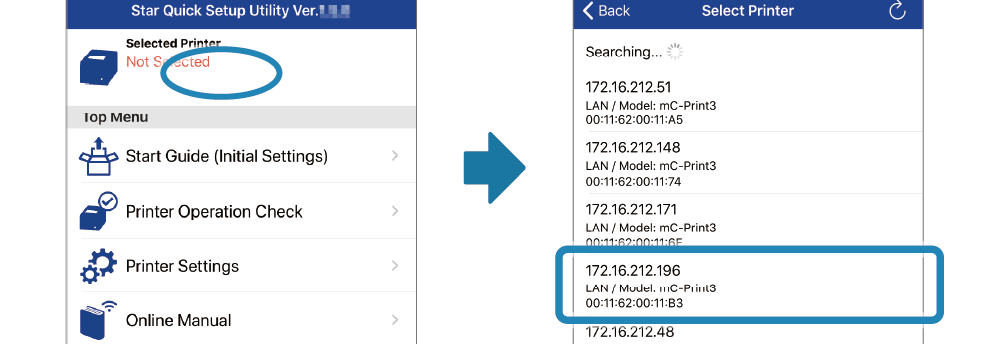
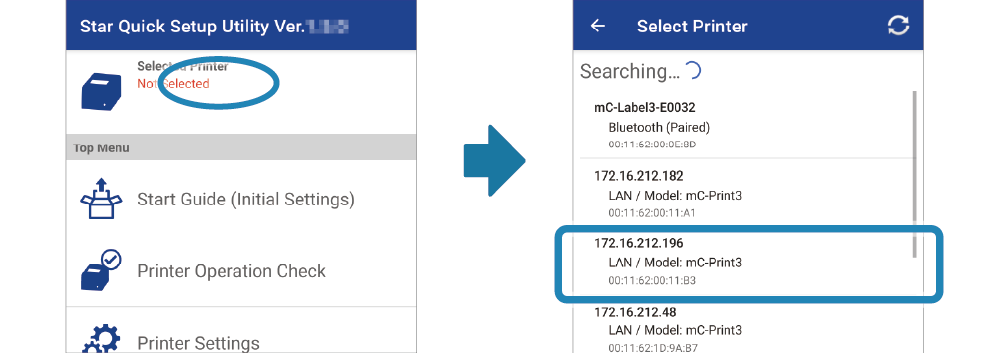
Download and install Star Quick Setup Utility. Use App - Start Star Quick Setup Utility and select to the connected printer.
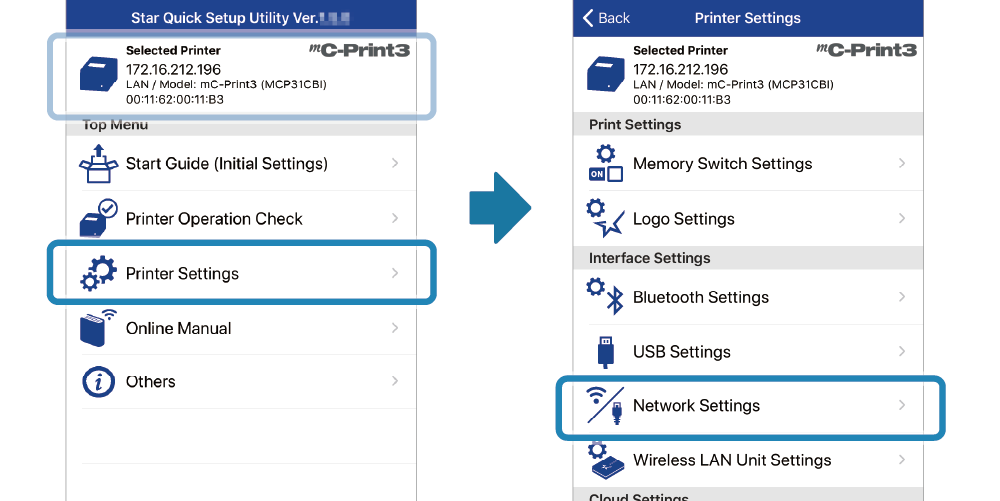
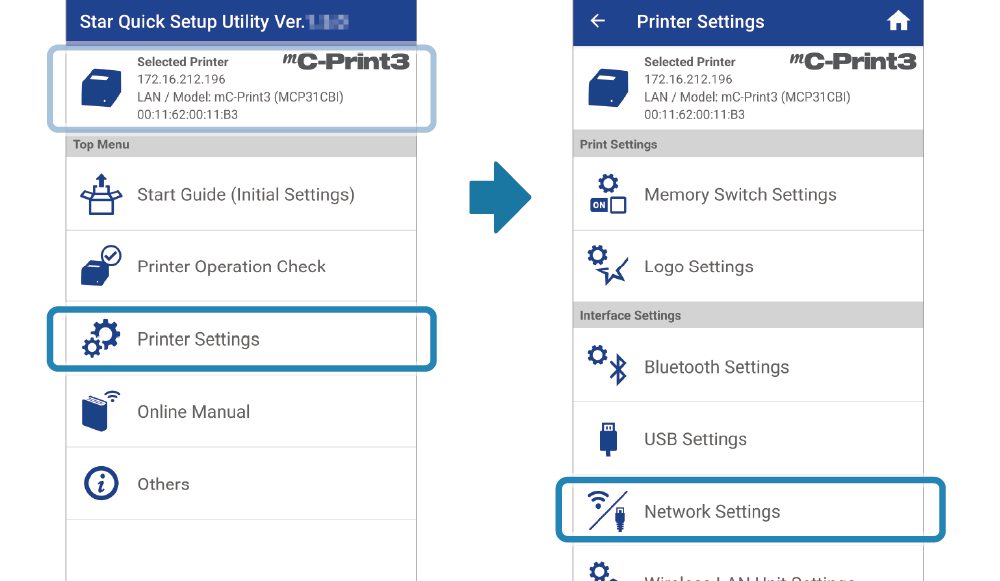
- The connected printer is displayed.
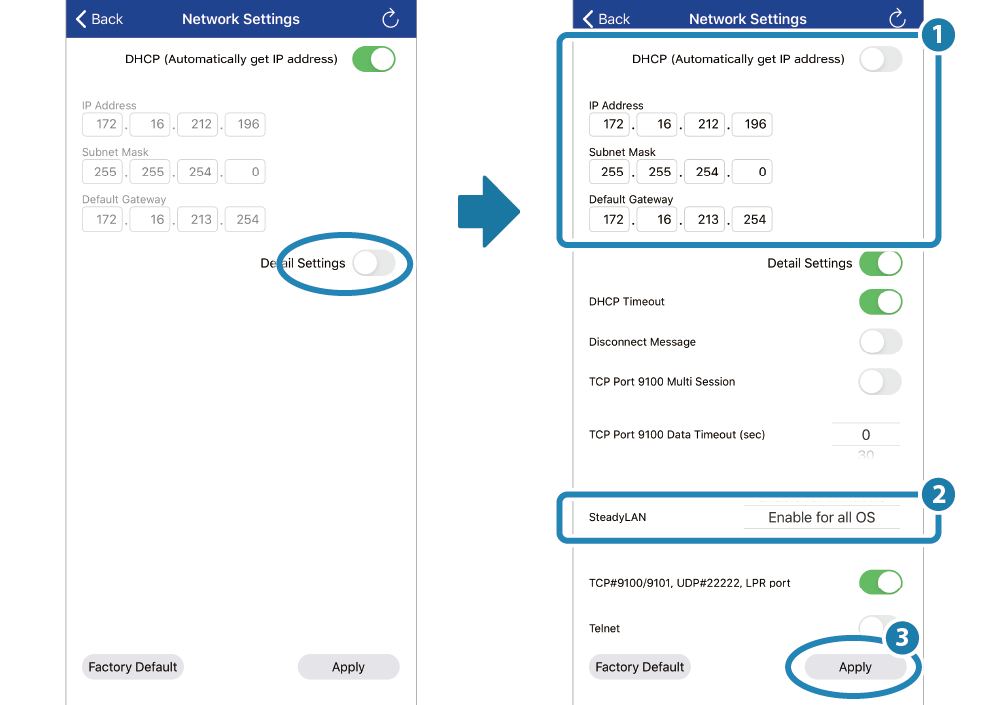
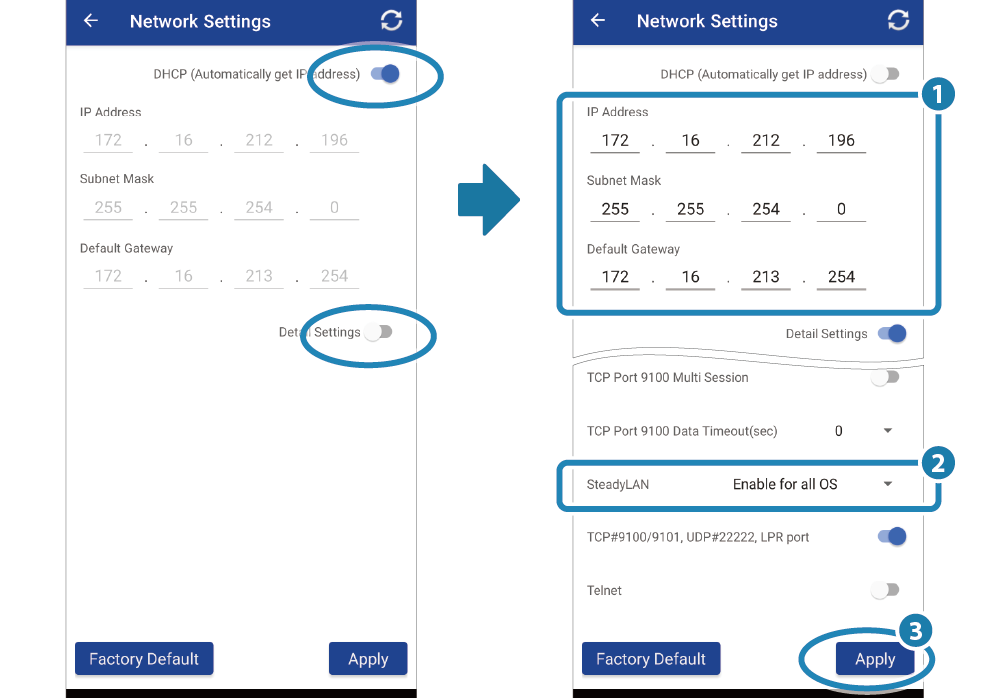
Open [Printer Settings] - [Network Settings]. - Display the Detail Settings, set up the network (static IP address of the printer)
 and set SteadyLAN to "Enabled"
 , and tap [Apply]
 .
.
- Use the special app to configure the printer network and SteadyLAN settings.
Download and install Star Quick Setup Utility. Use App - Start Star Quick Setup Utility and select to the connected printer.
- The connected printer is displayed.
Open [Printer Settings] - [LAN Settings]. - Display the Detail Settings, set up the network (static IP address of the printer)
 and set SteadyLAN to "Enabled"
 , and tap [Apply]
 .
.
- Use the special app to configure the printer network and SteadyLAN settings.
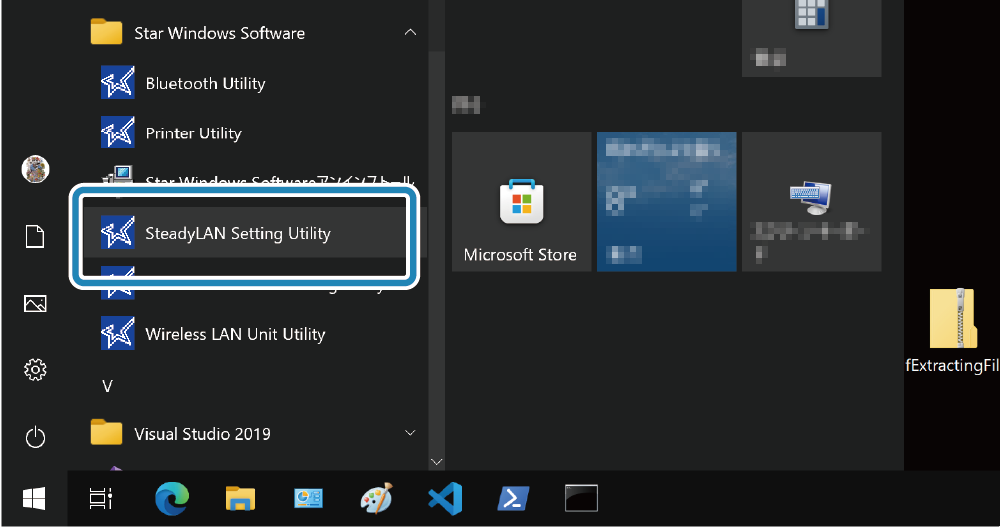
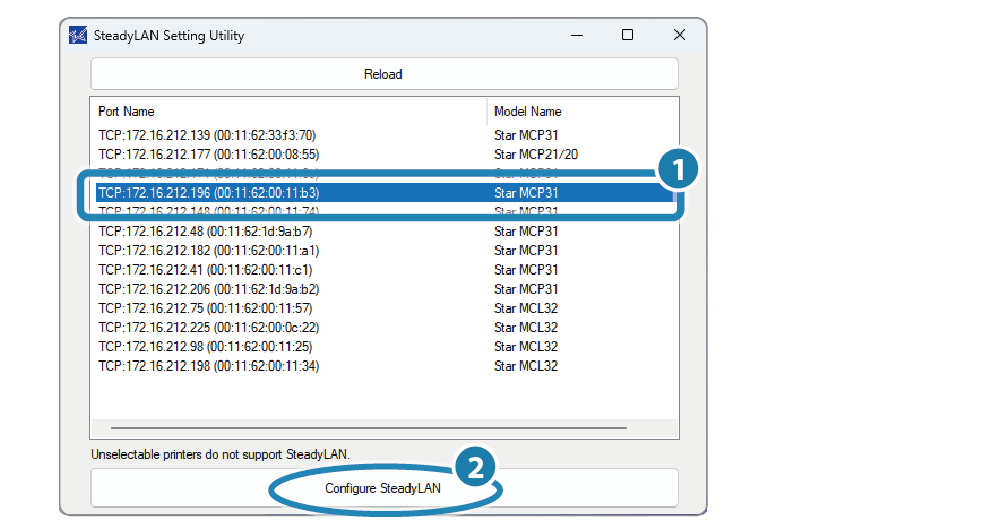
Download and install Star Windows Software. Use App - From the Start menu, start [Star Windows Software] - [SteadyLAN Setting Utility].
- Select the connected printer
 and tap [Configure SteadyLAN]
  .
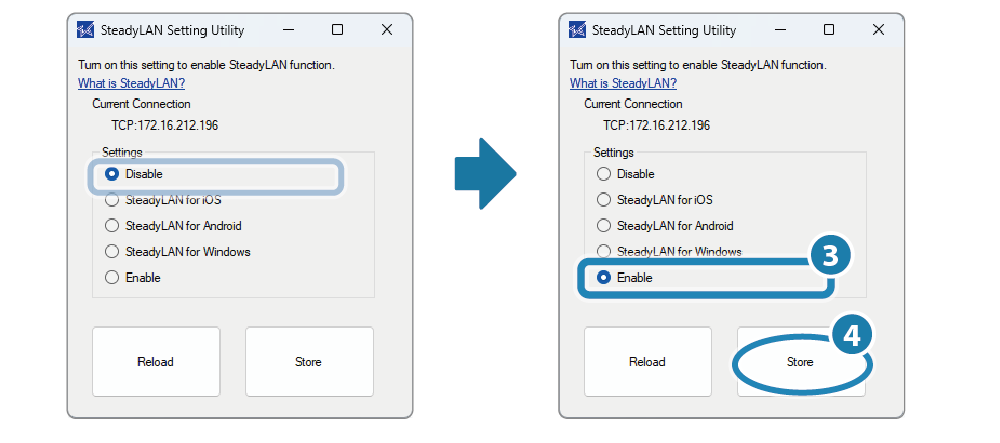
. - Select Enabled
 and tap [Store]
  .
. - When the "Success" dialog box appears, SteadyLAN setting is completed.
Tap [OK] to exit SteadyLAN Setting Utility.

6. Connect the host device to the printer
- Take the plug on the other end of the USB cable or the Lightning cable that was connected to the printer in Step 1, and connect it to the host device.


Reference information
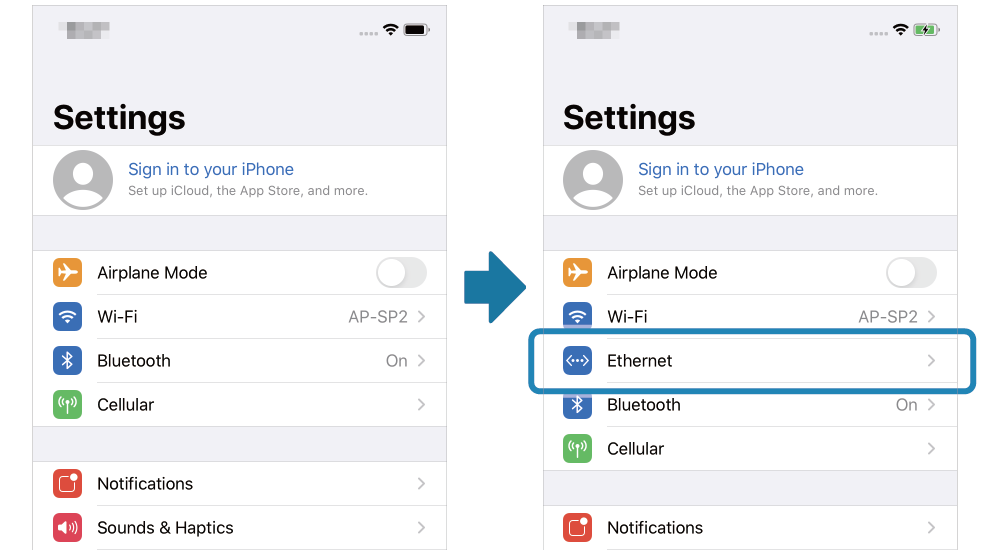
When the iOS device is connected to the printer, "Ethernet" is displayed in the iOS device settings.
With many models, when host device communication is changed from wireless LAN to wired LAN, the Wi-Fi icon changes to the Ethernet icon.


7. Turn OFF the host device Wi-Fi
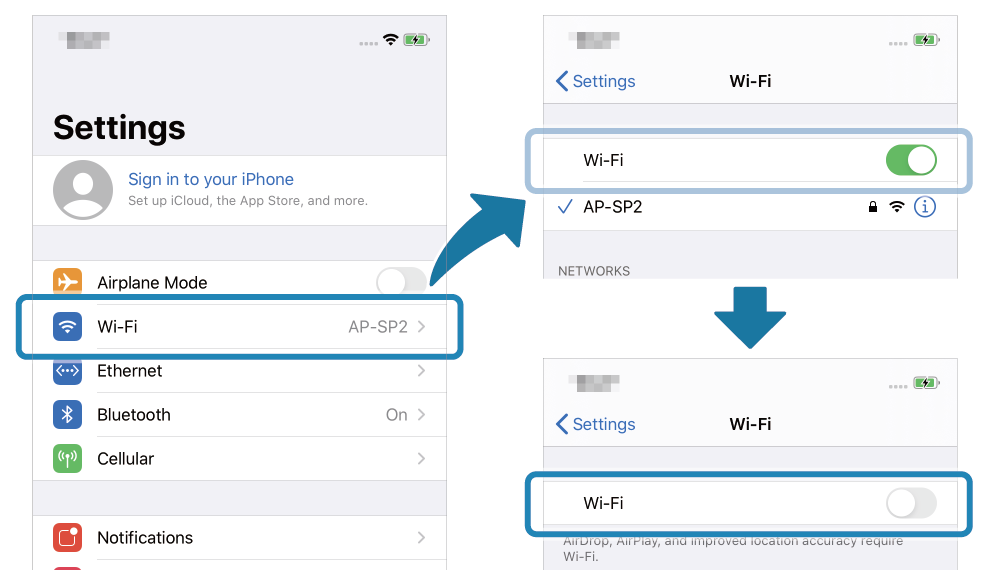
- Set Wi-Fi to "OFF" from [Settings] - [Wi-Fi] on the iOS device.
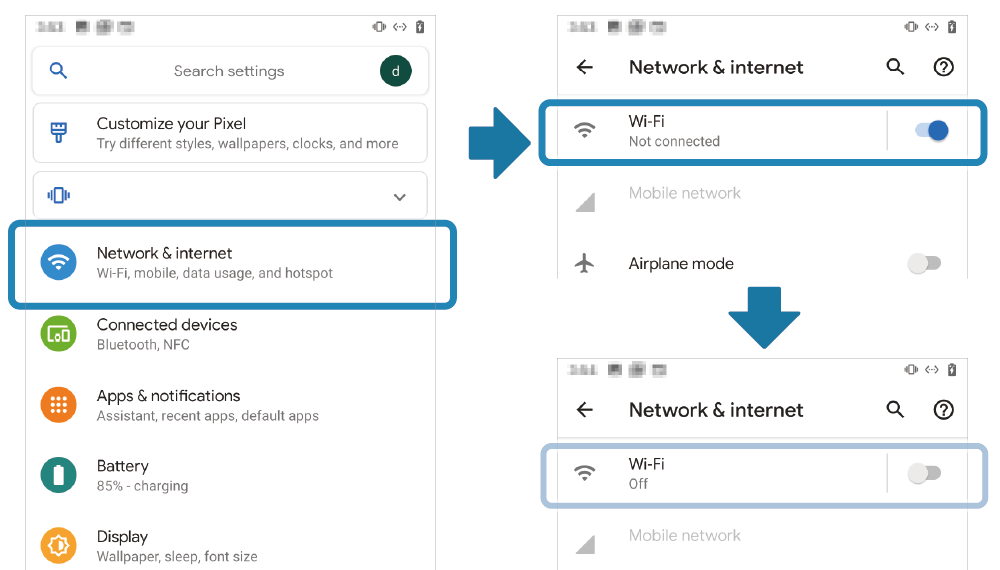
- Open [Settings] - [Network & Internet], and set Wi-Fi to "OFF."
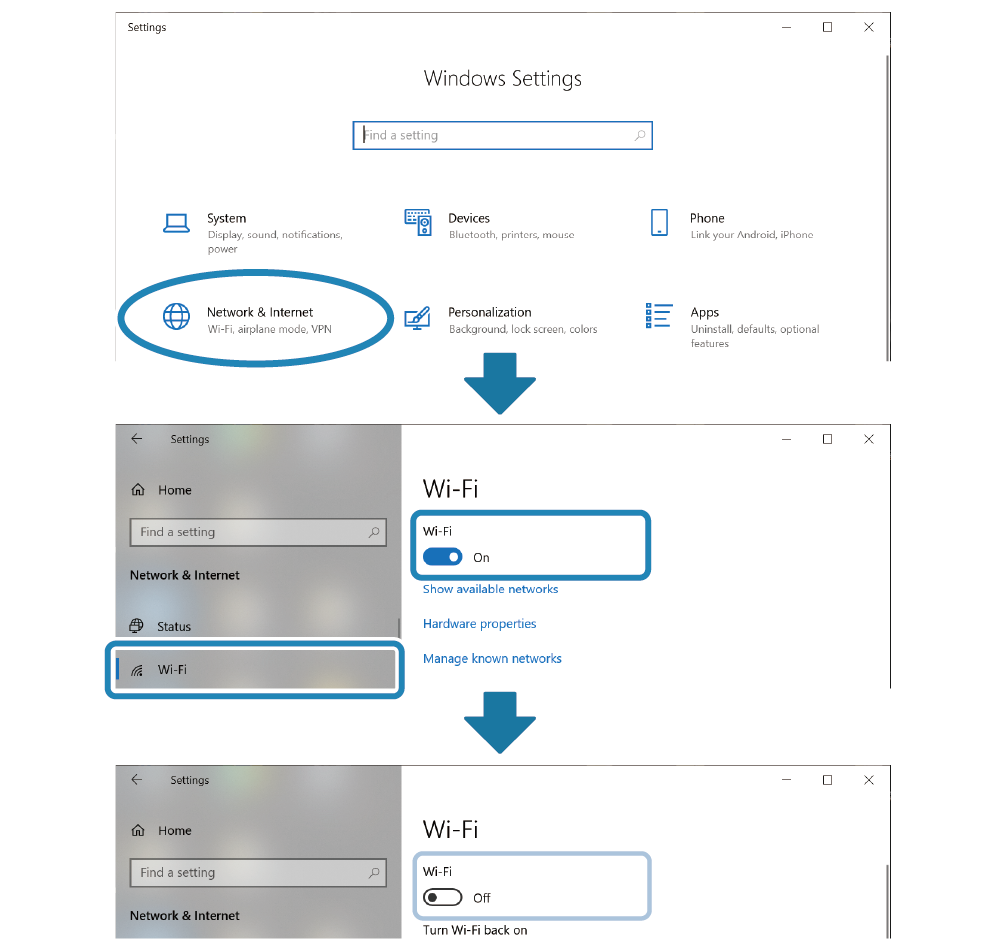
- Open [Settings] - [Network & Internet], and set Wi-Fi to "OFF."
Note
The IP address and MAC address used differ between Wi-Fi and wired LAN (Ethernet). Configure the wired LAN network settings if necessary.