Paper Setup
Use paper that meets the specifications of the printer. Paper Roll Specifications
When using 58mm wide roll or 40mm label paper roll, mount the paper roll guide to the printer. Paper Roll Guide
Note
The TSP100IV SK is not recommended for switching between label paper roll and receipt paper roll during operation.
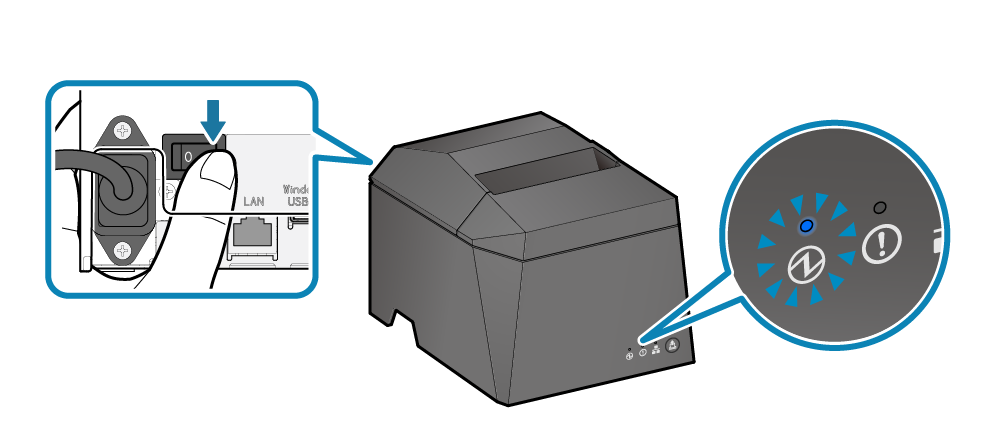
1. Turn power on
- Set paper with the power turned on to automatically feed and cue the paper.
2. Open printer cover
- Push the opening lever
 to open the printer cover
  .
.
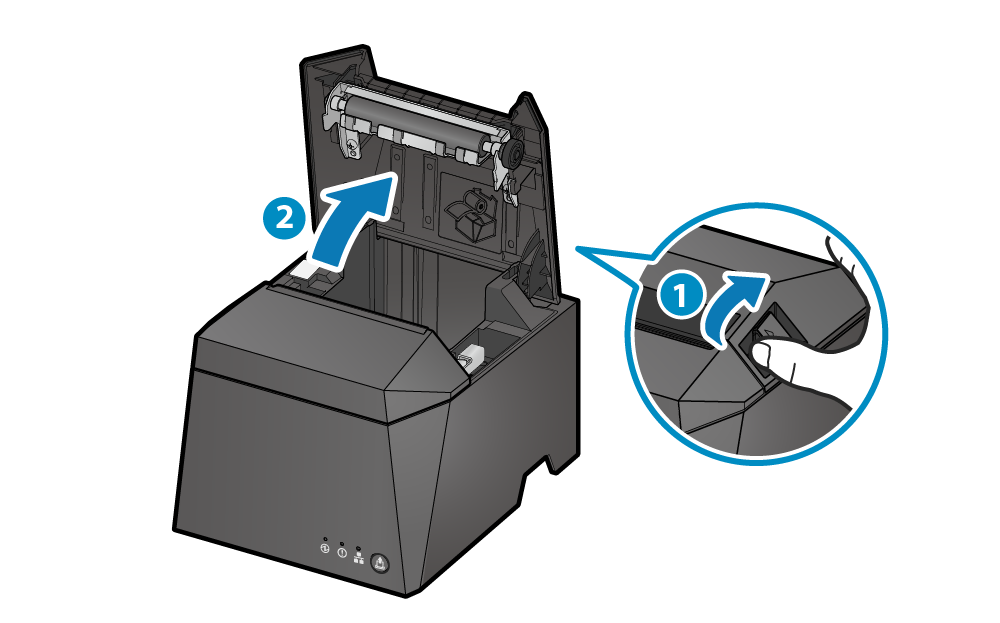
Caution
When replacing paper, remove the paper core remaining in the paper roll holder.
3. Paper setup
- Set the paper roll in the direction shown in the illustration
 .
.
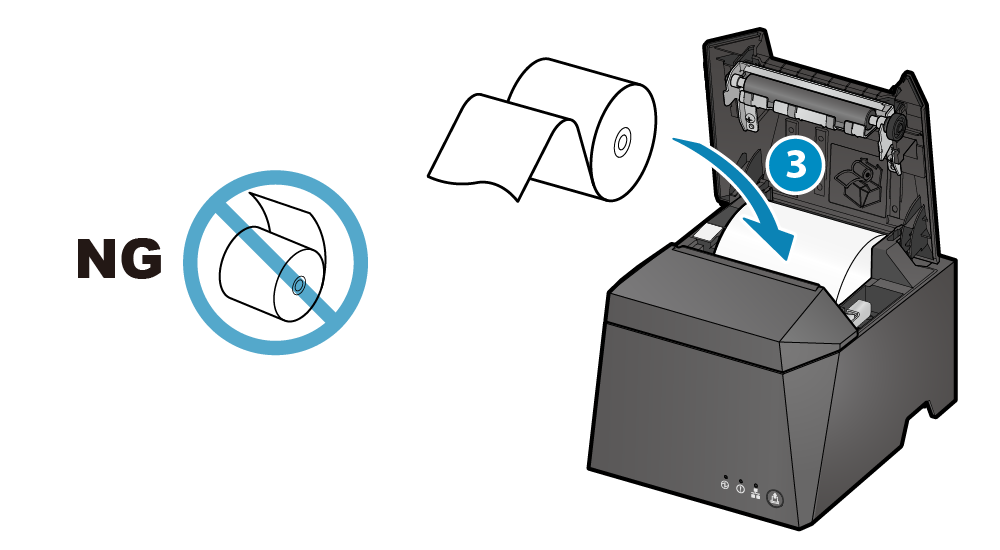
Note
To prevent a paper jam, carefully wind the paper tightly from the paper roll before setting it in the printer.
When using vertically
- If the unit is set up vertically using the provided rubber feet or the wall-mounting holes, set the label paper roll as shown in the following illustration.
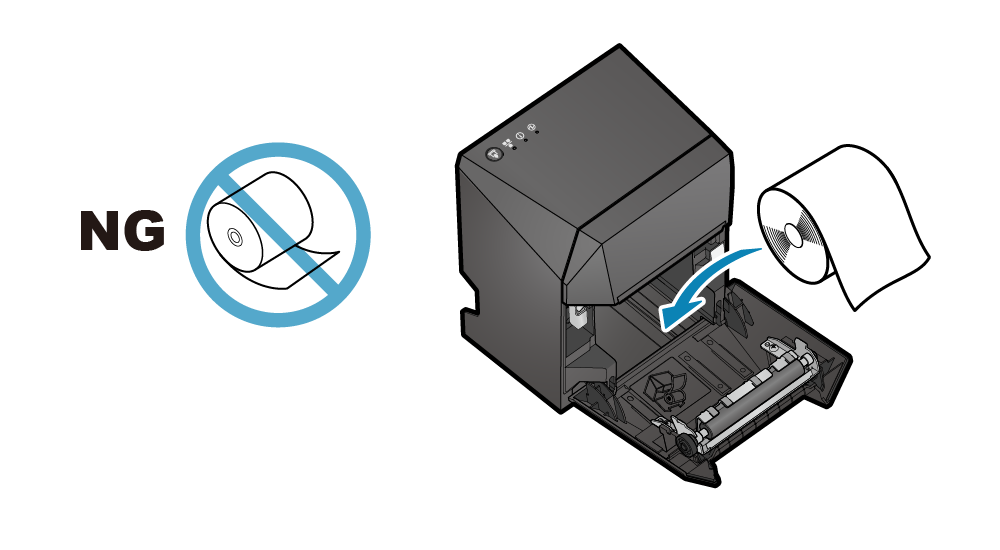
Note
When used in a vertical orientation, use only label paper rolls.
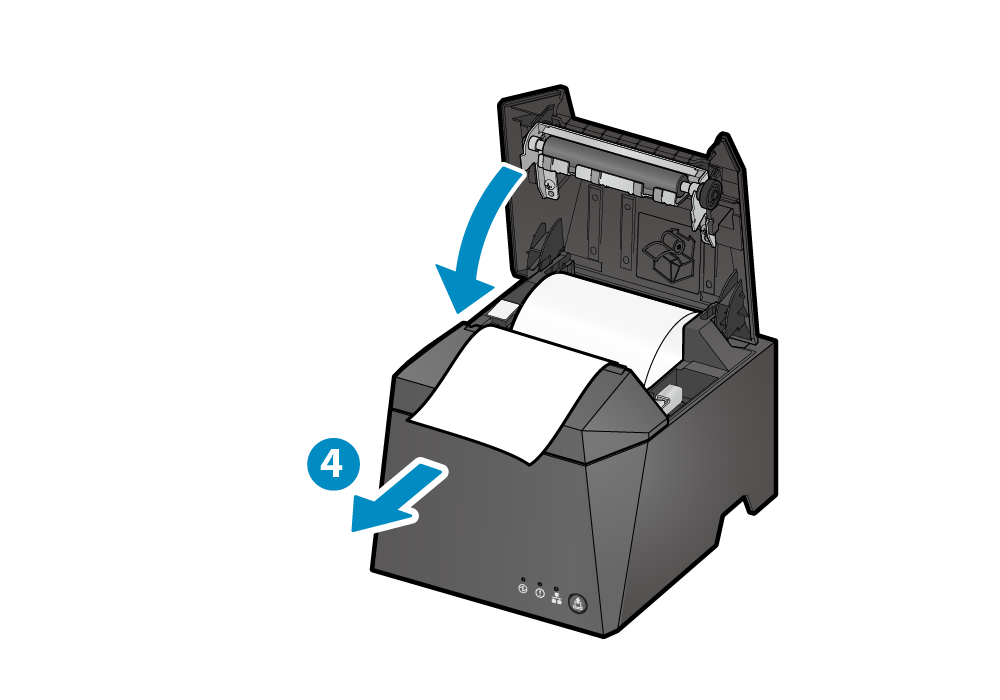
4. Close printer cover
- Pull the end of the paper straight out
 , sandwich the paper and close the printer cover.
The setting is completed when the paper is cut automatically.
- Push both sides as shown in the diagram and close the printer cover.
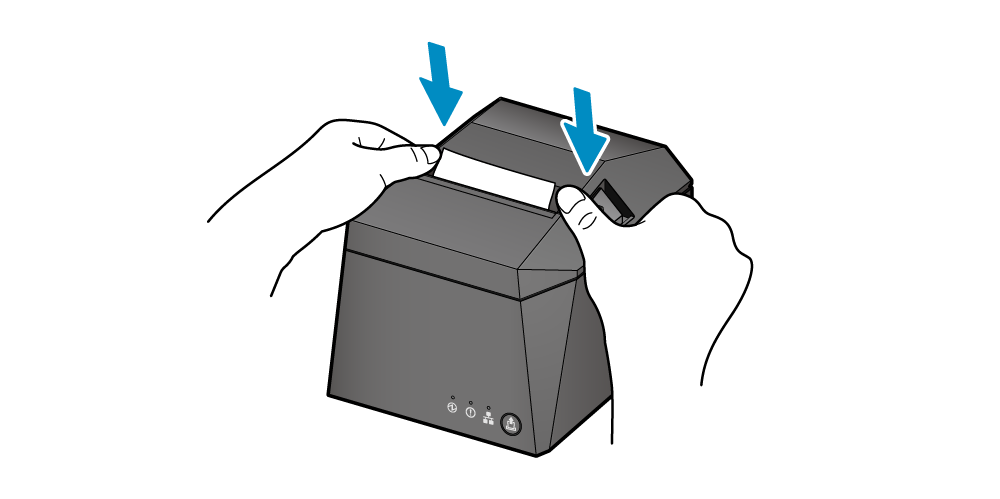
Note
Remove the cut paper that was cut automatically.
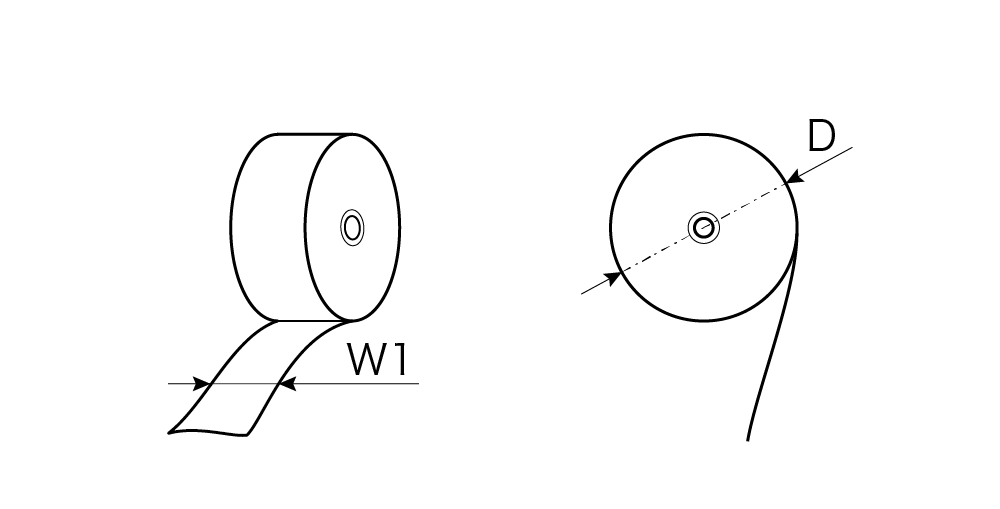
Paper roll specifications
Use paper rolls that comply to the specifications. Applicable specifications vary depending on the paper types.
Linerless sticky label paper
| Paper width [W1] | 79.5±0.5mm / 57.5±0.5mm* / 39.0±0.5mm* |
|---|---|
| Maximum roll diameter [D] | φ83mm |
| Paper thickness | 65 to 98μm |
| Trailing edge treatment |
|
* When using roll paper of this width, use the included paper roll guide.
Receipt paper
| Paper width [W1] | 79.5±0.5mm / 57.5±0.5mm* |
|---|---|
| Maximum roll diameter [D] | φ83mm |
| Paper thickness | 49 to 85μm |
| Trailing edge treatment |
|
* When using roll paper of this width, use the included paper roll guide.
Refer to here for consumable parts.