
Quick Start
The StarXpand SDK includes a sample application that allows you to test printing operation.
As the first step to control the printer using the StarXpand SDK, let's try to build the sample application in the following 4 steps and print a sample receipt.
Step 1. Set Connection between Printer and Device

Step 2. Construct Environment for Native Applications

Step 3. Build Sample Application

Step 1.
Set Connection between Printer and Device
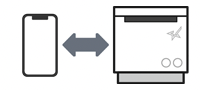
Prepare the printer and make it communicable to a tablet or PC.
Select the printer interface.
Interface
LAN Bluetooth Bluetooth Low Energy USB
Procedure for communication settings
For connection through Bluetooth, you need to first pair the iOS device to the printer.
- 1. Turn the printer power on.
Memo
If you are using TSP650II, TSP650IISK, TSP700II, TSP800II, or SP700, press and hold the PAIR button on the back of the main unit after power-on to blink the LED in green. - 2. Open "Settings" on iOS and select [Bluetooth].
- 3. Turn Bluetooth on.
- 4. Select the device name you would like to pair.
Memo
The pairing method varies depending on the type of printer. If no on-screen instructions are displayed, no action is required.
・If you are prompted to enter a PIN, enter the PIN. (The default is "1234".)
・If a pairing code is displayed on the iOS device, check that the same pairing code is printed by the printer.
After checking, press the feed button on the printer and approve the confirmation on the iOS device. - 5. When pairing is completed, "Connected" will be displayed next to the device name.
Connect the printer and the iOS device to the same network (segment).
- 1. Open "Settings" on iOS and select [Wi-Fi].
- 2. Turn Wi-Fi on.
- 3. Select the network you would like to use and connect the iOS device.
- 4. Turn the printer power on.
- 5. Plug the LAN cable into the printer and connect the printer and the iOS device to the same network (same segment).
Memo
The default for the Star POS printer is "DHCP: Enabled".
For an environment without DHCP, select "Supported OS and Environment List > Utility List" on this link, see "Ethernet Printer User Guide", and set a static IP address for the printer.
Connect the printer and the iOS device with Bluetooth Low Energy.
- 1. Turn the printer power on.
- 2. Turn Bluetooth on of iOS device.
Memo
Pairing between the iOS device and the printer is required depending on the supported models.
Pairing is performed via the API library, so pairing is not required from the device’s settings screen.
Refer to [API User Guide - Pairing]for details.
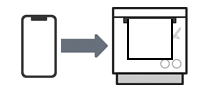
Turn the printer power on and connect the iOS device to the printer with the USB cable or Lightning cable.
Memo
USB ports communicable with iOS devices vary depending on the printer.
Check the online manual of the printer you are using or the Hardware Manual.
Connect the printer and the Android device to the same network (segment).
- 1. From the Android Settings, select Network & Internet > Internet.
- 2. Turn Wi-Fi on, select the network you would like to use, and connect the Android device.
- 3. Turn the printer power on.
- 4. Plug the LAN cable into the printer and connect the printer and the Android device to the same network (same segment).
Memo
The default for the Star POS printer is "DHCP: Enabled".
For an environment without DHCP, select "Supported OS and Environment List > Utility List" on this link, see "Ethernet Printer User Guide", and set a static IP address for the printer.
For connection through Bluetooth, you need to first pair the Android device with the printer.
- 1. Turn the printer power on.
Memo
If you are using TSP650II, TSP650IISK, TSP700II, TSP800II, or SP700, press and hold the PAIR button on the back of the main unit after power-on to blink the LED in green. - 2. Turn Bluetooth on for the Android device.
- 3. From the Android Settings, select Connected devices > + Pair new device.
- 4. Select the device name you would like to pair.
Memo
The pairing method varies depending on the type of printer. If no on-screen instructions are displayed, no action is required.
・If you are prompted to enter a PIN, enter the PIN. (The default is "1234".)
・If a pairing code is displayed on the Android device, check that the same pairing code is printed by the printer.
After checking, press the feed button on the printer and approve the confirmation on the Android device. - 5. When pairing is complete, the device name will be displayed under "Paired devices".
Connect the printer and the Android device with Bluetooth Low Energy.
- 1. Turn the printer power on.
- 2. Turn Bluetooth on of Android device.
Memo
Pairing between the Android device and the printer is required depending on the supported models.
Pairing is performed via the API library, so pairing is not required from the device’s settings screen.
Refer to [API User Guide - Pairing]for details.
Turn the printer power on and connect the Android device to the printer with the USB cable.
Memo
USB ports communicable with Android devices vary depending on the printer.
Check the online manual of the printer you are using or the Hardware Manual.
Step 2.
Prepare Development Environment for iOS Applications
Step 2.
Prepare Development Environment for Android Applications
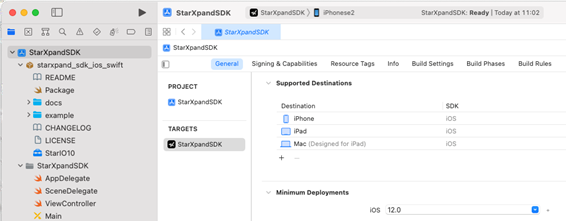
Prepare a development environment for iOS applications.
Install Xcode.
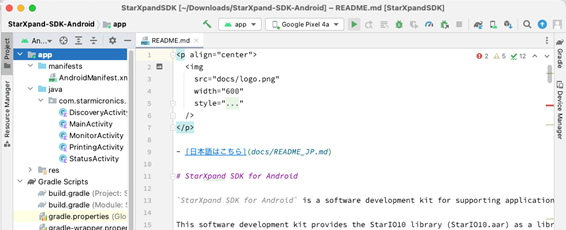
Prepare a development environment for Android applications.
Install Android Studio.
- Android Studio:
- https://developer.android.com/studio
Memo
For the supported development environments, see here.
Step 3.
Build Sample Application
Execute the following command to clone the StarXpand SDK from GitHub.
$ git clone https://github.com/star-micronics/StarXpand-SDK-iOS.git
Memo
The ZIP package of the StarXpand SDK is available for download on our Developer site. Obtain the ZIP package from the following URL and unzip it.
https://starmicronics.com/support/developers/ios-sdks/
From the Xcode menu, select File > Open... to open the SDK sample application project and build the sample application.
Execute the following command to clone the StarXpand SDK from GitHub.
$ git clone https://github.com/star-micronics/StarXpand-SDK-Android.git
Memo
The ZIP package of the StarXpand SDK is available for download on our Developer site. Obtain the ZIP package from the following URL and unzip it.
https://starmicronics.com/support/developers/android-sdks/
From the Android Studio menu, select File > Open... to open the SDK sample application project and build the sample application.
Step 4.
Print Sample Receipt
When the build succeeds, the print screen sample application starts.
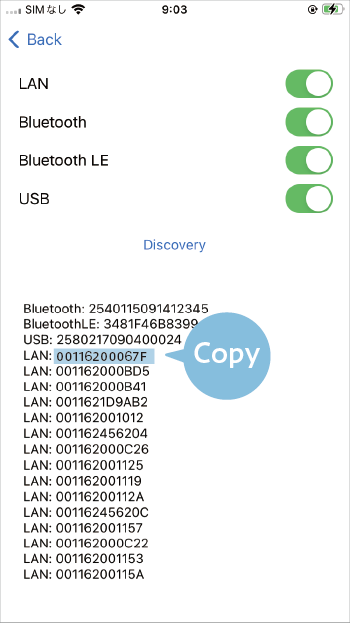
First, search for the printer. Tap Discovery.
First, search for the printer. Tap [Discovery].


When you select Interface and tap Discovery, printers that can be connected to tablets are displayed.
The text following ":" indicates the printer Identifier.
Copy the Identifier because it will be used to specify the destination printer in the next step.
When you select Interface and tap [Discovery], printers that can be connected to tablets are displayed.
The text following ":" indicates the printer “Identifier”.
Take note of the Identifier because it will be used to specify the destination printer in the next step.

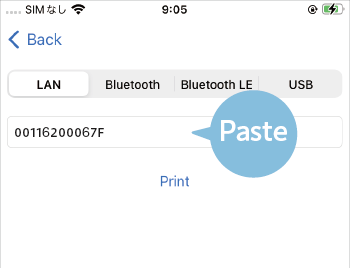
Finally, print a sample receipt.
Go back to the previous screen and tap Printing.
Enter the printer Identifier you copied on the Discovery screen in the Identifier field and tap Print.
A pairing request screen appears and a passkey entry is required when connecting the printer for the first time.There is a time limit for input, and the required passkey value varies by model. Refer to the manual for each model and confirm the passkey to be entered in advance.
Pairing is performed only during the initial connection with the printer and will not occur again thereafter after a successful pairing. If you reset the Bluetooth settings on your device or replace the printer, pairing will be required again.
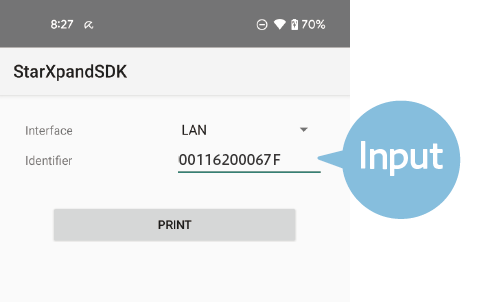
Lastly, print a sample receipt.
Go back to the previous screen and tap [Printing].
Enter the printer Identifier of which you took note on the Discovery screen in the Identifier field and tap [Print].
A pairing request screen appears and a passkey entry is required when connecting the printer for the first time.There is a time limit for input, and the required passkey value varies by model. Refer to the manual for each model and confirm the passkey to be entered in advance.
Pairing is performed only during the initial connection with the printer and will not occur again thereafter after a successful pairing. If you reset the Bluetooth settings on your device or replace the printer, pairing will be required again.
Was the sample receipt successfully printed?
Next, let's use the printer from your application. Refer to API User Guide.