Quick Start
The Star Document Markup Designer feature of the Star Micronics cloud service allows you to edit and preview documents in Star Document Markup format through intuitive UI operations.
Let's create print data in Star Document Markup format according to the following four steps:

Step 1. Accessing the Star Document Markup Designer
1 Access the Star Document Markup Designer at the following URL:
https://star-document-markup-designer.smcs.site/main/index#home
Step 2. Selecting the Template
1 Click [CREATE FROM TEMPLATES] and select the template from the list that appears.
* In this example, select "Sample." 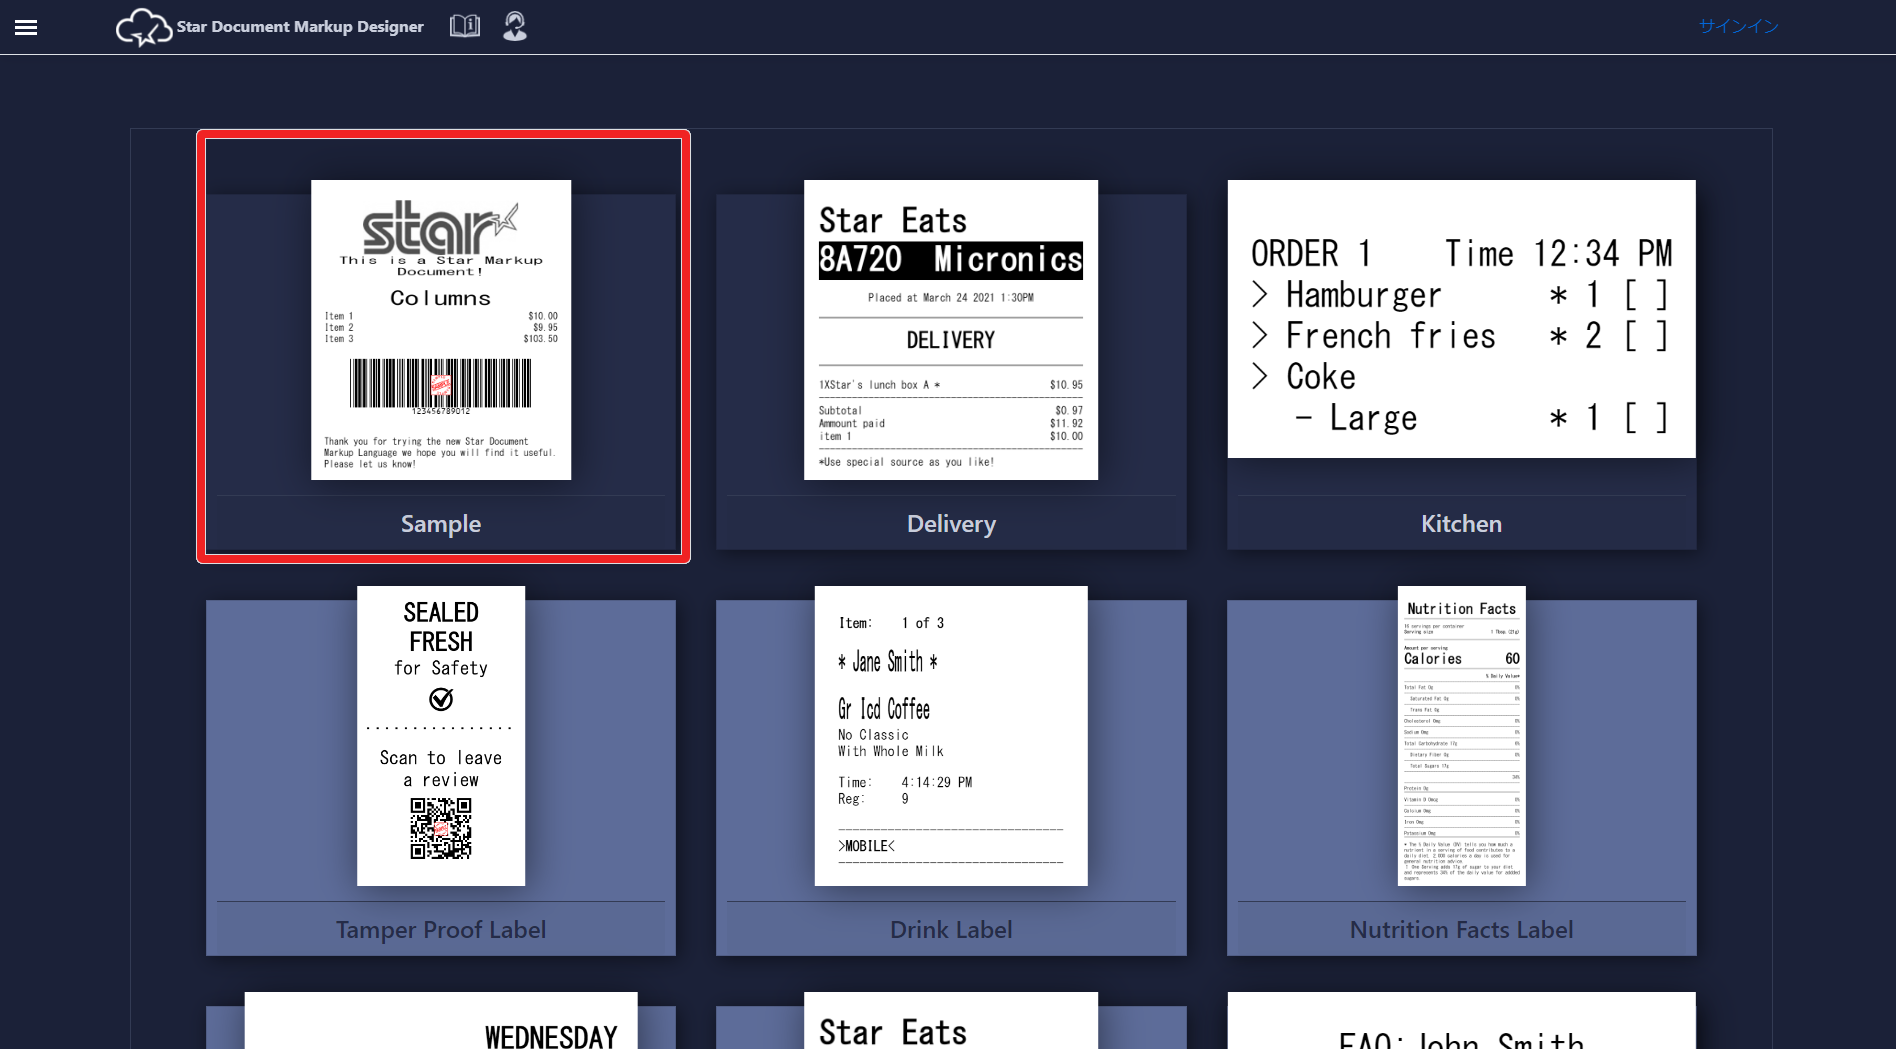
Step 3. Editing or Adding Tags
1 Edit the template.
Icons listed on the left represent tags, and the corresponding print data to be generated from each tag is previewed on the right.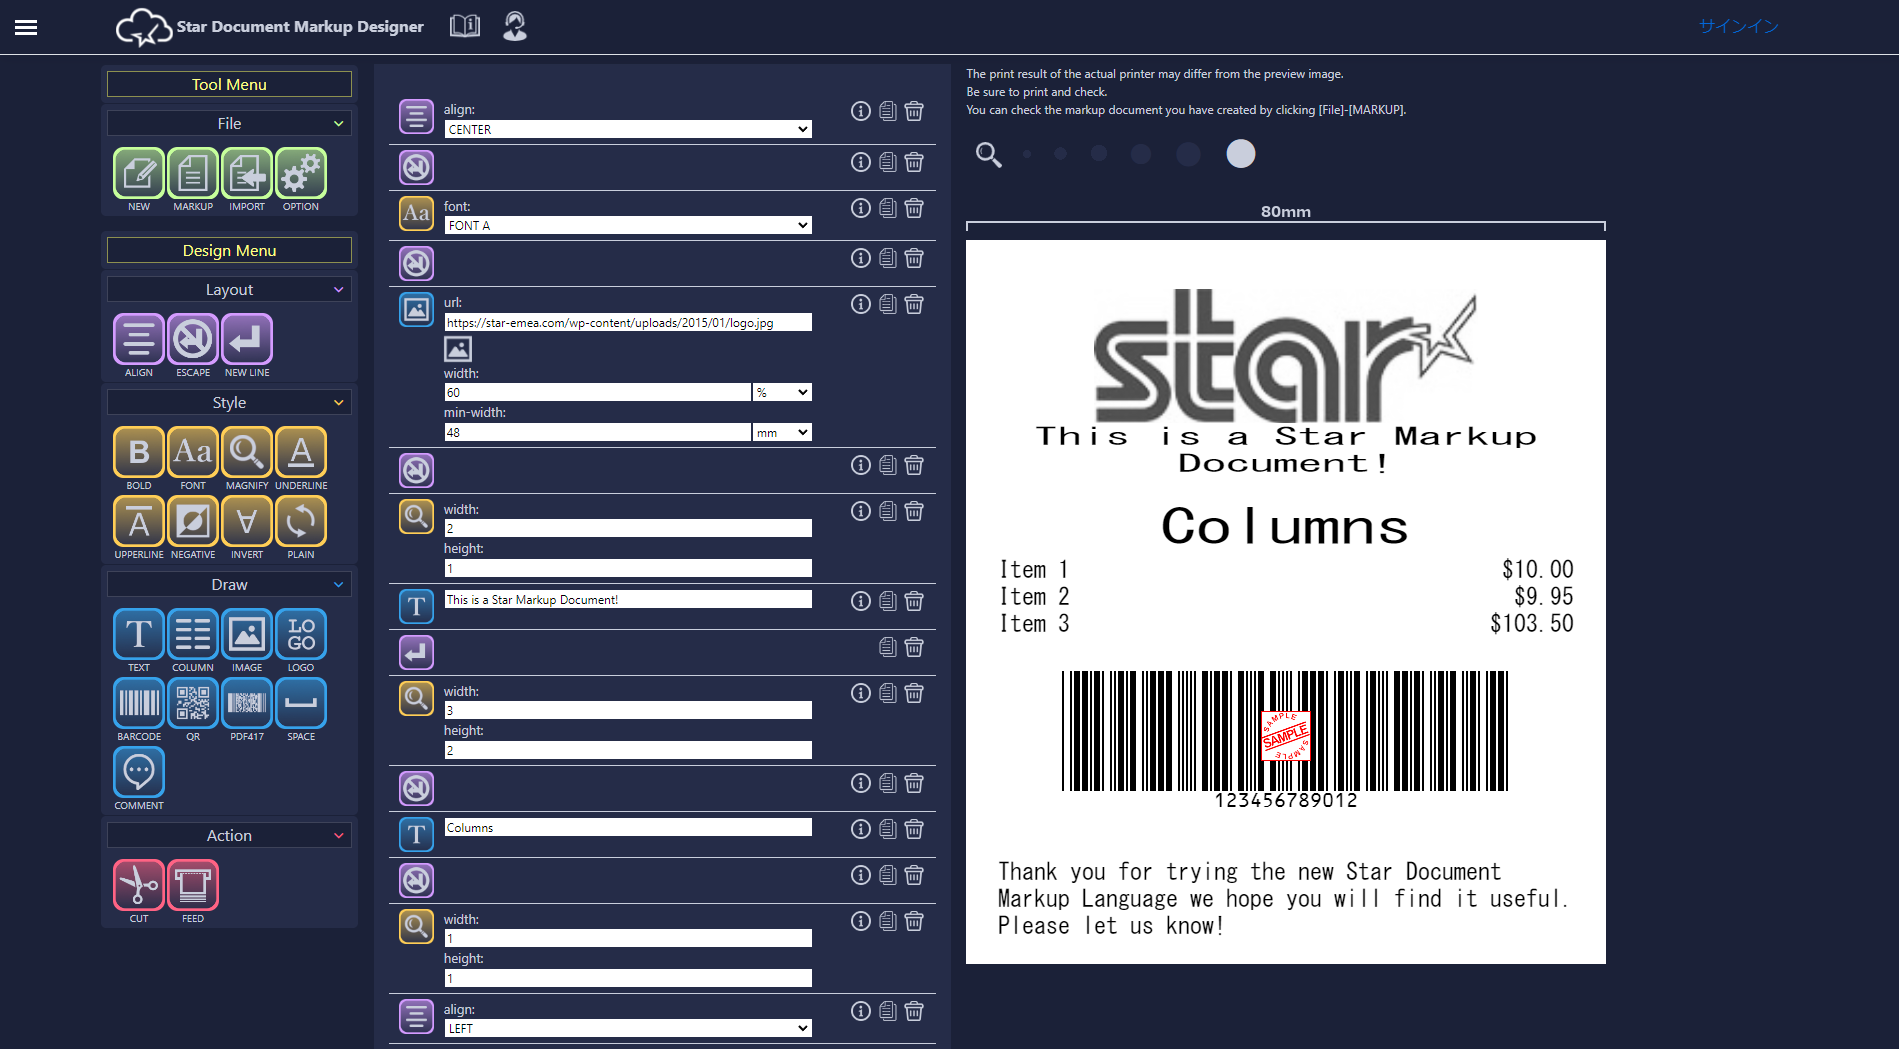
2 When you change the align tag value to LEFT, a preview is displayed with the Star logo and the text "This is a Star Markup Document!" aligned to the left.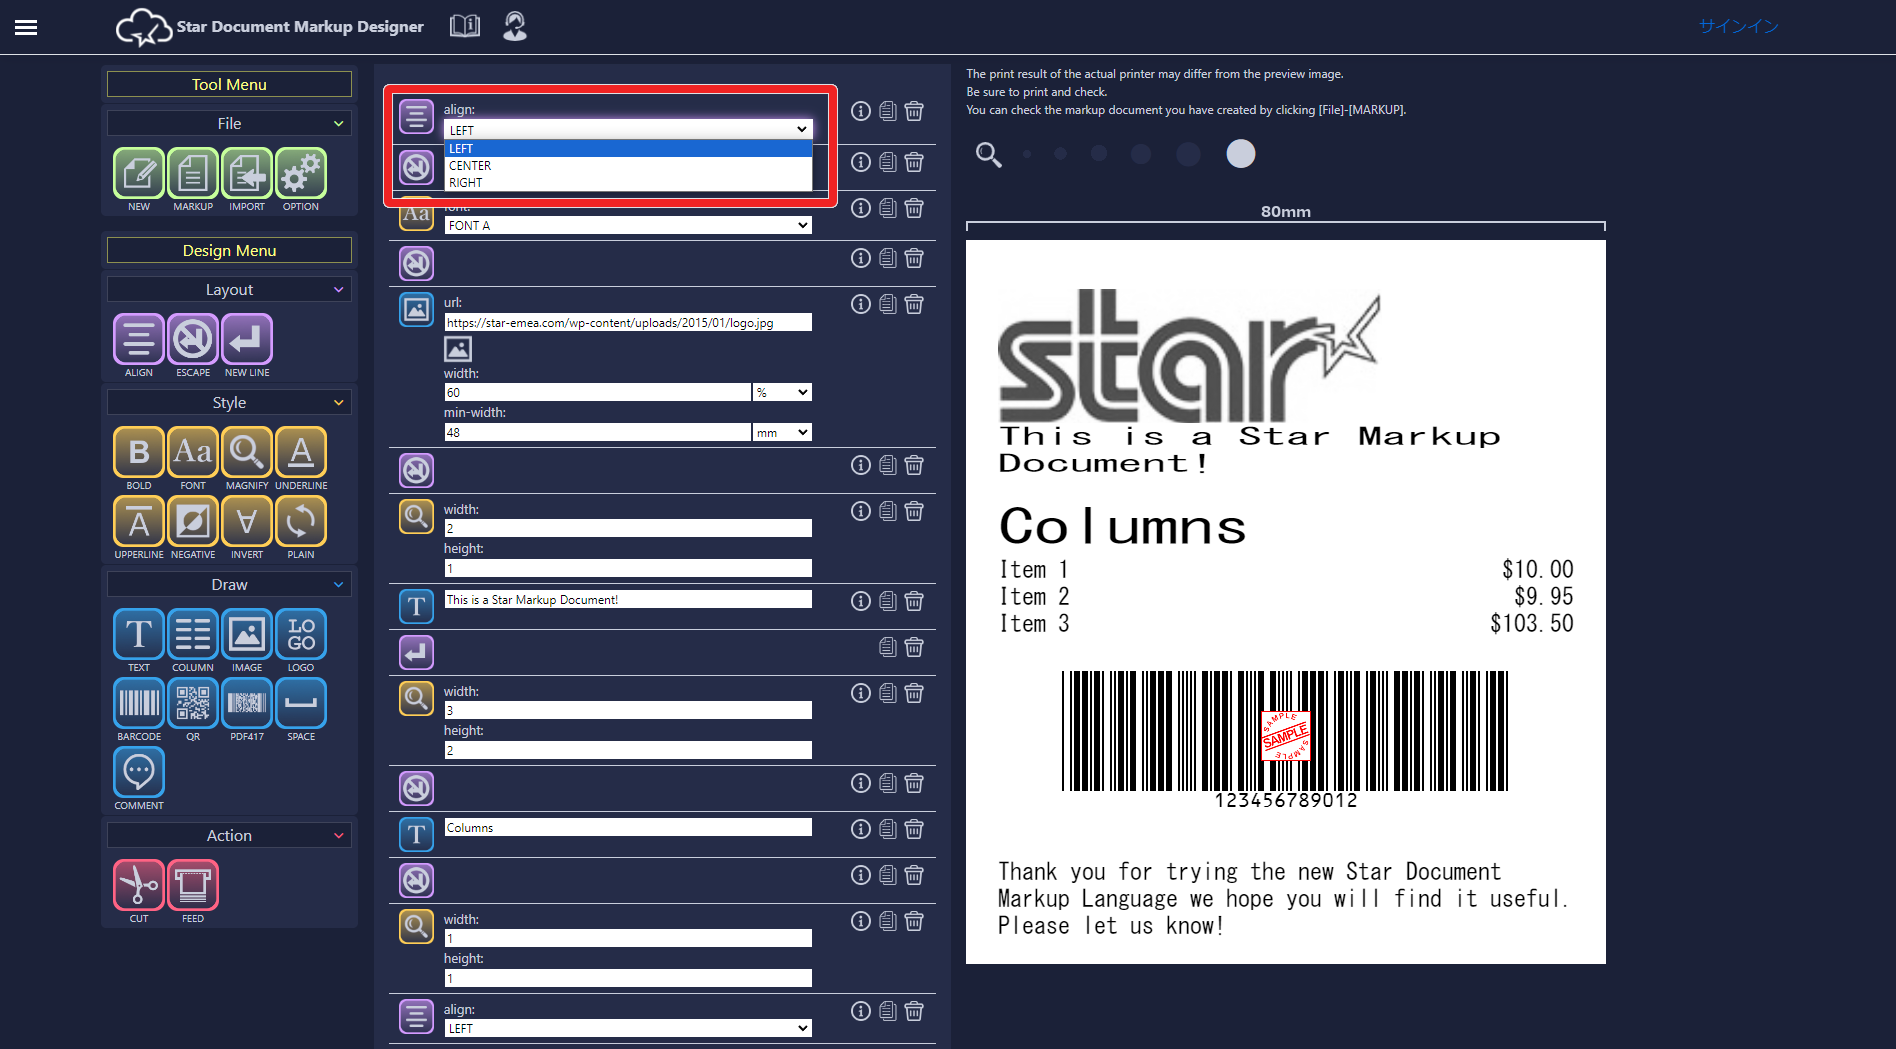
3 Select [Design Menu] > [Draw] > [TEXT] and drag and drop the text "Star Document Markup" under the align tag to add it to the preview. 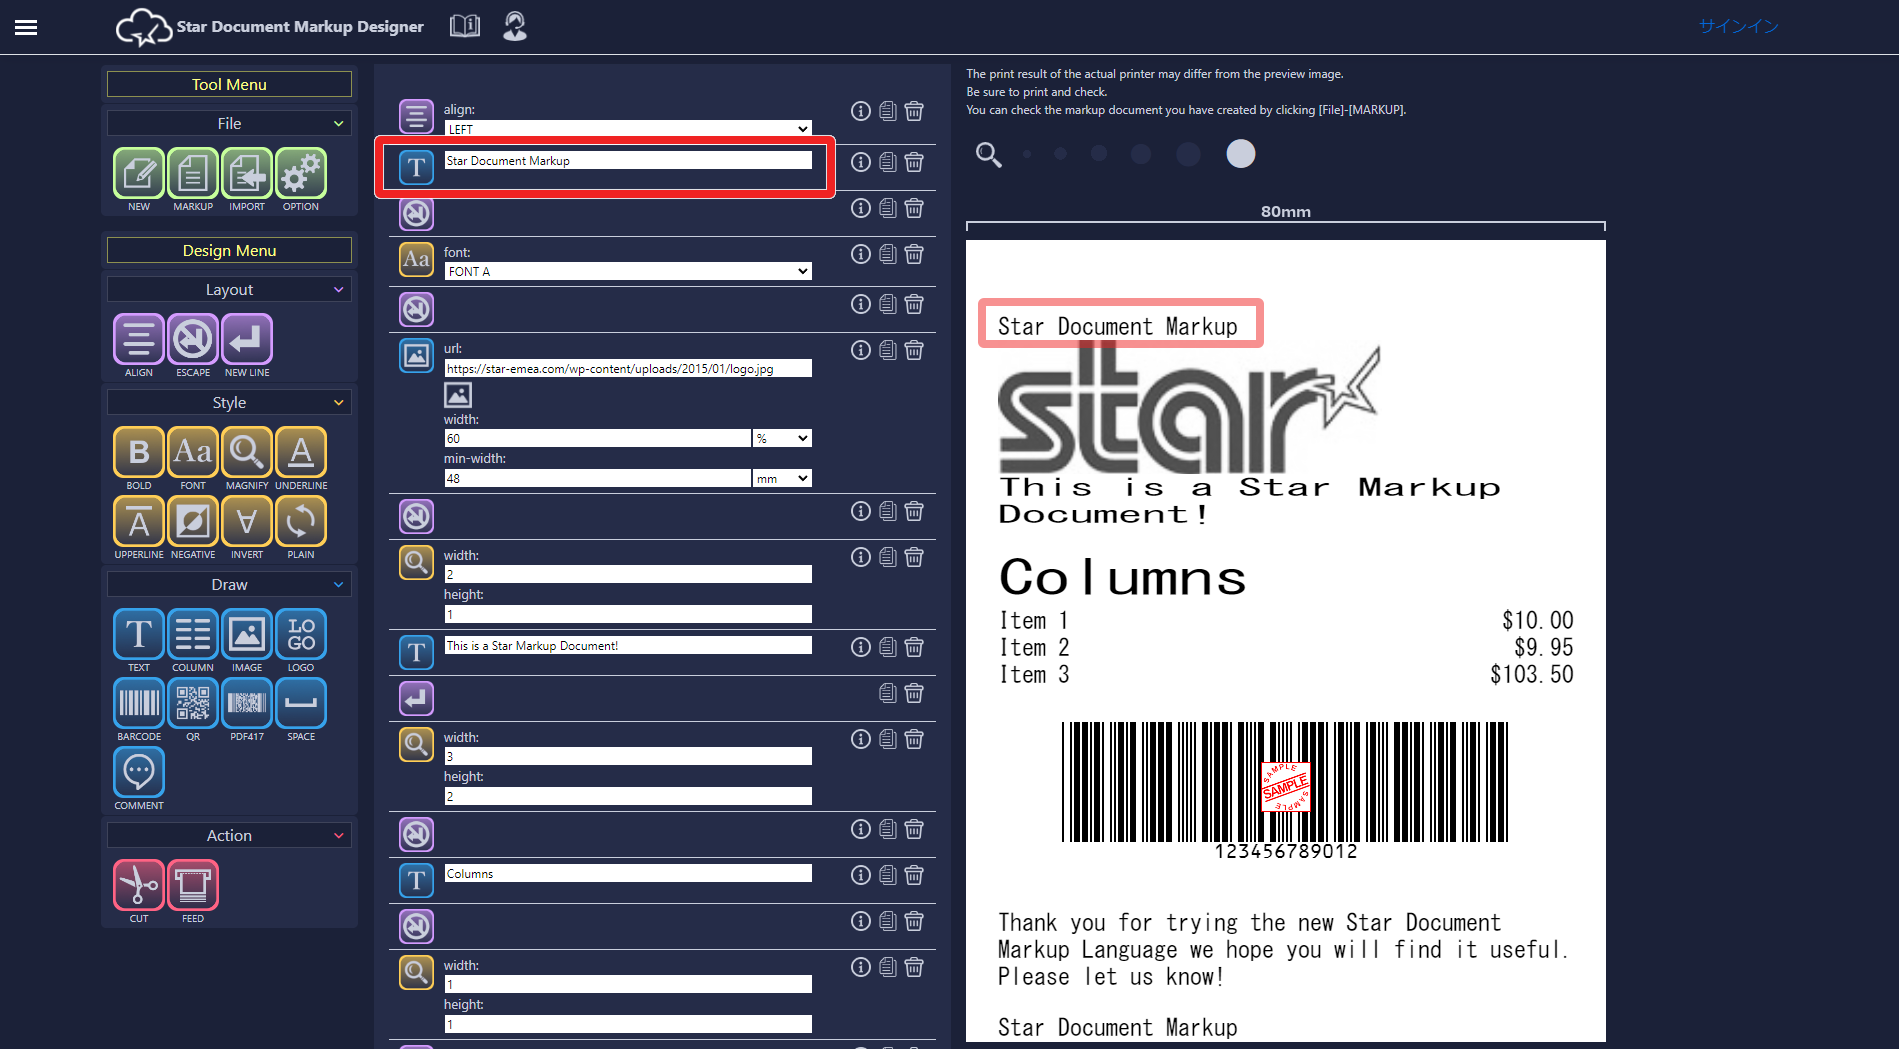 Select whatever icon you try, edit the template, and preview it.
Step 4. Checking the Generated Markup Document
1 Select [Tool Menu] > [File] > [MARKUP].
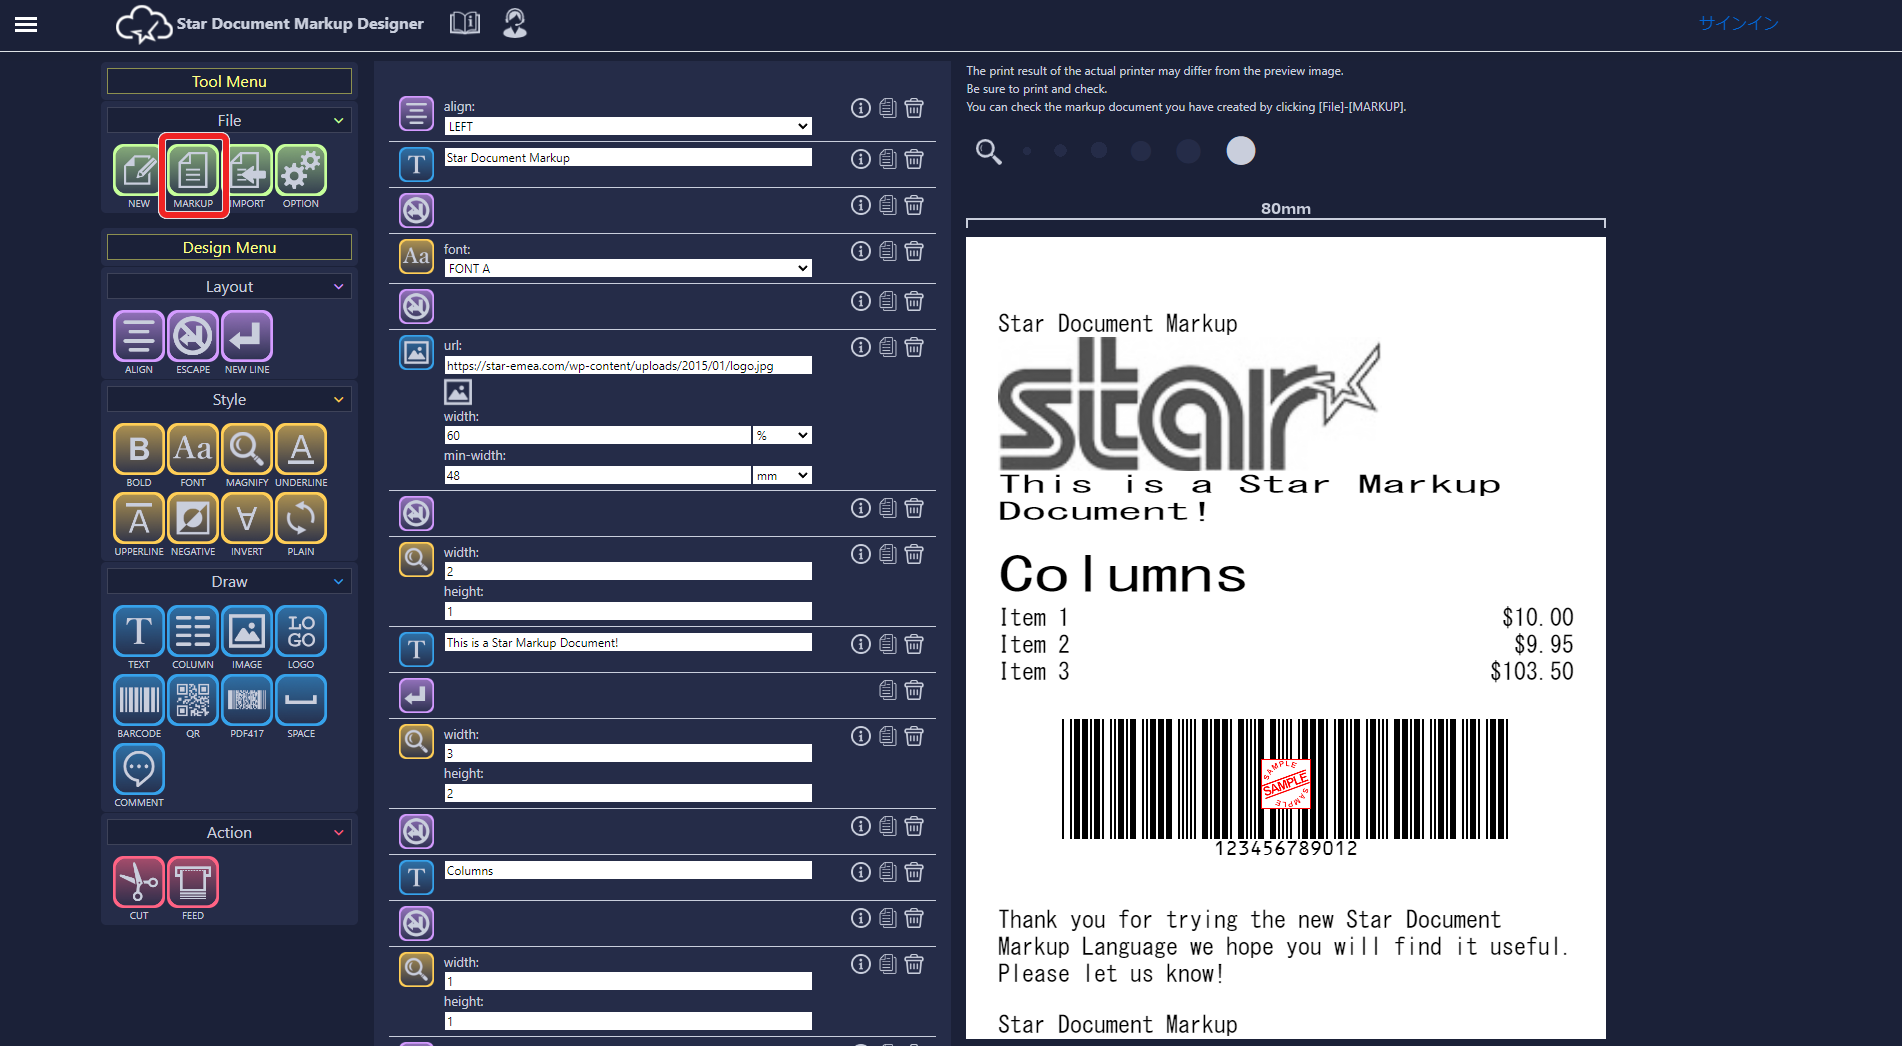
The markup document that has been edited so far to print the template is displayed.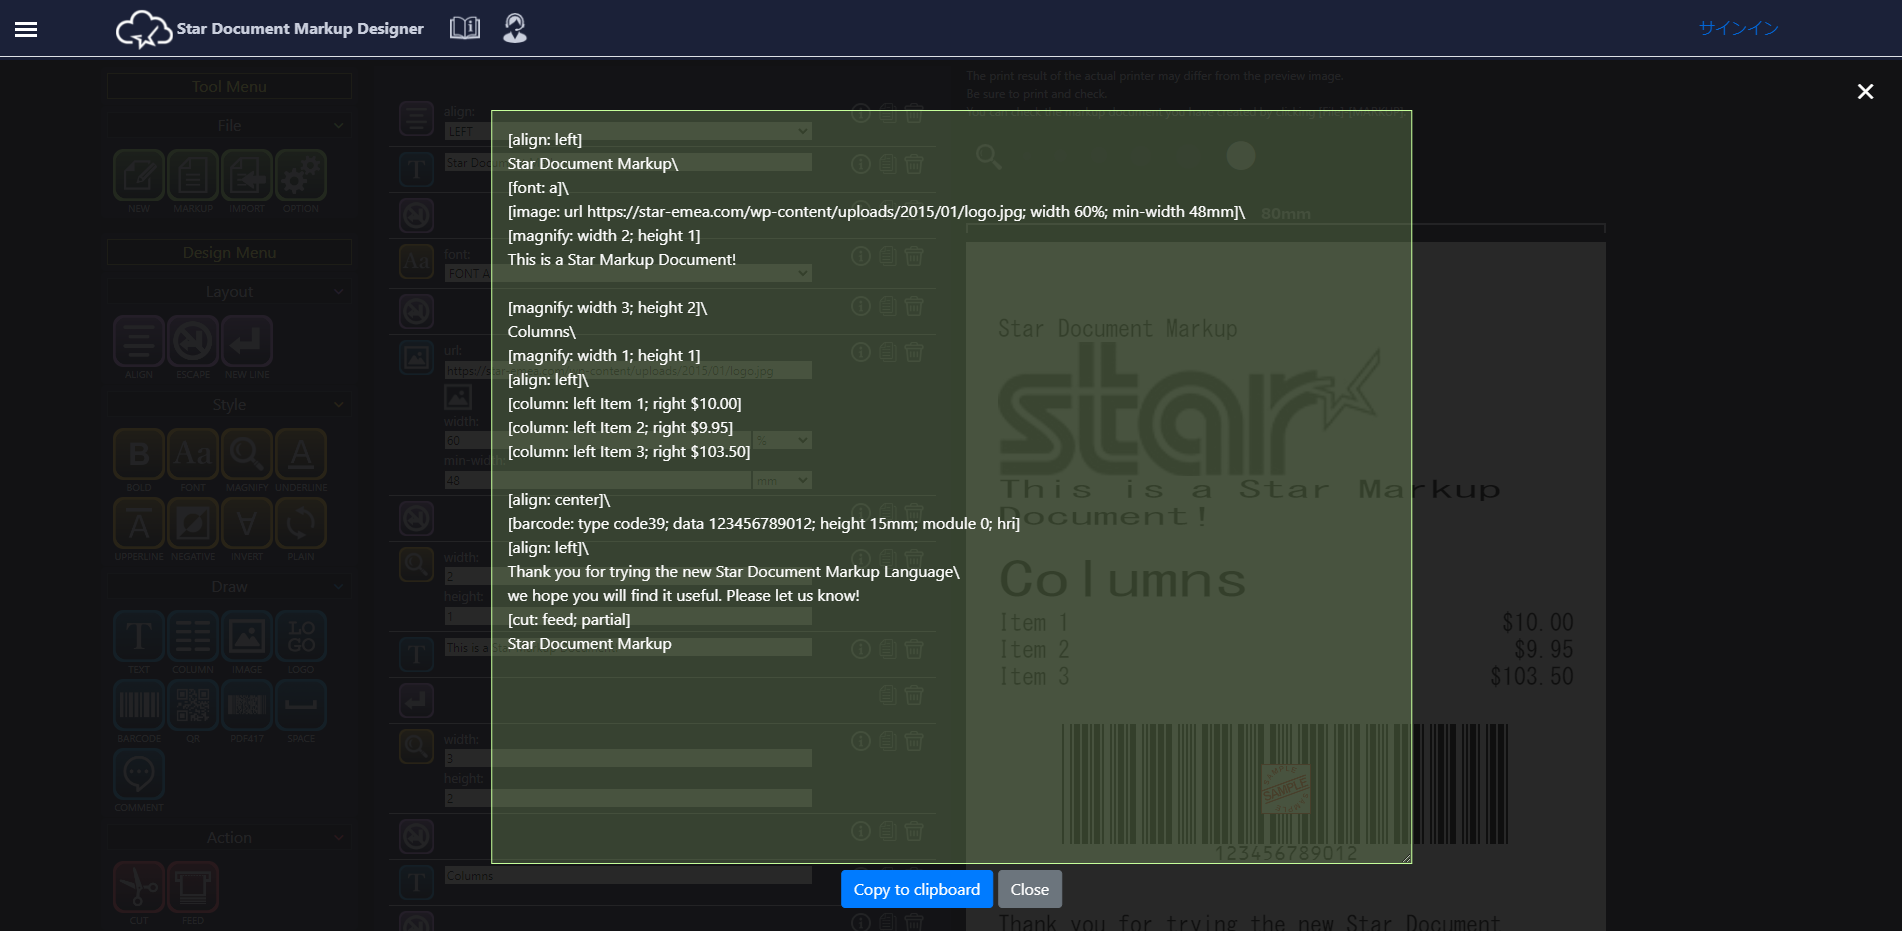
For details on how to create print data using Star Document Markup, click the Specifications page.