Use Accessories
The following accessories are included with this product for use when required.
Paper roll guide
Always mount before using a 58mm width paper roll.
1. Mount the paper roll guide
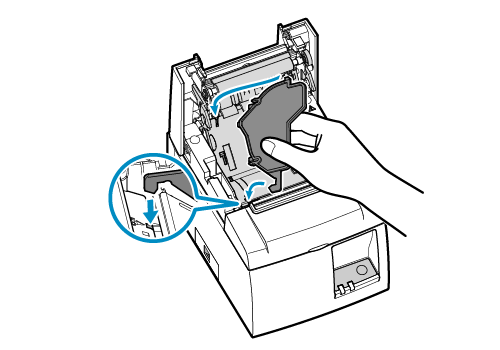
- Align the paper roll guide to the "△58" indicated on this equipment.
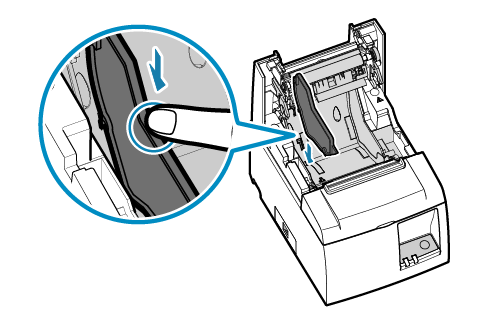
- Press the paper roll guide until a clicking sound is heard.
- Use the specified application and change the setting for the "printing width".
Use App - Do not change the paper width after starting use.
The friction of the head, rubber roller, and cutter vary depending on the paper width, which may be the cause for a problems occurring when printing or cutting.
Caution
Wall mounting bracket
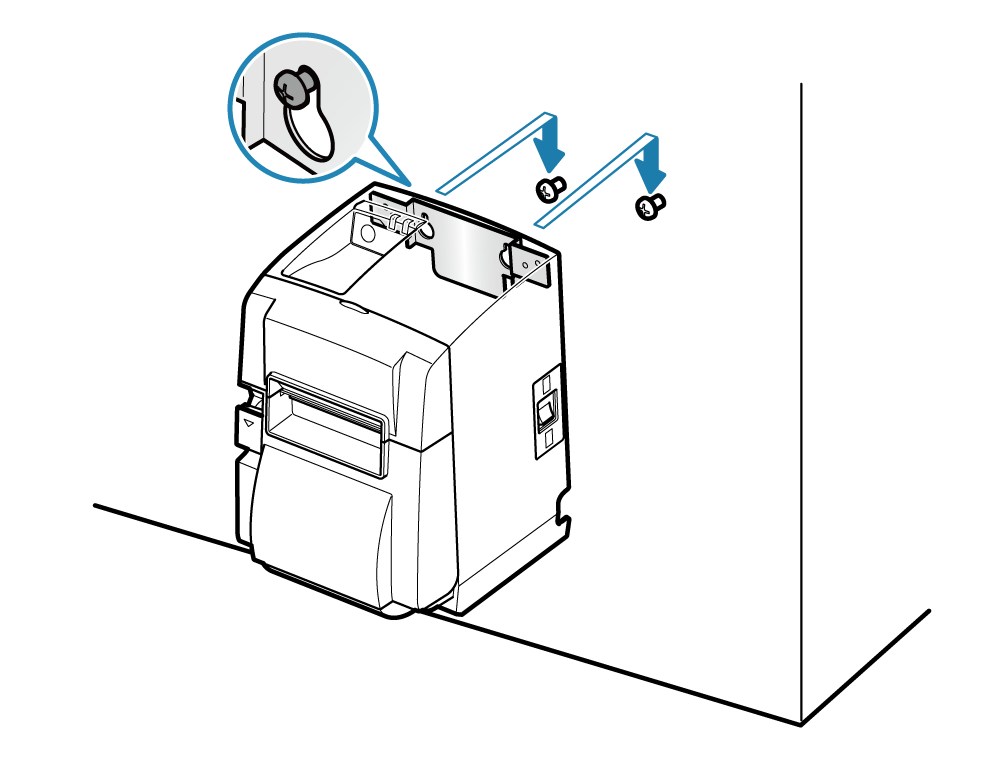
The wall mounting bracket uses the attached screws to be secured to the printer body, and the printer is secured to the wall by hooking it to the screw that is attached to the wall.
Screws for mounting on the wall is not included.
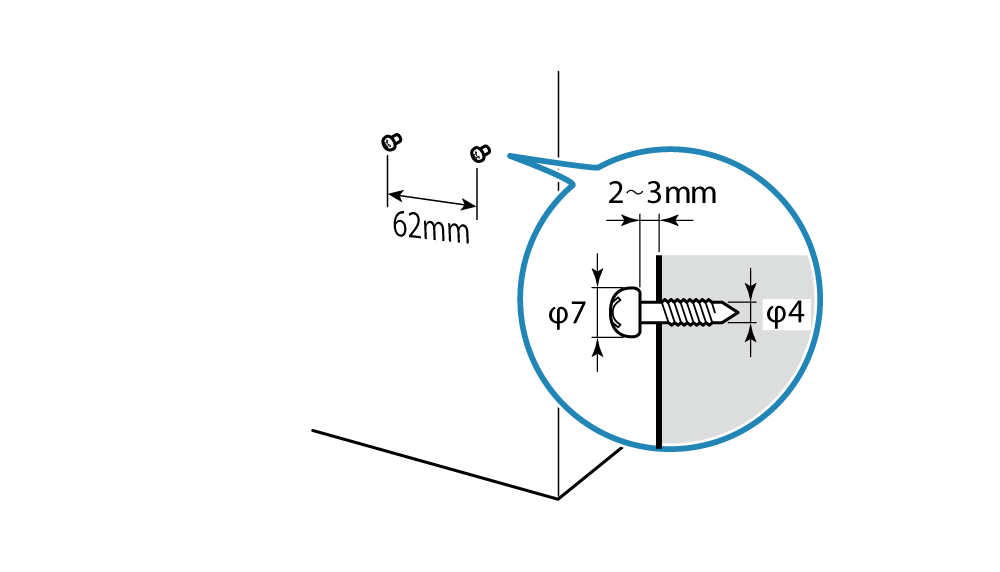
Prepare two screws available commercially (screw diameter: 4mm) that are suitable for the wall material (wood, steel, concrete, etc.).
Refer to Safety Information before mounting.
Caution
The weight of the printer will be approx. 2.4 kg, including the weight of the paper roll.
The screws that attach to the wall must have shear strength that can withstand a pull strength of more than 12kgf (118N).
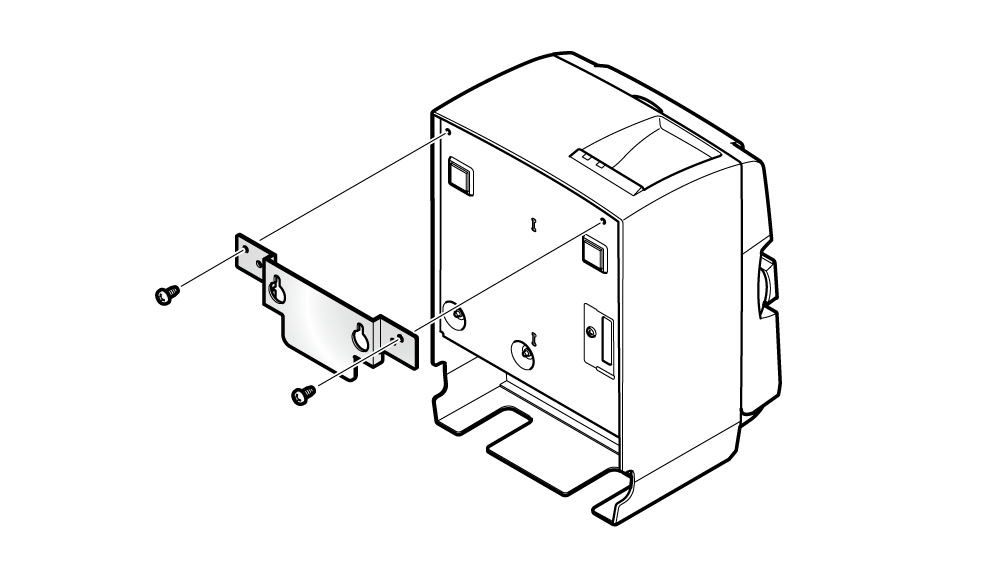
1. Attach the wall mounting bracket to the printer
- Align the hole for the wall mounting bracket and the printer, and secure using the two attached screws (M3).
2. Attach the screw for mounting the printer on the wall
- Prepare the two screws to match the wall material and attach them to the wall with the following dimensions.
- Make sure to attach the two screws horizontally.
3. Mount the printer on the wall
- Align the screws attached to the wall in step 2 with the holes in the wall mounting bracket, and hook the printer.
4. Set paper roll
- Pay attention to the direction of the paper roll and set the paper roll. Set the paper roll (when in vertical position)
Rubber feet
1. Attach the rubber feet to the printer
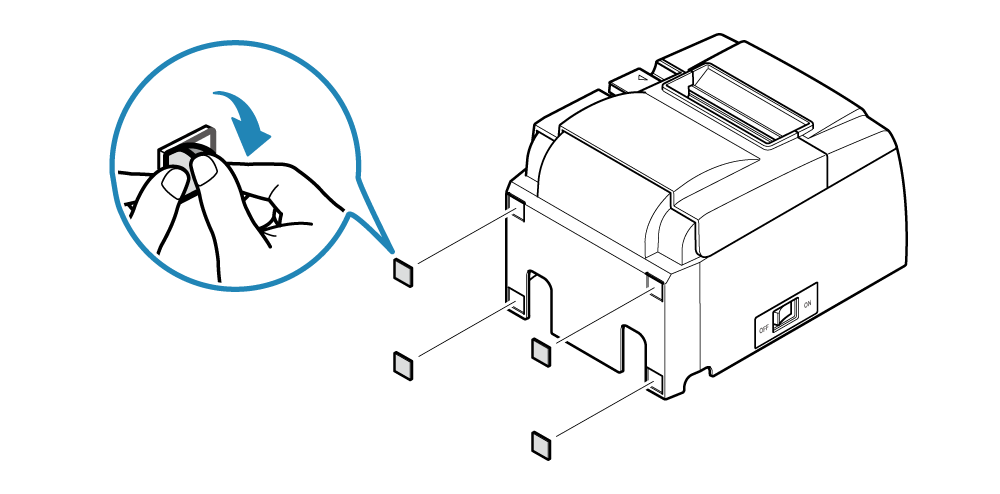
- Peel off the release paper on the back of the rubber feet, and paste the rubber feet on the 4 places on the back of the printer.
Wipe away any dirt from the location where it will be placed, before pasting.
2. Set paper roll
- Pay attention to the direction of the paper roll and set the paper roll. Set the paper roll (when in vertical position)
Switch cover
1. Attach the switch cover to the printer
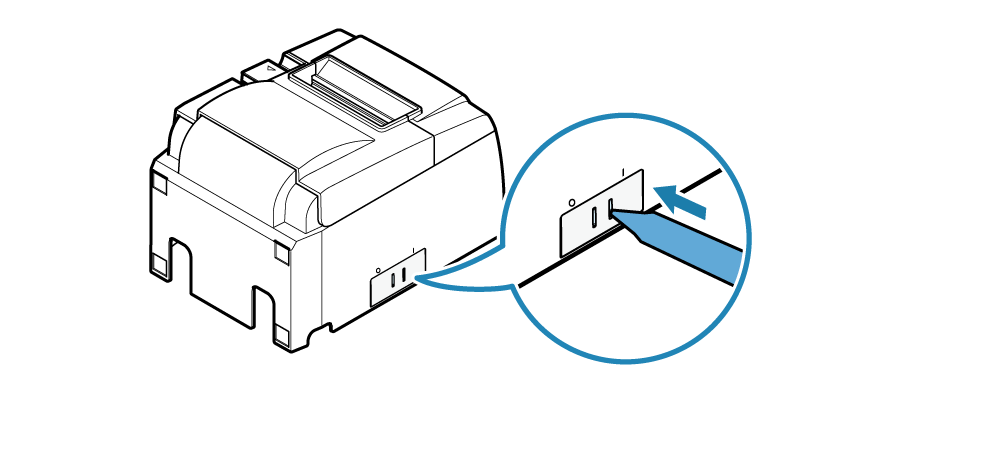
- Peel off the release paper on the back of the switch cover and paste it to the power switch section on the printer.
Wipe away any dirt from the location where it will be placed, before pasting.
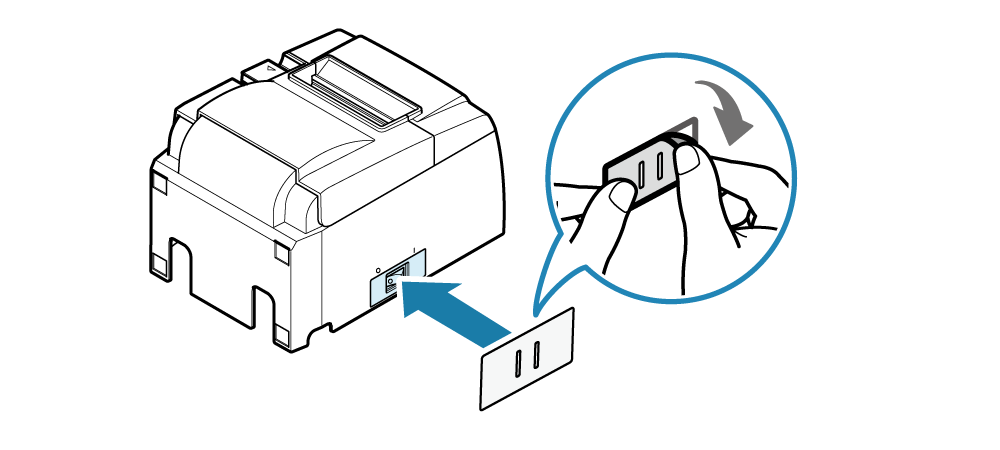
- By inserting a tapered object such as a ball point pen in the hole of the switch cover, the power switch can be turned ON or OFF.
