

Quick Start
The StarXpand SDK includes a sample application that allows you to test printing operation.
As the first step to control the printer using the StarXpand SDK, let's try to build the sample application in the following 4 steps and print a sample receipt.
Step 1. Set Connection between Printer and Host Device

Step 2. Construct Environment for Sample Applications
Step 3. Build Sample Application

Step1.
Set Connection between Printer and Host Device
Prepare the printer and make it communicable to a tablet or PC.
Select the OS of the host device.
OS
Windows Ubuntu macOS / ChromeOS
Procedure for communication settings
- 1. Turn the printer power on and connect the host device to the printer with the USB cable.
Memo
USB ports communicable with host devices vary depending on the printer.
Check the online manual or instruction manual of the printer you are using. - 2. Replace the printer driver.
Executeexample/scripts_for_client/Windows/install.batwith administrator privileges.
Memo
When the printer driver is replaced, other software applications will no longer be able to use the USB printer.
To use the printer in other software programs, restore the driver by performing the procedure below:
- Open Device Manager.
- Right-click the relevant printer from Universal Serial Bus controllers and select Update Driver Software.
- Select Browse my computer for driver software.
- Select Let me pick from a list of device drivers on my computer.
- Select USB Printing Support and click [Next].
- 1. Turn the printer power on and connect the host device to the printer with the USB cable.
Memo
USB ports communicable with host devices vary depending on the printer.
Check the online manual or instruction manual of the printer you are using. - 2. Replace the printer driver.
Executeexample/scripts_for_client/linux/onetime.shwith administrator privileges.
Memo
When the printer driver is replaced, the existing driver will no longer be used.
The following operations can cancel this effect. To use the existing printer driver, perform one of the following:
- Removing and reinserting the printer USB cable
- Restarting the printer
- Restarting Ubuntu
- 1. Turn the printer power on and connect the host device to the printer with the USB cable.
Memo
USB ports communicable with host devices vary depending on the printer.
Check the online manual or instruction manual of the printer you are using.
Step 2.
Construct Development Environment for Sample Applications
Prepare a React development environment to build sample applications.
https://react.dev/learn/setup
Step3.
Build Sample Application
Execute the following commands to build the sample application contained in the StarXpand SDK cloned from GitHub.
> git clone https://github.com/star-micronics/star-io10-web.git
> cd star-io10-web/example
> yarn install
> set NODE_OPTIONS=--max-old-space-size=4144
> yarn start
$ git clone https://github.com/star-micronics/star-io10-web.git
$ cd star-io10-web/example
$ yarn install
$ export NODE_OPTIONS="--max-old-space-size=4144"
$ yarn start
Step4.
Print Sample Receipt
When the build succeeds, the sample application starts.
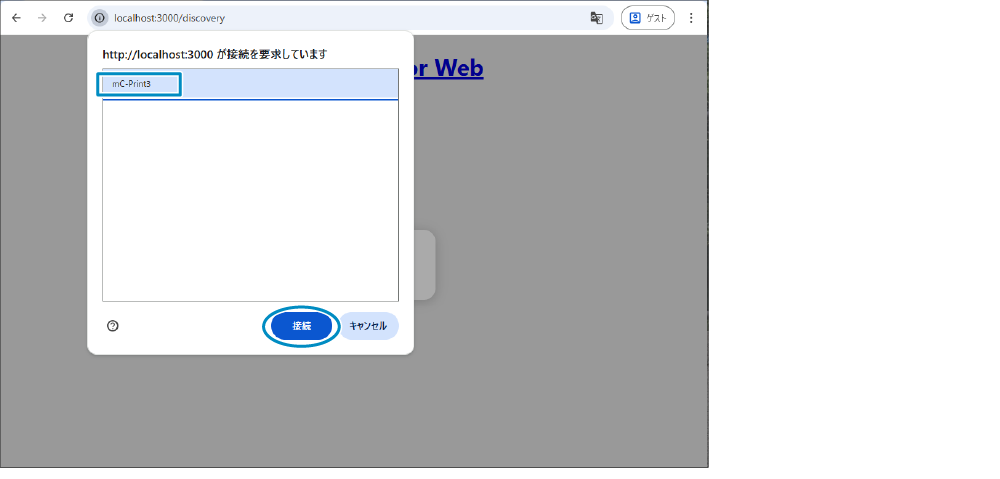
First, search for the printer and obtain permission to connect. Click [Discover].
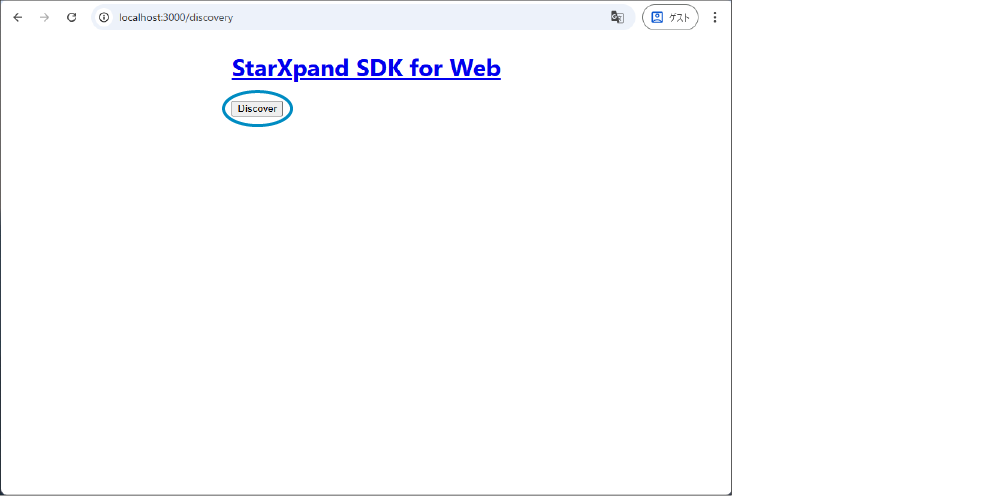
Select the printer from the pop-up window and click [Connect].
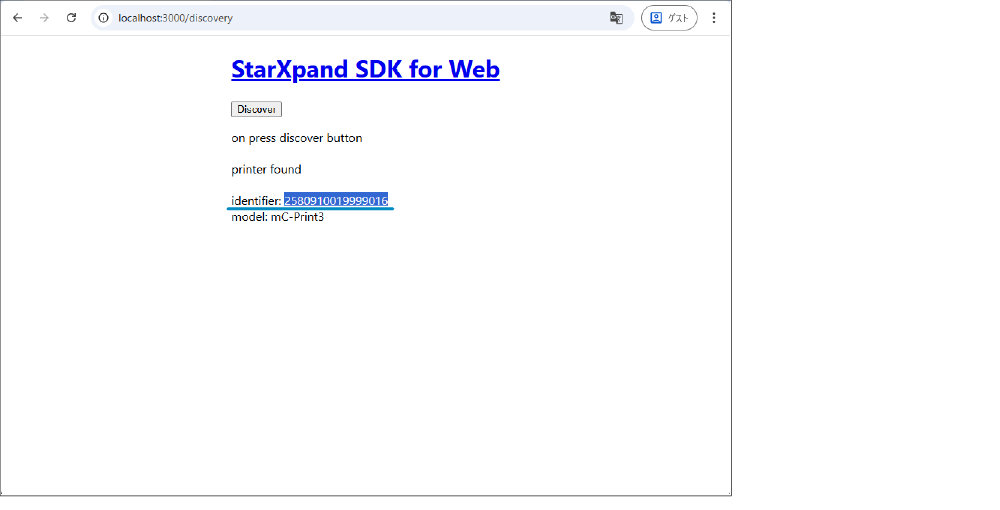
The text following "identifier:" indicates the "identifier". Copy or take note of it.
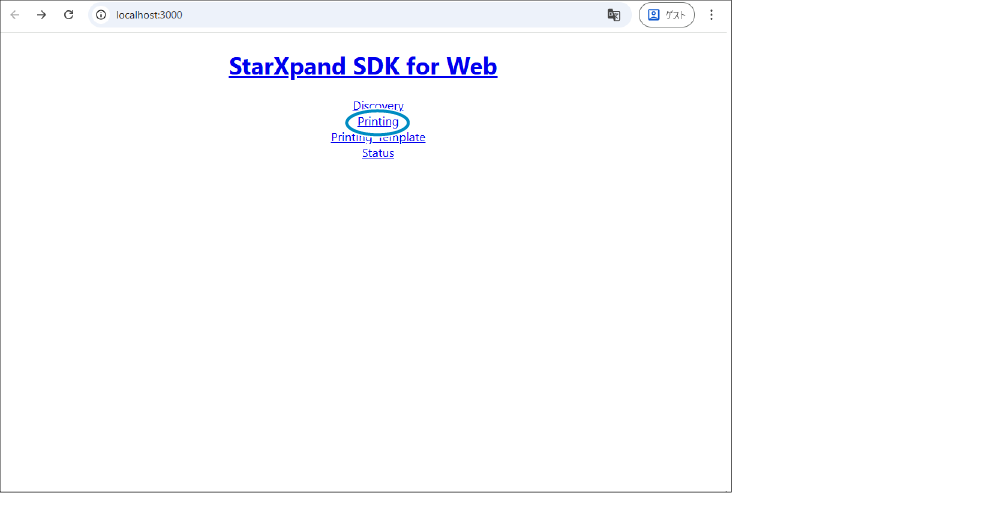
Next, print a sample receipt. Go back to the previous screen and click Printing.
Enter the printer Identifier you copied on the Discovery screen in the Identifier field and click [Print].
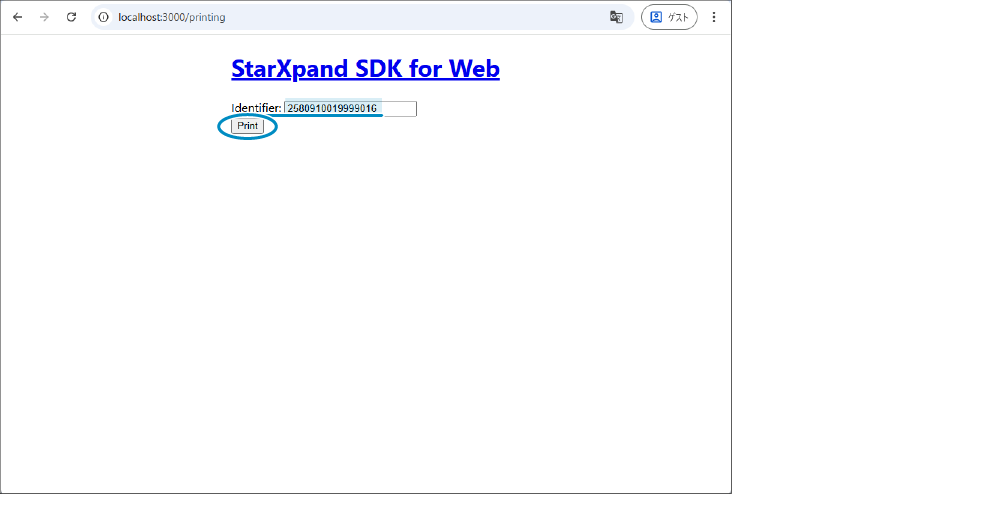
Was the sample receipt successfully printed?
Next, let's use the printer from your application. Refer to API User Guide.