1. Getting Started
1.1. To build an Android project, Android Studio are needed.
These tools are available in one package from the Android Studio – Official Site .
It is assumed Android Studio have already been installed on your PC at this point. Should you need assistance or additional information, visit the Android Studio – Official Site .
StarPRNT SDK V5.20.0 has checked this using Gradle 8.11.1 and Android Gradle Plugin 8.9.0. This SDK provides libraries that are built using Java version 11.
How to open the StarPRNT SDK project in Android Studio
1. Unzip the StarPRNT SDK package.
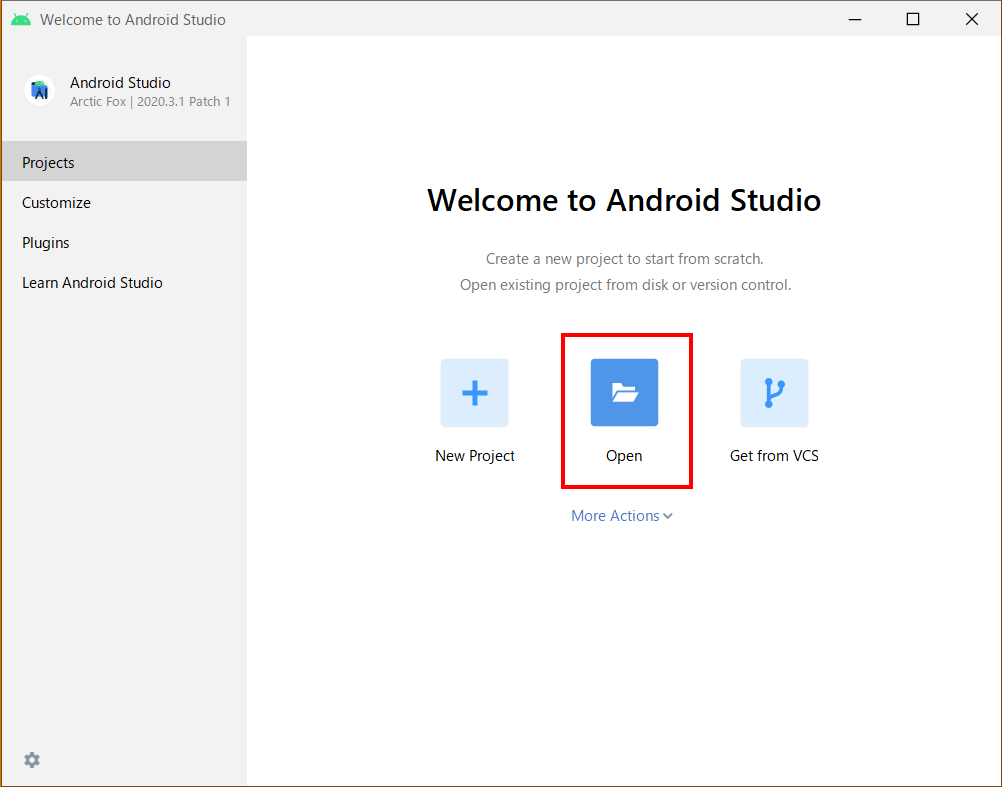
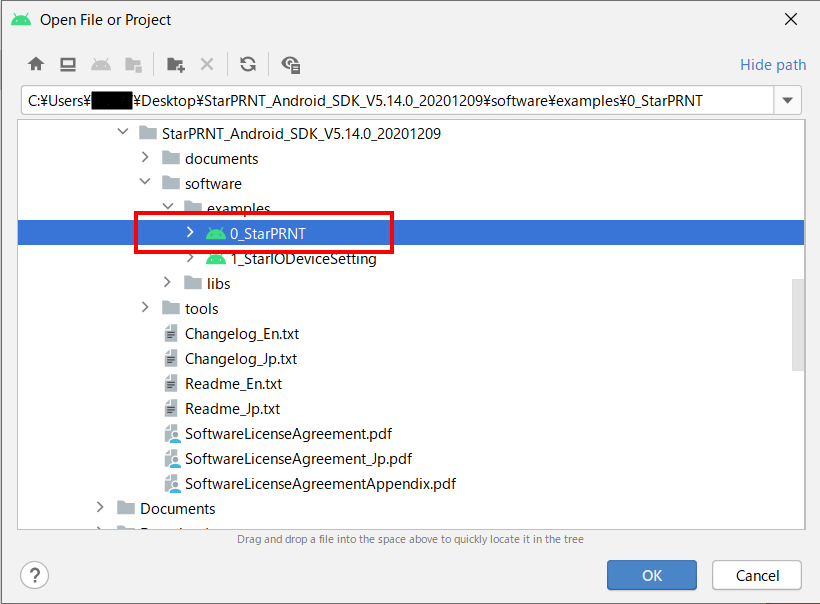
2. Execute Android Studio and open StarPRNT SDK.
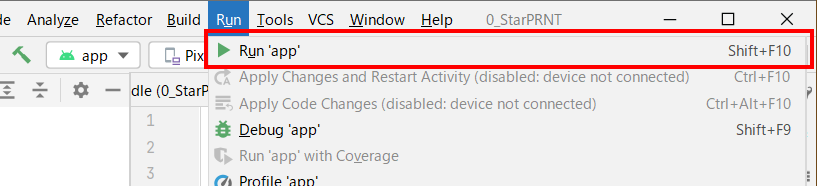
Running the project
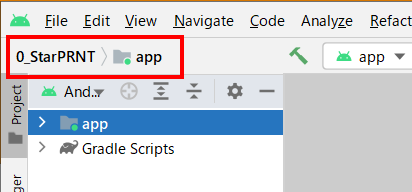
Click “Run” in the top menu bar and then select “Run ‘app’”.
1.2. Operating System
Android 7.0 or later
1.3. Printer
Note
The “StarIOPort” library listed in the table below has been renamed to “stario” since V2.11.2.
Printer |
Firmware version |
Interface |
Emulation |
Library version |
|---|---|---|---|---|
| mC-Print2 | 2.2+ | Bluetooth | StarPRNT | StarIOPort: 2.3.0+ |
| Ethernet | ||||
| USB | ||||
| mC-Print3 | 2.2+ | Bluetooth | StarPRNT | StarIOPort: 2.3.0+ |
| Ethernet | ||||
| USB | ||||
| mC-Label2 | 1.0+ | Bluetooth | StarPRNT | StarIOPort: 2.14.0+ |
| Ethernet | ||||
| USB | ||||
| Wireless LAN | ||||
| mC-Label3 | 1.0+ | Bluetooth | StarPRNT | StarIOPort: 2.11.0+ |
| Ethernet | ||||
| USB | ||||
| mPOP | 1.0+ | Bluetooth | StarPRNT |
StarIOPort: 2.2.2+ StarIOPort: 2.11.0+[7] |
| USB[4][7] | ||||
| FVP10 | 1.2+ | Bluetooth | StarLine | StarIOPort: 2.2.2+ |
| Ethernet | ||||
| USB | ||||
| TSP100IV | 1.0+ | Ethernet | StarPRNT | StarIOPort: 2.10.0+ |
| USB[4] | ||||
| Bluetooth | StarIOPort: 2.13.0+ | |||
| Wireless LAN | ||||
| TSP100IV SK | 2.0+ | Ethernet | StarPRNT | StarIOPort: 2.10.0+ |
| USB[4] | ||||
| Bluetooth | StarIOPort: 2.13.0+ | |||
| Wireless LAN | ||||
| TSP100IIIW | 1.0+ | Wireless LAN | StarGraphic | StarIOPort: 2.2.2+ |
| TSP100IIILAN | 1.0+ | Ethernet | StarGraphic | StarIOPort: 2.2.2+ |
| TSP100IIIBI | 1.0+ | Bluetooth | StarGraphic | StarIOPort: 2.2.2+ |
| TSP100IIIU | 1.7+ | USB | StarGraphic | StarIOPort: 2.2.5+ |
| TSP100IIU+ | 1.0+ | USB | StarGraphic | StarIOPort: 2.2.5+ |
| TSP100ECO | 2.0+ | USB | StarGraphic | StarIOPort: 2.2.2+ |
| TSP100U | 2.0+ | USB | StarGraphic | StarIOPort: 2.2.2+ |
| TSP100GT | 2.0+ | USB | StarGraphic | StarIOPort: 2.2.2+ |
| TSP100LAN | 2.0+ | Ethernet | StarGraphic | StarIOPort: 2.2.2+ |
| TSP650II | 1.0+ | Bluetooth | StarLine | StarIOPort: 2.2.2+ |
| Ethernet | ||||
| USB | ||||
| TSP650IISK | 1.0+ | Bluetooth | StarLine | StarIOPort: 2.9.0+ |
| Ethernet | ||||
| USB | ||||
| TSP700II | 5.0+ | Bluetooth | StarLine | StarIOPort: 2.2.2+ |
| 3.0+ | Ethernet | |||
| USB | ||||
| TSP800II | 2.0+ | Bluetooth | StarLine | StarIOPort: 2.2.2+ |
| 1.2+ | Ethernet | |||
| USB | ||||
| TUP500 | 1.0+ | Ethernet | StarLine | StarIOPort: 2.6.0+ |
| USB | ||||
| BSC10II | 3.0+ | Ethernet | StarPRNT[8] | StarIOPort: 2.12.0+ |
| USB[4] | ||||
| BSC10 LAN | 1.0+ | Ethernet | EscPos | StarIOPort: 2.2.2+ |
| BSC10 | 1.0+ | USB[1] | EscPos | StarIOPort: 2.2.2+ |
| SP700 | 3.0+ | Bluetooth (EU / USOnly) |
StarDotImpact | StarIOPort: 2.2.2+ |
| Ethernet | ||||
| USB | ||||
| SK1-211/221/V211 | 1.0+ | USB | StarPRNT | StarIOPort: 2.6.0+ |
| SK1-211/221/V211 Presenter | 1.0+ | USB | StarPRNT | StarIOPort: 2.6.0+ |
| SK1-311/321/V311 | 1.0+ | USB | StarPRNT | StarIOPort: 2.6.0+ |
| SK1-311/V311 Presenter | 1.0+ | USB | StarPRNT | StarIOPort: 2.6.0+ |
| SM-S210i | 2.4+ | Bluetooth | StarPRNT[2] |
StarIOPort: 2.2.2+ StarIOPort: 2.11.0+[5] |
| EscPosMobile | ||||
| SM-S220i | 2.0+ | Bluetooth | StarPRNT[2] | StarIOPort: 2.2.2+ |
| EscPosMobile | ||||
| SM-S230i | 1.0+ | Bluetooth | StarPRNT |
StarIOPort: 2.2.2+ StarIOPort: 2.11.0+[5] |
| EscPosMobile | ||||
| USB | StarPRNT | |||
| SM-T300i | 2.4+ | Bluetooth | StarPRNT[2] |
StarIOPort: 2.2.2+ StarIOPort: 2.11.0+[5] |
| EscPosMobile | ||||
| SM-T300 | 1.1+ | Bluetooth | StarPRNT[2] |
StarIOPort: 2.2.2+ StarIOPort: 2.11.0+[5] |
| EscPosMobile | ||||
| SM-T400i | 2.4+ | Bluetooth | StarPRNT[2] |
StarIOPort: 2.2.2+ StarIOPort: 2.11.0+[5] |
| EscPosMobile | ||||
| SM-L200 | 1.0+ | Bluetooth | StarPRNT | StarIOPort: 2.2.2+ |
| StarPRNTL[3] | ||||
| SM-L300 | 1.0+ | Bluetooth | StarPRNT | StarIOPort: 2.2.5+ |
| StarPRNTL[3] |
| [1] | BSC10 setting with for USB I/F.Please set busy condition to “Reception Buffer Full”. (MSW #7, bit4 set to ON) |
| [2] | Support for StarPRNT emulation is SM-S210i, SM-S220i, SM-T300i and SM-T400i: firmware version 3.0 or later. SM-T300(DB): firmware version 4.0 or later. |
| [3] | Support for StarPRNTL emulation is firmware version 2.0 or later. |
| [4] | Please use Android 9.0 or later when connecting via USB-A. Also, simultaneous connection of multiple devices is not supported. |
| [5] | To use firmware version 5.0 or later. |
| [7] | When using POP10CI, POP10CBI with firmware version 5.0 or later, connection via USB-C is available. |
| [8] | When using in Standard Mode. |
Mobile Printer
When using StarPRNT emulation
To use the StarPRNT emulation, set the emulation setting of the printer to “StarPRNT”. To change the emulation, proceed as follows. (For SM-L200 and SM-L300, it does not need to switch the emulation.)
Turn the printer power and open the printer cover.
Press and hold the POWER button and the FEED button simultaneously. As soon as the ERROR lamp flashes five times, release the buttons. The emulation switchover takes place automatically.
After setting a paper, close the printer cover. The set emulation is printed out.
ESC/POS : EMU = ESC/POS
StarPRNT : EMU = StarPRNT
If the emulation is not switched correctly, repeat the above steps 1 to 3.At that time, in step 2, make sure not to release the buttons until the lamp completes the 5th flash.
Please reboot the printer after switching the emulation. *It will be valid after rebooting the printer.
1.4. Supported Peripherals
Supporting Peripherals |
Contents |
|---|---|
BCR-POP1 |
Barcode reader |
DS9208 |
Zebra Technologies (Symbol) barcode reader |
USB HID |
USB HID Class (Keyboard mode) |
SCD222U |
Customer display |
mC-Sound |
Melody speaker |
| BCR-POP1 | DS9208 | USB HID | SCD222U | mC-Sound | |
|---|---|---|---|---|---|
| mC-Print2 | ✔ | ✔ | ✔[2] | ✔ | - |
| mC-Print3 | ✔ | ✔ | ✔[2] | ✔ | ✔[1] |
| mC-Label2 | ✔ | - | ✔ | ✔ | - |
| mC-Label3 | ✔ | - | ✔ | ✔ | - |
| mPOP | ✔ | ✔ | ✔[4] | ✔[3] | - |
| TSP100IIIU | - | - | - | ✔ | - |
| TSP100IV | ✔ | ✔ | ✔ | ✔ | ✔ |
| TSP100IV SK | ✔ | ✔ | ✔ | ✔ | ✔ |
| [1] | Firmware version 1.3 or later is required. |
| [2] | Firmware version 3.0 or later is required. |
| [3] | Firmware version 2.0 or later is required. |
| [4] | Firmware version 3.0 or later is required. |
1.5. Connecting a Star POS Printer to an Android Device
1.5.1. Bluetooth
All Star Bluetooth devices have each initial device name as a factory default setting, such as “Star Micronics” and “DK-AirCash”. When using multiple devices, which have same device name, it is useful to change the device name for identifying each device easily.
You can change the LAN/Bluetooth settings of the Star POS device, such as changing the Bluetooth device name. Please use the Utility/Driver .
Pairing of a Star POS device with your Android Device
Ensure Bluetooth is enabled and the Star POS Device is powered on.When the security setting of the Star POS device is set to SSP, press the PAIR button for more than 5 seconds to make it available for pairing.
Tap Settings.
Tap Bluetooth to ON.
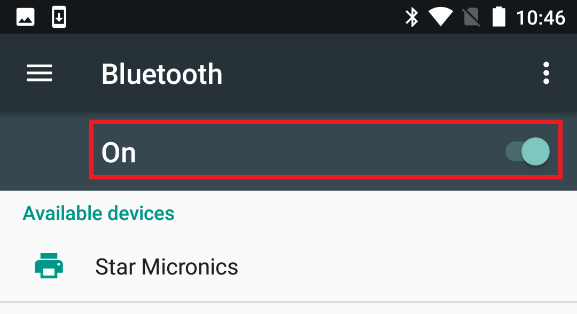
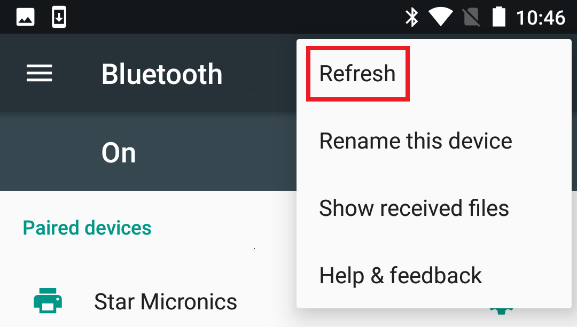
Tap Search for Devices.
Find the Star POS Device you wish to connect to and tap it to pair.
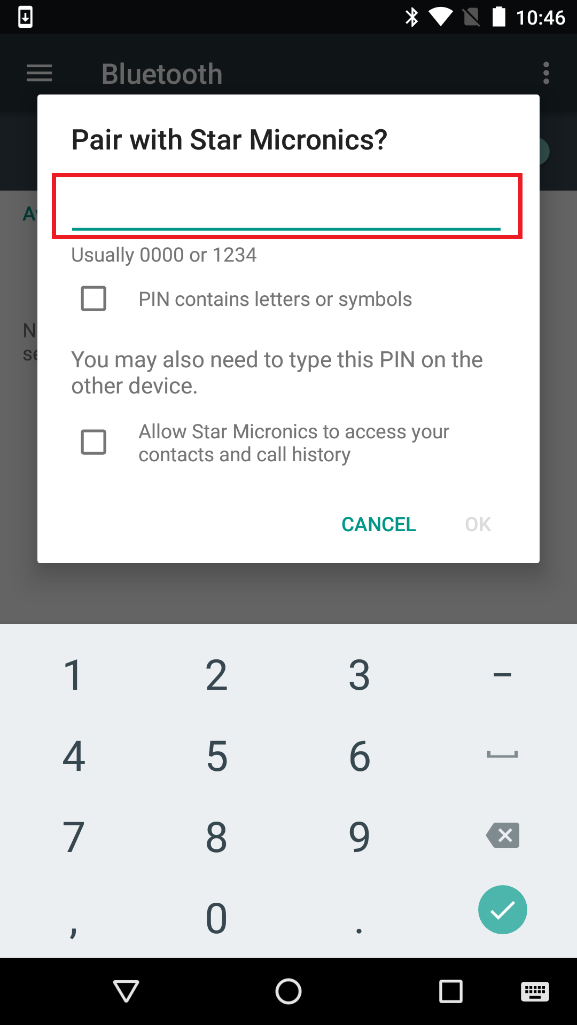
If necessary, perform the following operation.
- Star POS Printer Bluetooth Security with PIN Code
- Enter the PIN number.The factory default for standard Star POS Device is “1234”.
- Star POS Printer Bluetooth Security with SSP Numeric Comparison
- Compare the 6-digit authentication code displayed or printed on the printer with the one displayed on the Android device to confirm that they match.If a match is found, pressing the FEED switch pairs them, and pressing the POWER switch cancels the paring.
1.5.2. Ethernet Interface
Assign an IP Address to the Star Printer and connect it to the network.Standard Star Printers do not ship with an IP Address pre-assigned; this can set by a DHCP network.
Use Star POS Printers with the #9100 Multi Session disabled.The setting can be confirmed by Test Print which can be executed by holding down the printer’s feed button while turning the printer on.
Refer to “guidelines-ethernet_en.pdf” for how to confirm and change the #9100 Multi Session setting and how to set the Static IP Address.
You can set up your POS Printers which can connect to TCP/IP. Please use the Utility/Driver .
Star Quick Setup Utility and Star Setting Utility cannot be used with printers where an IP address has not been assigned (IP address 0.0.0.0).
This software uses TCP communication port 9100, TCP communication port 9100, UDP communication port 2222.
Network Access Permission
Assign an IP Address to the Star POS Devices and connect it to the network.
Tap Settings.
Ensure Wi-Fi is ON.
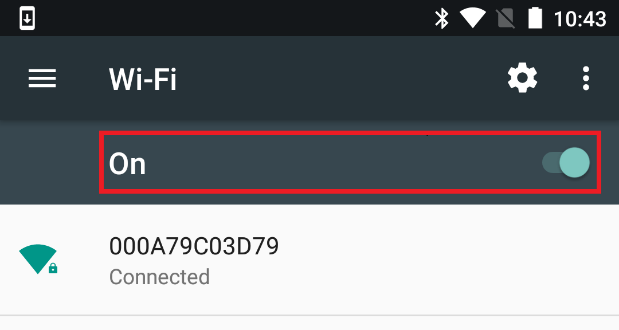
Connect to the same network the Star POS Device is on.
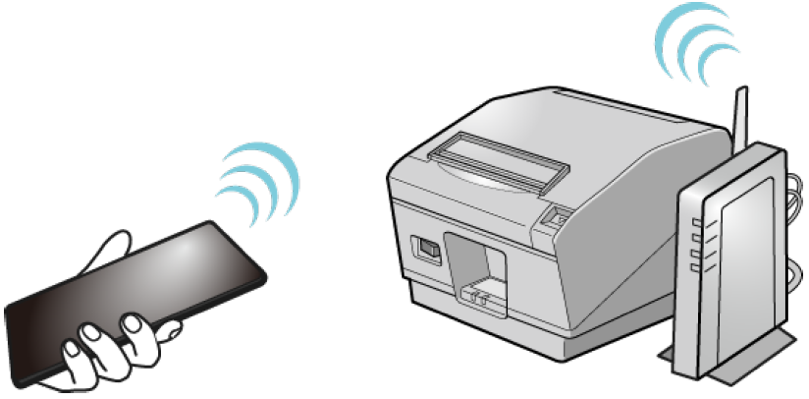
1.5.3. Wireless LAN Interface
Connecting Tablet/PC. See the Online manual .
For other points, refer to the item of Ethernet interface.
1.5.4. USB Interface
No specific Star Micronics driver or printer software needs to be installed on the Android device.
The USB cable needed can vary by tablet. Most Android tablets do not support the common A to B USB cable.Some require mini/micro USB cables or adapters/docks.Review the specifications for your tablet to ensure the correct cable is being used; there is no specific pin out for Star USB Printers.
When you use USB hub, cascade connection is recommended up to one stage.The maximum number of devices which can be connected at the same time is 4.

USB Access Permission
Please refer to Project setting.
1.6. Utility/Driver
Download from App Store , Google play , Star Global Support Site .
Software |
mC-Print2 | mC-Print3 | mC-Label2 | mC-Label3 | mPOP | FVP10 | TSP100IV | TSP100IV SK | TSP100IIIW | TSP100IIIBI | TSP100IIIU | TSP100IIU+ | TSP100ECO | TSP100U | TSP100GT | TSP100LAN | TSP650II | TSP650IISK | TSP700II | TSP800II | TUP500 | SM-S210i | SM-S220i | SM-S230i | SM-T300i/T300 | SM-T400i | BSC10II | BSC10 | SM-L200 | SM-L300 | SP700 | SK1-211/221/V211 | SK1-211/221/V211 Presenter | SK1-311/321/V311 | SK1-311/V311 Presenter | |
|---|---|---|---|---|---|---|---|---|---|---|---|---|---|---|---|---|---|---|---|---|---|---|---|---|---|---|---|---|---|---|---|---|---|---|---|---|
| iOS/Android | Star Setting Utility[1] | - | - | - | - | - | ✔ | - | - | - | - | - | - | - | - | - | - | ✔ | ✔ | ✔ | ✔ | ✔ | ✔[4] | ✔[4] | ✔[4] | ✔[4] | ✔[4] | - | - | ✔ | ✔ | ✔ | - | - | - | - |
| Star Quick Setup Utility | ✔ | ✔ | ✔ | ✔ | ✔ | - | ✔ | ✔ | ✔ | ✔ | ✔ | ✔ | ✔ | ✔ | ✔ | ✔ | - | - | - | - | - | - | - | - | - | - | ✔ | - | - | - | - | - | - | - | - | |
| SK Setting Utility[2] | - | - | - | - | - | - | - | - | - | - | - | - | - | - | - | - | - | - | - | - | - | - | - | - | - | - | - | - | - | - | - | ✔ | ✔ | ✔ | ✔ | |
| Windows | StarPRNT Intelligence | - | - | - | - | - | ✔ | - | - | - | - | - | - | - | - | - | - | ✔ | ✔ | ✔ | ✔ | ✔ | - | - | - | - | - | - | - | - | - | ✔ | - | - | - | - |
| Star Windows Software | ✔ | ✔ | ✔ | ✔ | ✔ | - | ✔ | ✔ | - | - | - | - | - | - | - | - | - | - | - | - | - | - | - | - | - | - | ✔ | - | - | - | - | - | - | - | - | |
| StarPRNT Intelligence for Portable | - | - | - | - | - | - | - | - | - | - | - | - | - | - | - | - | - | - | - | - | - | ✔ | ✔ | ✔ | ✔ | ✔ | - | - | ✔ | ✔ | - | - | - | - | - | |
| StarPRNT Intelligence for BSC10 | - | - | - | - | - | - | - | - | - | - | - | - | - | - | - | - | - | - | - | - | - | - | - | - | - | - | - | ✔ | - | - | - | - | - | - | - | |
| StarPRNT Intelligence for SK | - | - | - | - | - | - | - | - | - | - | - | - | - | - | - | - | - | - | - | - | - | - | - | - | - | - | - | - | - | - | - | ✔ | ✔ | ✔ | ✔ | |
| Star TSP100 futurePRNT[3] | - | - | - | - | - | - | - | - | ✔ | ✔ | ✔ | ✔ | ✔ | ✔ | ✔ | ✔ | - | - | - | - | - | - | - | - | - | - | - | - | - | - | - | - | - | - | - | |
| [1] | The memory switch setting cannot be changed. To change the memory switch setting, use the software for Windows. |
| [2] | Only for Android. |
| [3] | The memory switch setting cannot be changed. To change the memory switch setting, use the software for Android or iOS. |
| [4] | iOS version is not available for firmware versions 5.0 and later. |