2. Functions
2.1. Outline (System Configuration)
An outline of PassPRNT operation is shown below.
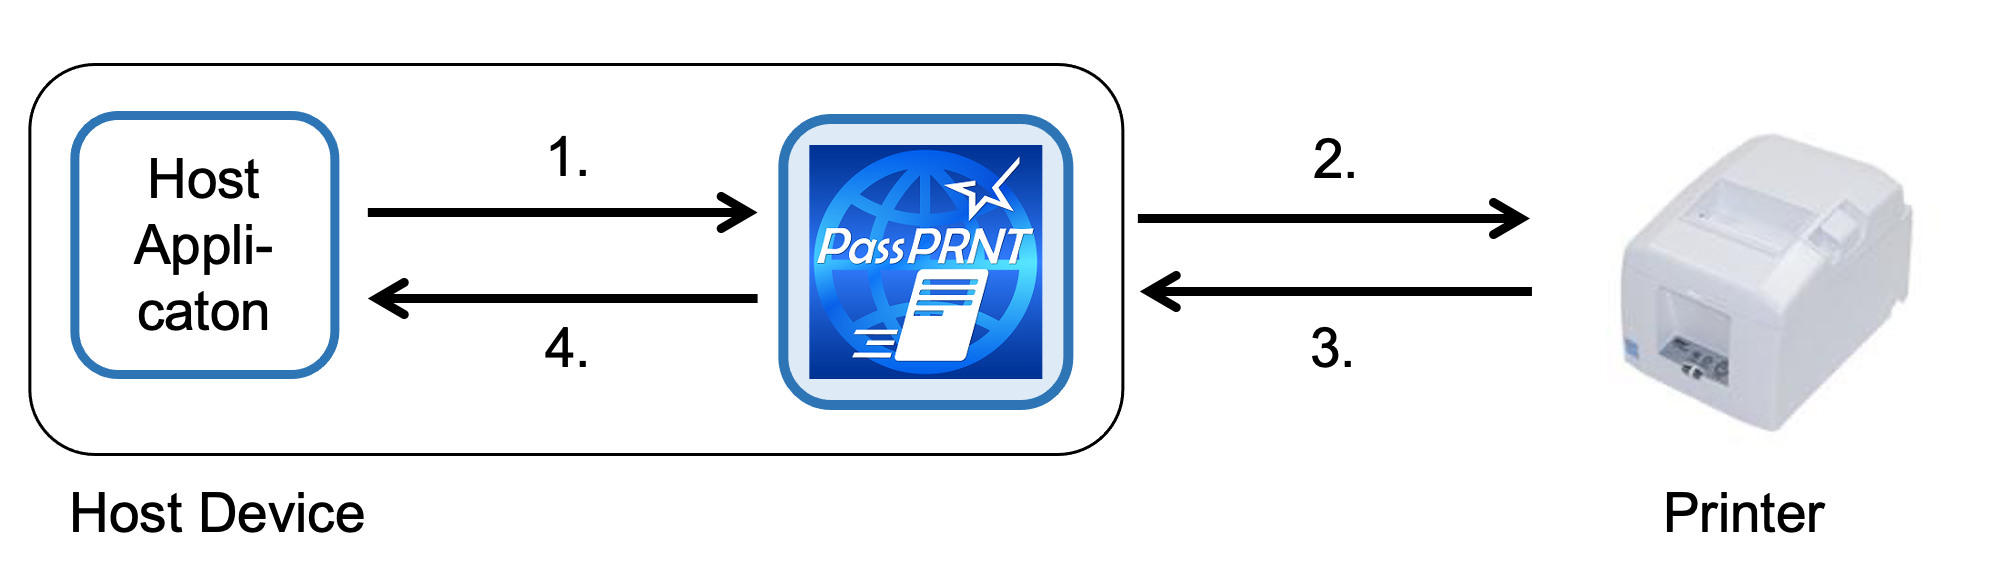
“Host application”, “PassPRNT”, and “Printer” exist as players in the processing. The host application and PassPRNT are installed in the host device. Data communication between the host device and printer is done using Bluetooth/LAN etc.
The key processes that occur at the time of printing are described below from the viewpoint of the data flowing between the players.Data specifications are described later in this manual.
In the host application, printing data for PassPRNT is generated, and a URL scheme is used to send the data to PassPRNT. (* At this time the OS automatically switches screens from the host application to PassPRNT.)
PassPRNT displays/generates the printing data in accordance with the received URL scheme data. After the data is generated, the printing data is sent to the printer.
After the printing data is sent, PassPRNT monitors the printer’s status to determine whether the printing was successful or not. (* The paper loading status and any opened covers are also monitored, and when an error occurs, the retry/cancel screen is displayed so that the printing process can be attempted again.)
When switching back to the host application from PassPRNT, printing success judgment result data is generated and sent to the host application at the time of the switch.
2.2. Hardware Configuration
The Hardware Configuration consists of the printing device (“Printer”) and the device on which PassPRNT is installed (“Host device”). These devices connect and communicate using various communication interfaces.
Model |
Firmware Version |
Communication Interface |
settings value |
|---|---|---|---|
TSP650II |
2.1 or later |
Bluetooth / LAN |
“” |
TSP700II |
5.1 or later |
Bluetooth / LAN |
“” |
TSP800II |
2.1 or later |
Bluetooth / LAN |
“” |
FVP10 |
2.0 or later |
Bluetooth / LAN |
“” |
BSC10
*Limited region model
|
1.0 or later |
LAN |
“escpos;” |
TSP100IIIBI |
1.0 or later |
Bluetooth |
“” |
TSP100IIIW |
1.4 or later |
LAN |
“” |
TSP100IIILAN |
1.3 or later |
LAN |
“” |
TSP100IV |
1.0 or later |
Bluetooth / LAN |
“” |
TSP100IV SK |
2.0 or later |
Bluetooth / LAN |
“” |
mPOP |
1.0.1 or later |
Bluetooth |
“portable;” |
mC-Print2 |
1.0 or later |
Bluetooth / LAN |
“portable;” |
mC-Print3 |
1.0 or later |
Bluetooth / LAN |
“portable;” |
mC-Label2 |
1.0 or later |
Bluetooth / LAN |
“portable;” |
mC-Label3 |
1.0 or later |
Bluetooth / LAN |
“portable;” |
BSC10II 2
*Limited region model
|
3.0 or later |
LAN |
“portable;” |
SM-S210i (StarPRNT)
*Japan model only
|
3.0 or later |
Bluetooth |
“portable;” |
SM-S210i (ESC/POS)
*Japan model only
|
2.5 or later |
Bluetooth |
“portable;escpos” |
SM-S230i (StarPRNT)
*EU/US model only
|
1.0 or later |
Bluetooth |
“portable;” |
SM-S230i (ESC/POS)
*EU/US model only
|
1.0 or later |
Bluetooth |
“portable;escpos” |
SM-T300i (StarPRNT) |
3.0 or later |
Bluetooth |
“portable;” |
SM-T300i (ESC/POS) |
2.5 or later |
Bluetooth |
“portable;escpos” |
SM-T400i (StarPRNT) |
3.0 or later |
Bluetooth |
“portable;” |
SM-T400i (ESC/POS) |
2.5 or later |
Bluetooth |
“portable;escpos” |
SM-L200 |
1.1 or later |
Bluetooth |
“portable;” |
SM-L300 |
1.0 or later |
Bluetooth |
“portable;” |
- 2
This is only available in “Standard Mode”. Please check the “Operation Mode” of the self-printing (turn on the power while pressing the Feed button).
To change emulation for a portable printer from ESC/POS to StarPRNT, refer to the procedure below. You can check the current emulation setting in the connection status of the settings screen.
Emulation Changing (from ESC/POS to StarPRNT) for Portable Printers
Turn on the printer power and open the printer cover.
Press and hold both the power button and the FEED button, and once the ERROR lamp flashes 5 times quickly release the power and FEED buttons. The emulation change will be automatically performed.
After setting the paper, closing the printer cover will start printing using the set emulation mode.
For ESC/POS mode: EMU = ESC/POS
For StarPRNT mode: EMU = StarPRNT
If the emulation mode does not change correctly, perform steps 1 through 3 of the procedure again.When doing so, for step 2, do not release the buttons during the flashing, and take care to only release the buttons after flashing has completed 5 times.
After switching from ESC/POS to StarPRNT, turn the power to the printer off and then turn it on again. The selected emulation will become active after the power to the printer is turned on again.
2.3. Software Configuration
Supported OS Infomation
ARM-type devices are not supported.
Star PassPRNT Version
Supported OS Version
V2.8.0~
Windows 11 (except IoT Enterprise Edition)Windows 10 21H1 or later (except IoT Enterprise Edition)V2.5.0~
Windows 11 (except IoT Enterprise Edition)Windows 10 2004 or later (except IoT Enterprise Edition)V2.4.0~
Windows 10 1809 Update or later
2.4. PassPRNT Screens
The various parts that make up PassPRNT are described here according to the screen they are displayed on.
“Configuration” Screen
The printer to be used is selected and set by the user on this screen. The description of each part of this screen is provided below.
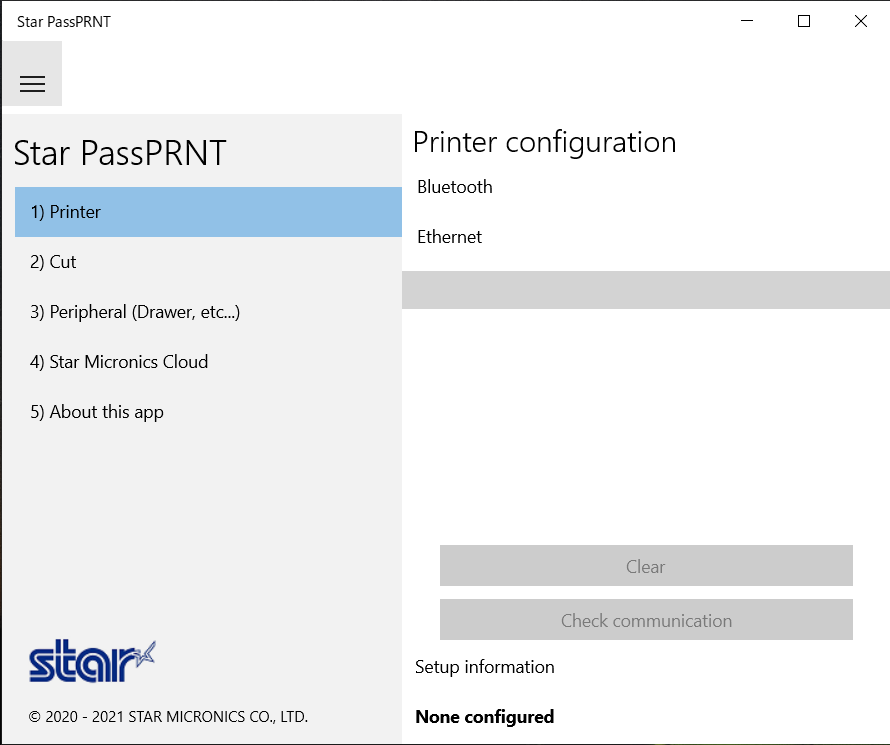
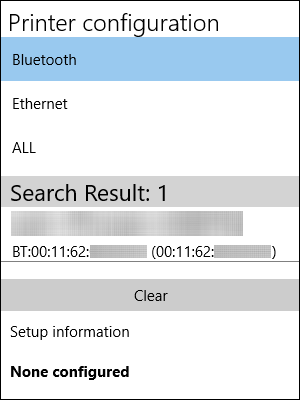
- Printer
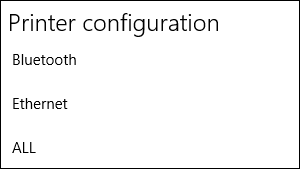
Searches for printers that can be connected and then displays them in a list. Only the printer models matching the selection for “Type” are displayed. After a printer is selected, a communication check is performed. [Selects the interface (except “Portable” type)] -> [The printer list displays]
- Select Cut Type
The Cut type setting becomes selectable
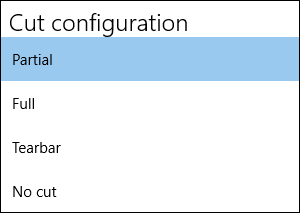
- CAUTION
For TSP650II, TSP100III series, TSP100IV, TSP100IV SK, and mC-Print3, BSC10II, the Cut type is set to partial cut even when “Full” is selected.
For BSC10, the Cut type is set to partial cut even when “Full” or “Tear bar” is selected.
For a mobile printer, paper is fed to the tear bar position even when “Partial” or “Full” is selected.
- Select Peripheral
Displays the Peripheral supported by the selected printer.
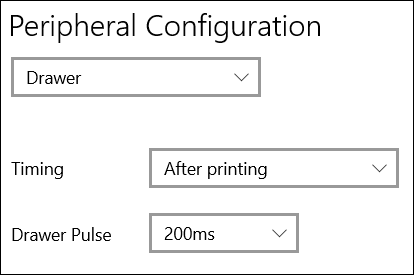
After selecting a peripheral, the advanced settings will be displayed.
Drawer
Setting
Parameter
Timing
Before printing
After printing
Drawer Pulse
200ms
500ms
Buzzer
Setting
Parameter
Timing
Before printing
After printing
Channel
Channel 1
Channel 2
Repeat
1 ~ 20
Drive Time
0 ~ 5100
Delay Time
0 ~ 5100
Melody Speaker
Setting
Parameter
Timing
Before printing
After printing
Sound Storage Area
Area1
Area2
Dip-Switch Setting
Sound Number
0 ~ 7
Volume
0 ~ 15
Dip-Switch Setting
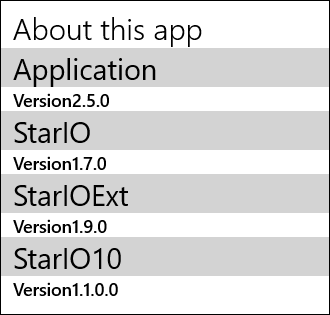
- About this app
Displays information about the application version.
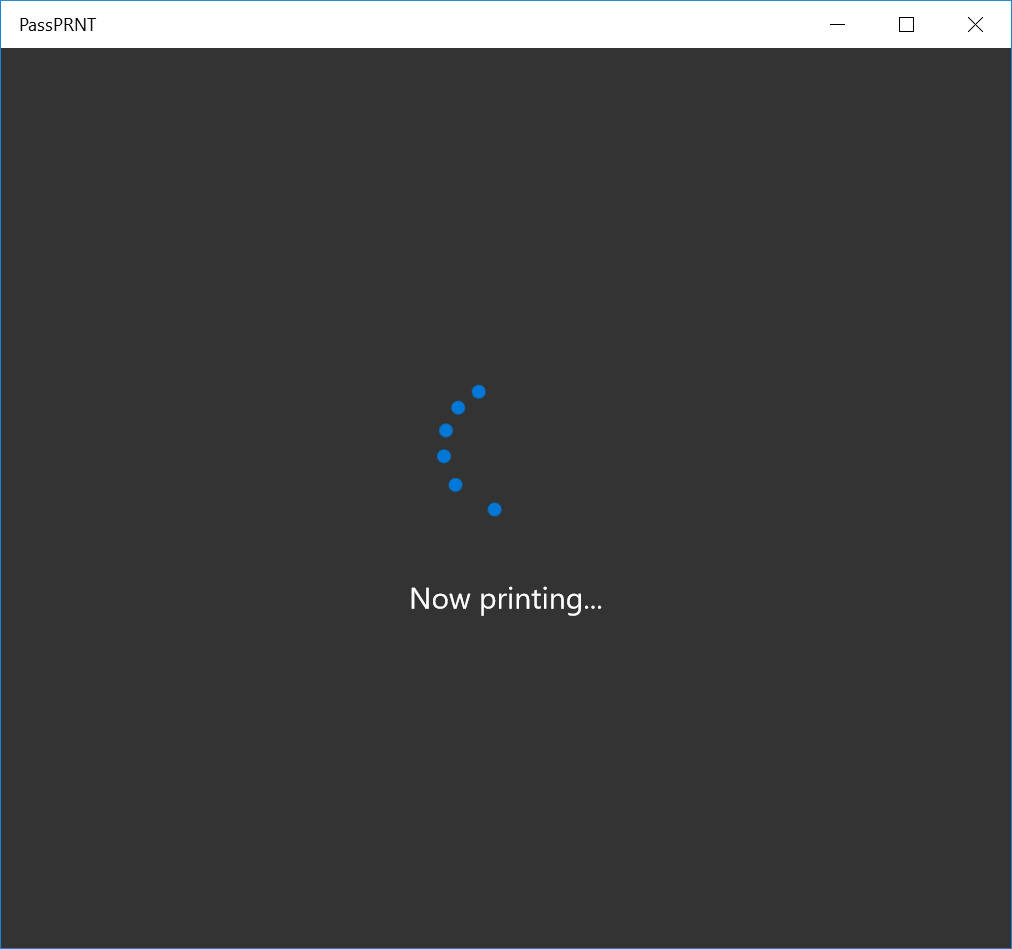
“Now printing” screen
This is the screen that is displayed when switching from the host application to print. Error messages may be displayed according to the status during printing.